Restoration using the “one shade” technique
Machine translation
Original article is written in RU language (link to read it) .
Restoring a damaged tooth can be a real nightmare. We tend to overcomplicate things. How can we achieve quick, easy and high-quality results? Once you know certain rules, the choice will be obvious: in many cases we can act in a non-classical manner to simplify the workflow.
About modern techniques for making composite veneers at the webinar Modern techniques for making composite veneers .
Development of light-curing composites
When light-curing composites first appeared, the choice of shades was not so wide. If anyone had a wider color range, it was only a very privileged few. These compounds were the "group" of shades we know today, a medium opacity composite that is designed to match the overall opacity of the tooth color.
In the mid-90s, a large number of esthetic composition sets appeared: for the first time, many doctors around the world began to make layer-by-layer restorations that perfectly matched the characteristics of natural teeth such as color, opacity, texture, etc. This trend reduced the use of a single-shade mass to the level of not aesthetic dentistry.
Technique of using one shade
It must be admitted that the use of layer-by-layer technology has been and remains relevant throughout all these years. However, there are indications when using a mass of one shade is more convenient. These are very simple indications proposed by the Styleitaliano group and discussed below.
Indications for single-shade restorations:
- small restorations such as small class IV defects or small diastema;
- limited restorations such as Class III or Class V restorations;
- elongated (extended) restorations, such as an extensive class IV defect, especially if they have a significant or very large bevel.
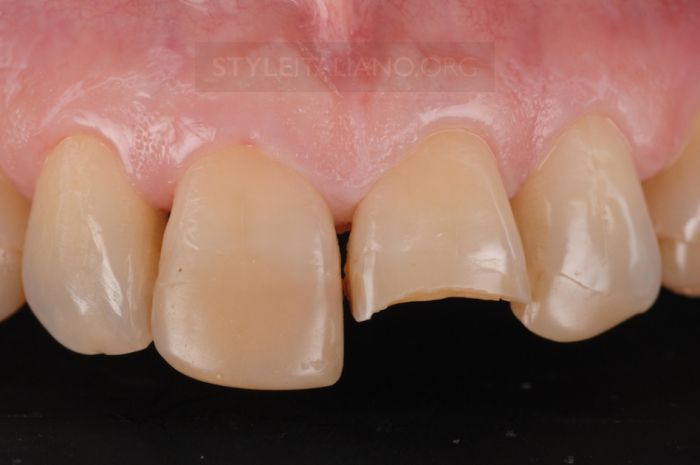
Photo 1. The patient presented to emergency care with a broken restoration. The fractured old composite restoration in tooth 2.1 and the poorly integrated restorations in 1.1 and 2.2, supposedly performed at the same visit, led us to consider a more comprehensive treatment that included replacing each of the old restorations.
Color matching and work color isolation
Color matching can be done using the Vita Guide Classical, but we initially checked that the colors of our material matched the VITA color shades. Note that this is often not the case.
Color matching is done before the teeth are dried, paying attention to the color of healthy tissues, and not to the color of the tooth as a whole, which still has a lot of old composite, and which in turn gives it a dark tint.
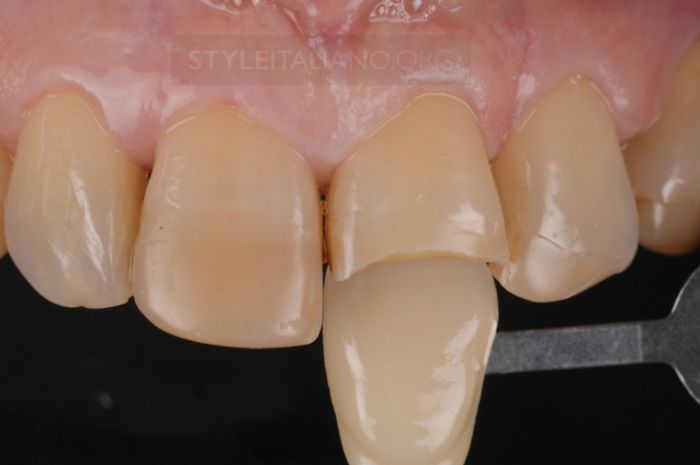
Photo 2.

Photo 3. Isolation of the working field. The rubber band must be clean and perfectly secured. This is not only to ensure a pleasant working field, but also to facilitate the placement of the die and wedge and to avoid liquid leakage.
Removal of old restoration and creation of adhesion
Removing the old restoration is probably one of the most difficult stages. Not so much because it takes time, but because of the concentration required to complete this step without removing the tooth structure. In this case, we worked with abrasive discs and several burs. In the final stage, a medium long bevel was made and the prepared tooth was polished.
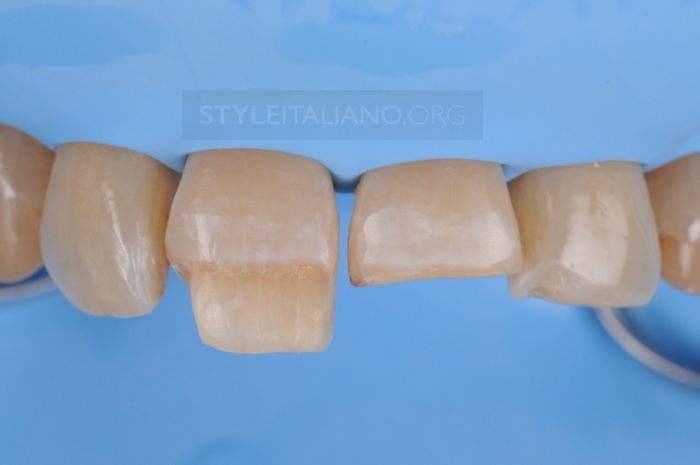
Photo 4.
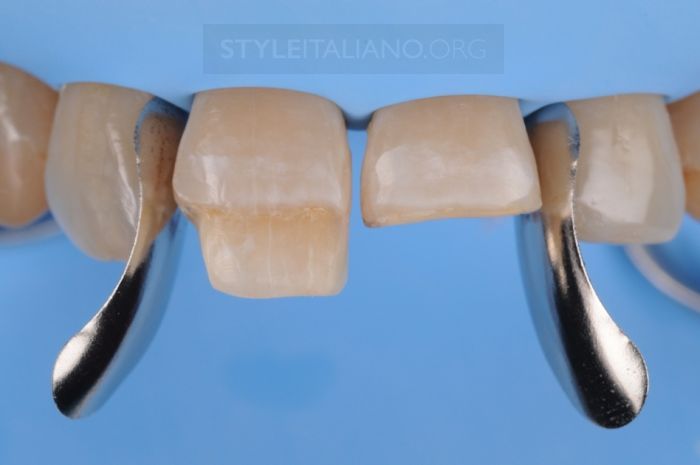
Photo 5. Removal of the old composite confirmed the presence of a defect in the enamel area, which was the reason for the previous restorations.
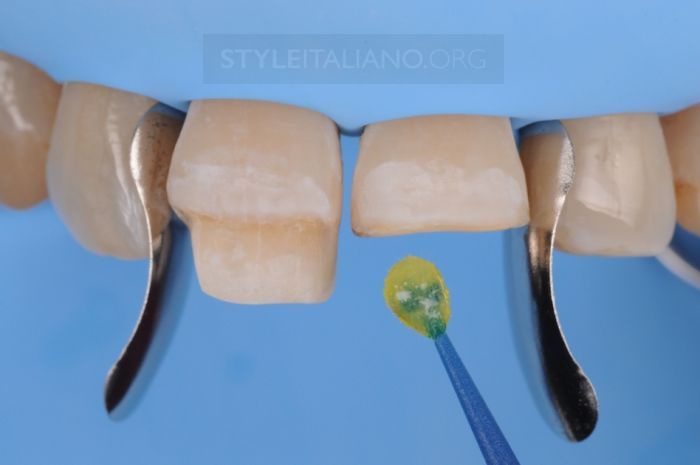
Photo 6: A universal bonding system was used to create adhesion using an etch and dry technique.
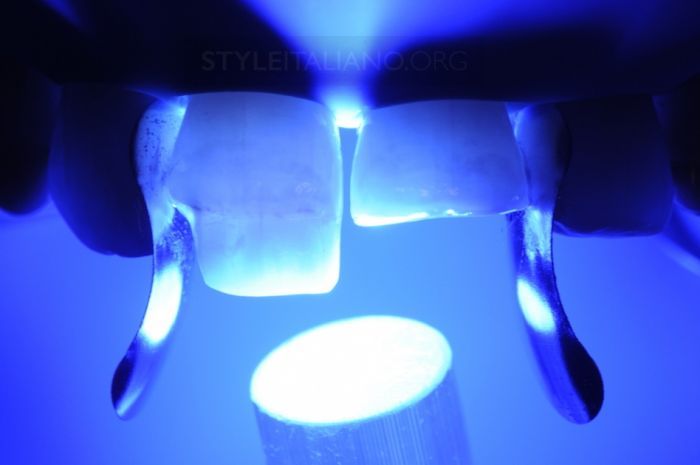
Photo 7. Long-term polymerization of the treated teeth was carried out.
Tooth restoration
Please note that although the restorations are created using a single mass, they are multi-layered. In this particular restoration technique, increasing the volume of the restoration is more important than the color. When creating layers using the single shade technique, there is no need to create very thin or precise layers. But we can focus on density and shape.
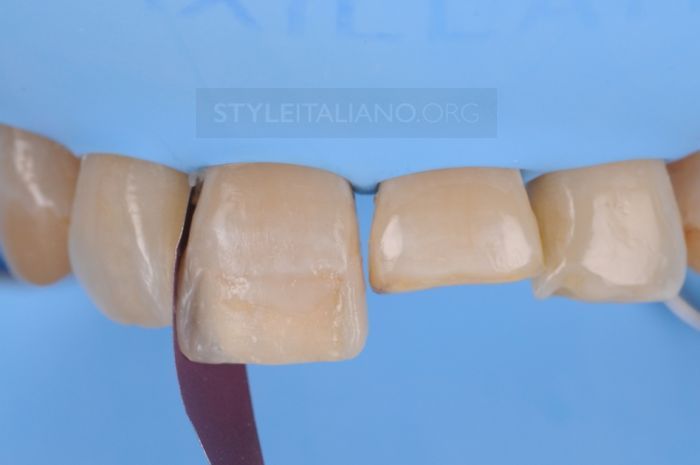
Figure 8: In this particular tooth, the proximal wall restoration had the advantage of using the existing enamel structure. For tooth 2.1 we will develop a similar strategy.
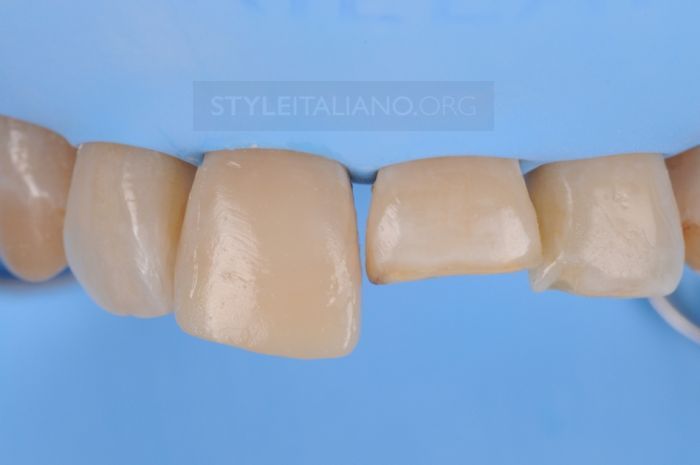
Photo 9. The vestibular wall is built independently of the others and carefully modeled to ensure that its surface remains level and smooth. We immediately quickly complete the formation of the proximal walls. This makes it easier to create the ideal surface and shape of the walls.
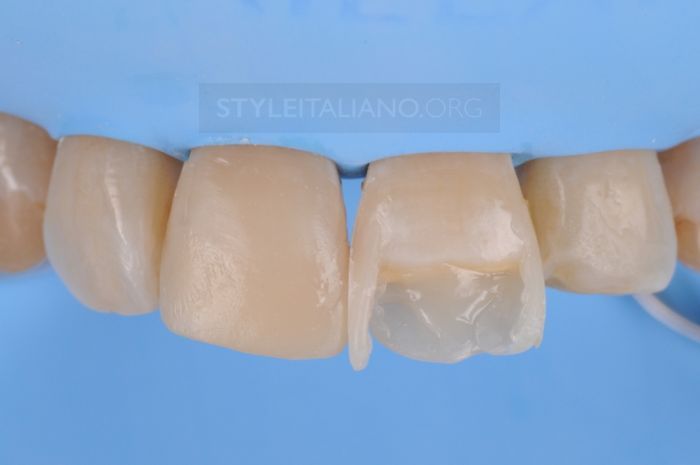
Figure 10. This appearance of the palatal and proximal walls would be unacceptable for a multi-layer technique using multiple shades as they would be thick and irregular in shape. But when dealing with one single color mass, this is not a problem.
The walls were made using a small amount of composite placed on the finger. It was used as a palatal wall. Note that the operator must angle the fingertip to simulate the angles of the tooth. After polymerizing the palatal wall, which is thicker than that used in the classic layering technique, we create the proximal walls using posterior sectional matrices (Garrison Slick Bands). The remaining step is to build a vestibular wall of the same color.
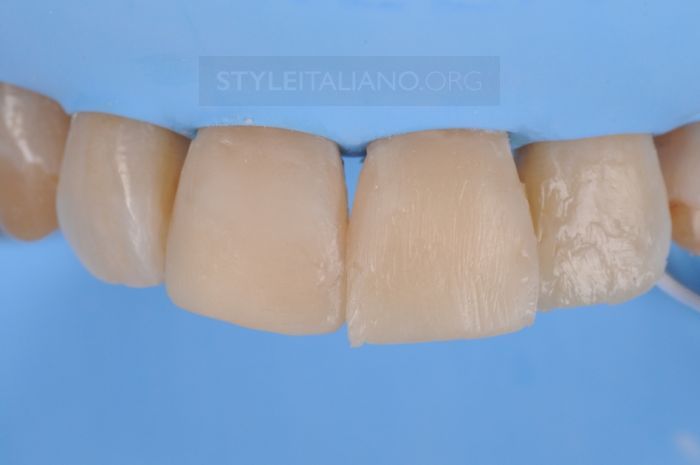
Photo 11. Look at how inaccurate the restorations are. From the very beginning we knew that the final stage would take longer than usual.
Processing, grinding, polishing
Finishing, as with most of our direct composites, is done using a diamond bur at low speed (Finishing Style Kit by Komet).
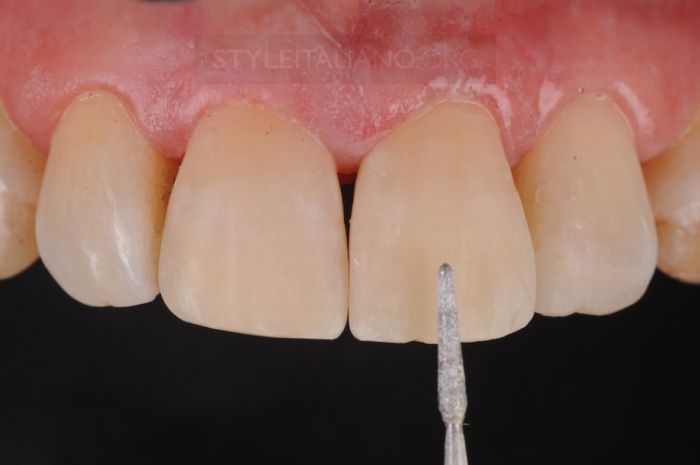
Photo 12. Low speed allows us to fully control the movements we make, even if the grain is small, the surface remains quite natural and smooth. Good shine and polish will become unusable if the processing step is not done accurately. However, it is impossible to achieve a perfect polish without proper “sanding.”

Photo 13. Pre-polishing was done with brown spiral wheels (3M) and polishing paste (Premier Diamond Twist SCL).
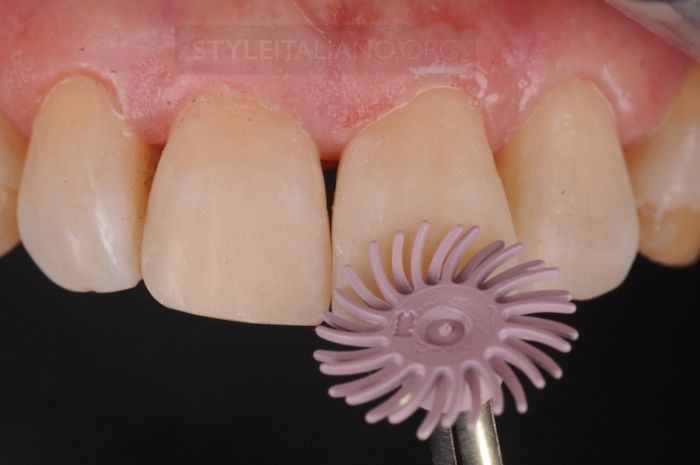
Photo 14. Polishing is done using a second spiral wheel.
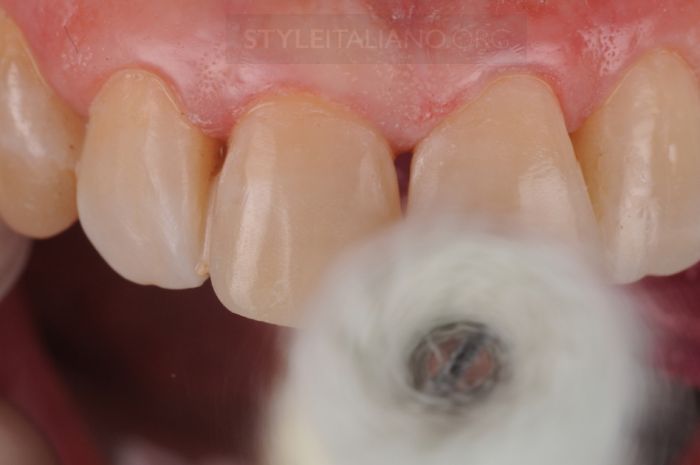
Photo 15. Additional shine is achieved using a sanding wheel.
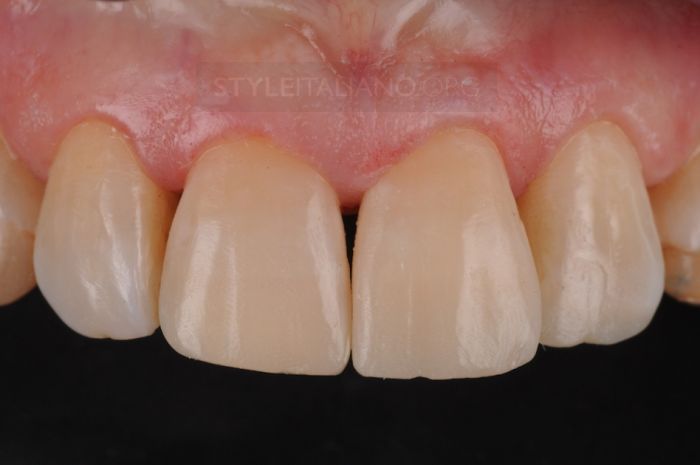
Photo 16. Immediate result after removal of the rubber dam. At this stage there are no guarantees of success or failure. Checking must be carried out after drying. What looks good now may look terrible a few days later.
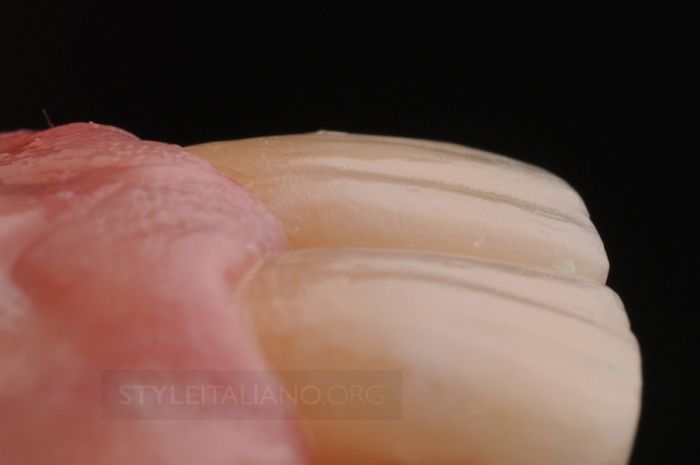
Photo 17. Surface texture after polishing.
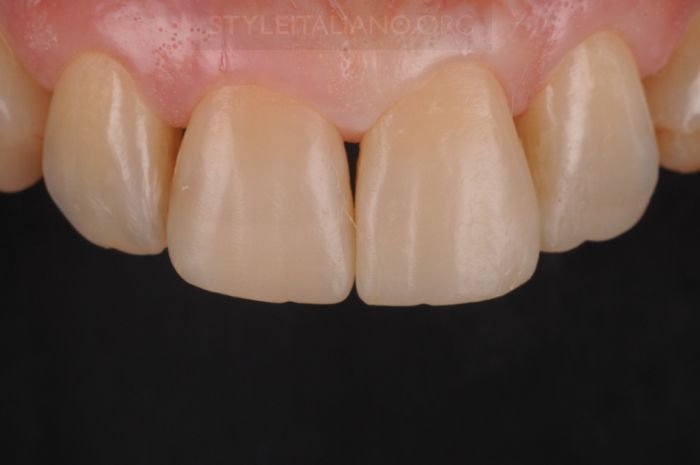
Photo 18. Check after 1 month.
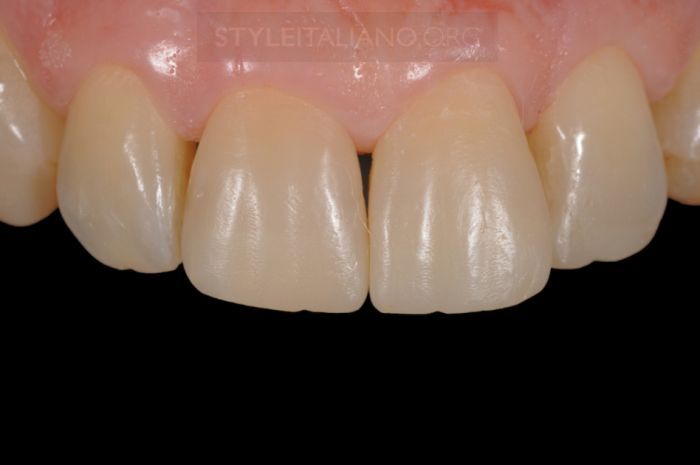
Photo 19. We check after one month and take pictures without diffusers to evaluate the maximum shine of the restorations.
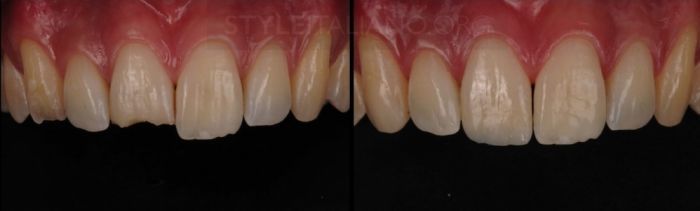
Photo 20.
Restoration with one shade (Conclusions)
Strategies such as single-shade restoration can be an ideal solution in many situations. If we follow the right guidelines, this can be a smart step in our clinical practice.
If the patient is expecting the best possible result, these “one shade” restorations can be corrected with a reduction or addition of hyperchromatic masses, translucent and opaque colors to achieve a deeper effect. But in most cases, neither the clinician nor the patient wants to do this, because the result is already perfect.
More up-to-date information about composite veneers at the SHAPE webinar - composite veneers in the anterior region .
http://www.styleitaliano.org/