
Creation of an approximal wall for class II restoration
Machine translation
Original article is written in RU language (link to read it) , IT language (link to read it) , UK language (link to read it) .
What does a doctor want in his daily practice? High-quality restorations for the patient, simple protocols for yourself, minimum time spent for both. Creating an approximal wall for a Class II restoration is always one of the most difficult challenges for the dentist. Using this clinical case as an example, we will try to identify the most appropriate direction for simplifying the restoration of class II cavities.
Learn more about direct dental restoration in the online course Online School of Restoration by Sergei Radlinsky. Occlusion. Biomimetics. Biomechanics of direct restoration .

Photo 1. – First, it is necessary to use a rubber dam. This clinical case uses Non Latex Flexi Dam, Coltene/Whaledent. When the preparation is completed, the time has come to think: how to restore the proximal wall of a carious tooth at the same height as the adjacent tooth?
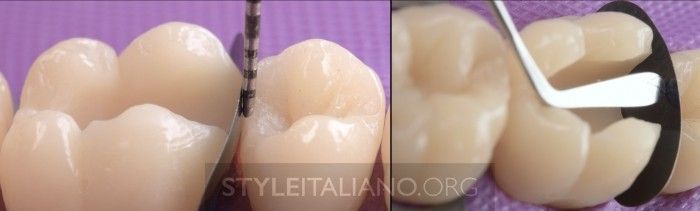
Photo 2. – Previously, determining the height of the marginal ridge of an adjacent tooth was difficult. But not with this new tool.

Photo 3 - To make the job easier we can now use a new version of the popular Posteiror Misura (posterior measurement) tool with two ends.
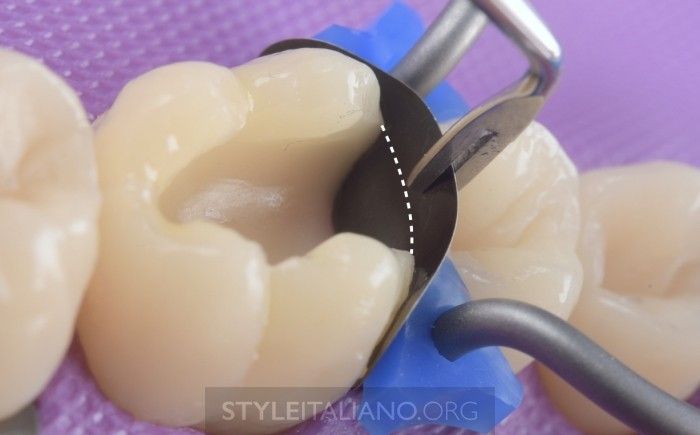
Photo 4. – One end of the tool is shaped like a fork, which allows you to measure and model the tooth wall in the presence of a matrix.
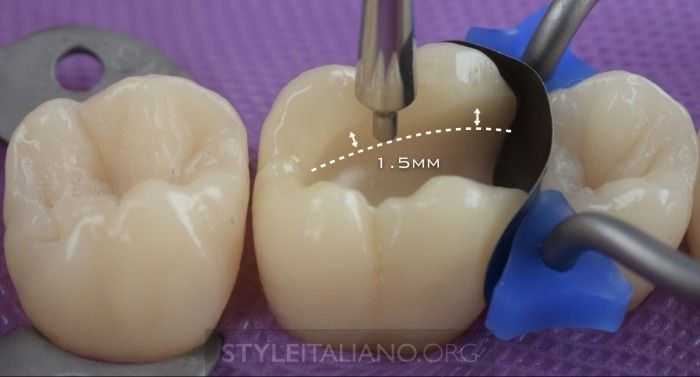
Photo 5. – The second end of the instrument is designed for vertical and horizontal measurement of the thickness of the composite layer during the restoration of the chewing group of teeth. We need a minimum of 1.5mm of composite to cover the color of the first layer.
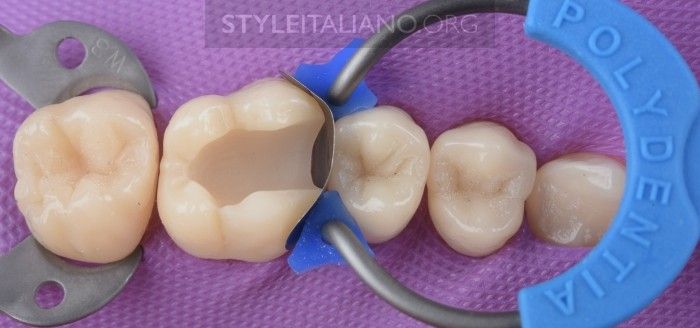
Photo 6. – We placed a matrix (LumiContrast Sectional Matrices, Molar 0.025mm/6.4mm), a wedge and a MyRing Classico (Polydentia).
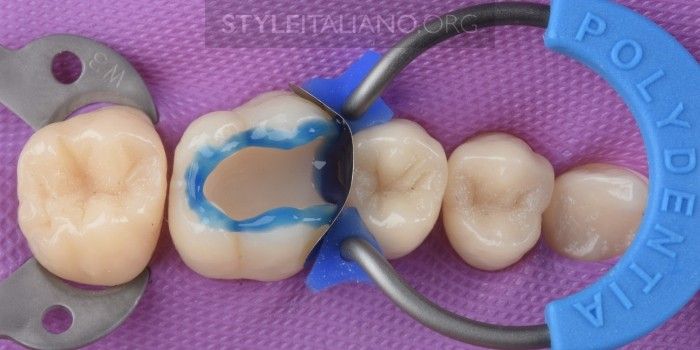
Photo 7. – Now you can start treatment. The first step is to etch the enamel for 30 seconds using the selective etching technique. In this clinical case, we used 35% phosphoric acid Etchant Gel S (Coltene).
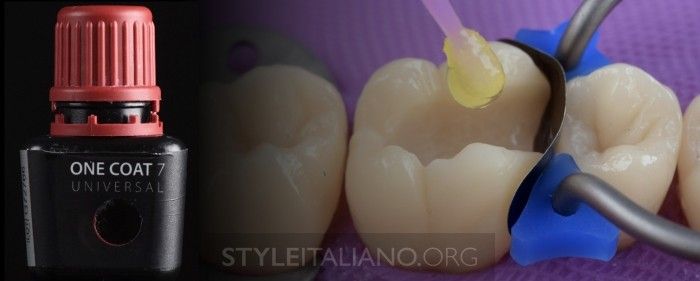
Photo 8. – Washing off the etching, using self-etching bond One Coat Universal Adhesive (Coltene). Active bonding, we pay more attention to dentin than to enamel. Exposure is 20 seconds, then we inflate the bond for 5-10 seconds to remove the solvent.
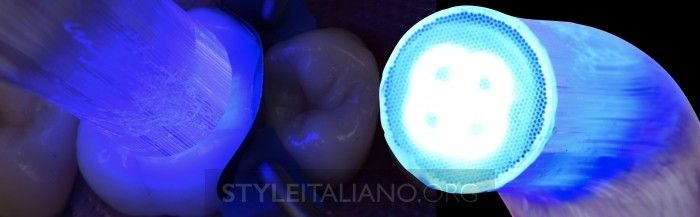
Photo 9. – Illumination of the bond for at least 20 seconds. To create a hydrophobic protective layer after exposure, apply a small amount of Bulk fill flowable composite to the adhesive. The lamp used is SPEC® 3 lamp (Coltene). This lamp has 3 modes:
- standard mode (suitable for most composite restorations);
- 3K mode (in case time is limited, for example, for children or patients with a gag reflex);
- Ortho mode (used in orthodontics, illuminates the entire arch).
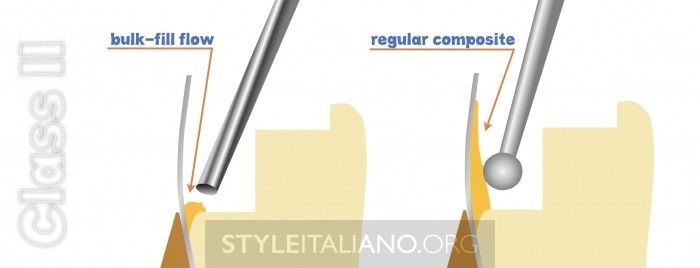
Photo 10. – To ensure the fit of the future restoration, it is necessary to apply a small portion of Bulk-flow flowable composite between the matrix and the tooth. Immediately after this (without preliminary exposure!) add a portion of the packable composite on top of the flowable composite.
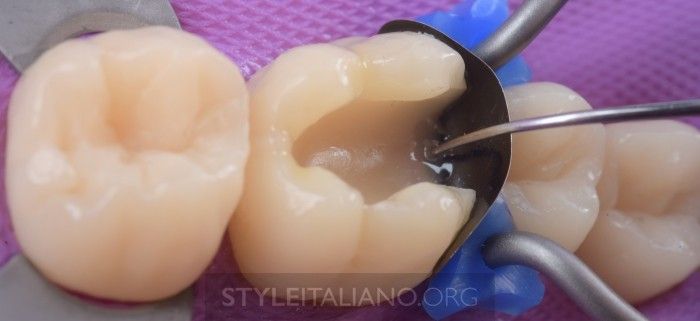
Photo 11. – Application of flowable composite, distribution with Fissura tool (LM Arte).
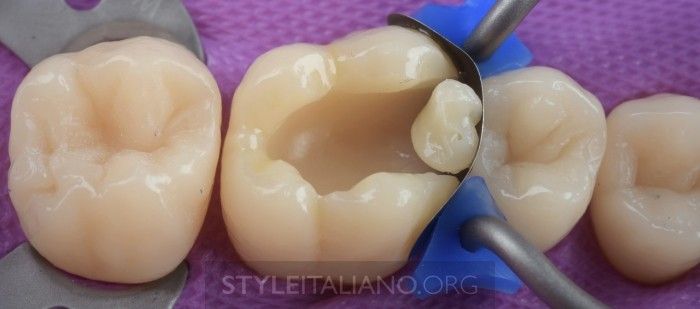
Photo 12. – Application of the Brilliant Ever glow (Coltene) packable composite.
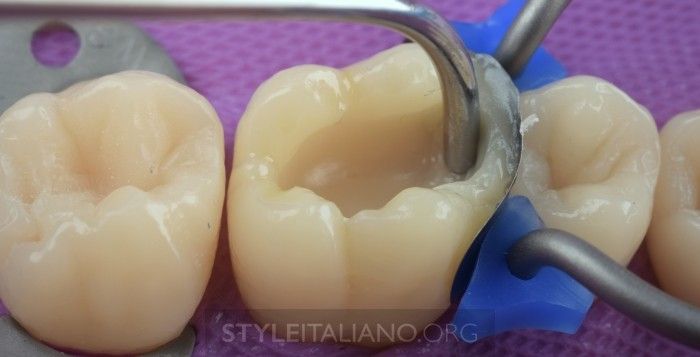
Photo 13. – Formation of the wall with the LM condensa tool (LM Arte). You may notice that the height of the composite wall is still higher than required.
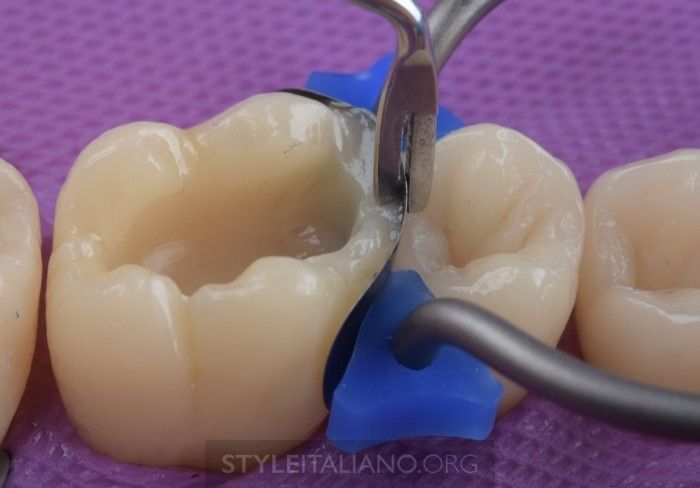
Photo 14 - Time for the main step: using Posteiror Misura to create a wall at the same height as the adjacent tooth.

Photo 15. – Removing excess material.
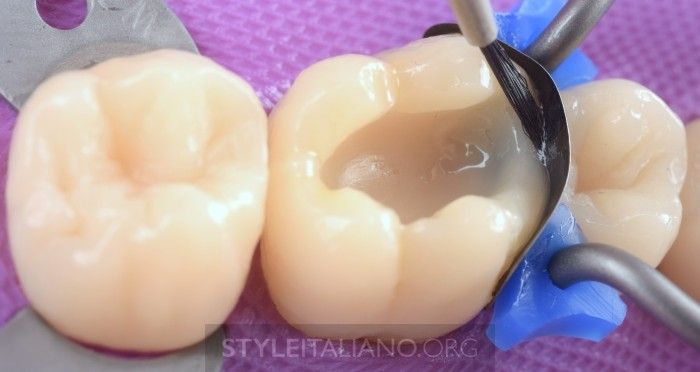
Photo 16. – Smoothing the surface using Compo Brush (Smile Line).
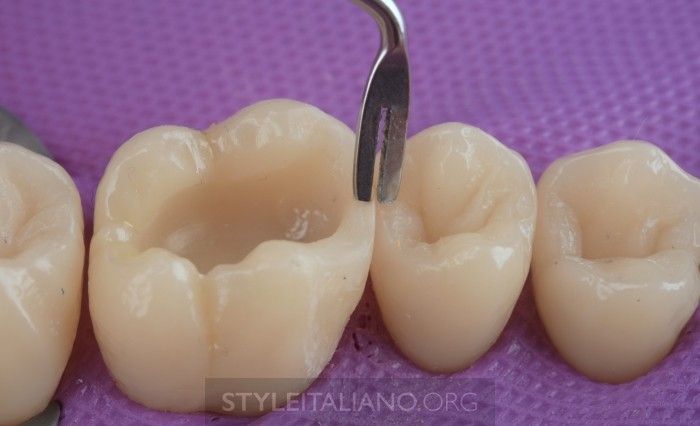
Photo 17. – The height of both approximal walls is at the same level.
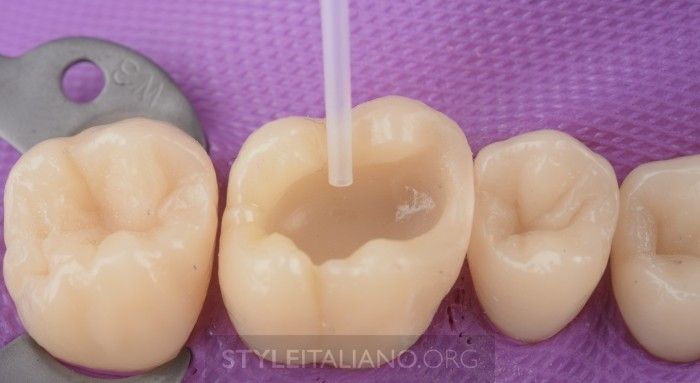
Photo 18. – A class II cavity has been converted into a class I cavity. To optimize time we use Fill-up! (Coltene) composite, since it can be applied in one layer even into deep cavities. The thickness of the layer does not matter; the exposure time is only 5 seconds.
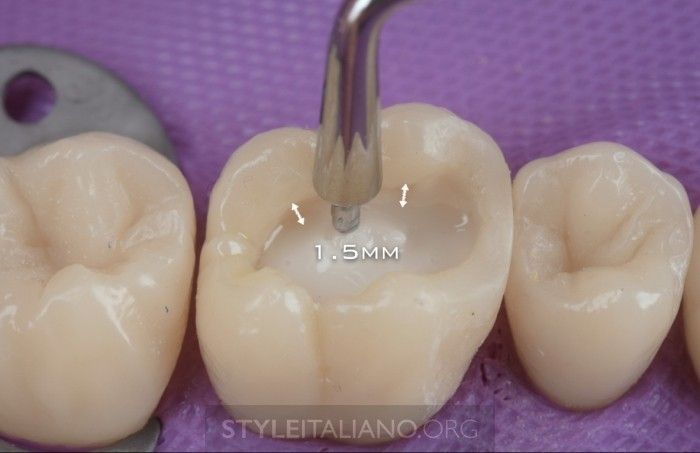
Photo 19. – The dentin layer is completed, let’s move on to the enamel layer. As noted earlier, its thickness should be 1.5 mm. It helps us measure the second end of the tool.

Photo 20. – The natural, natural anatomy of the chewing surface should be adhered to.
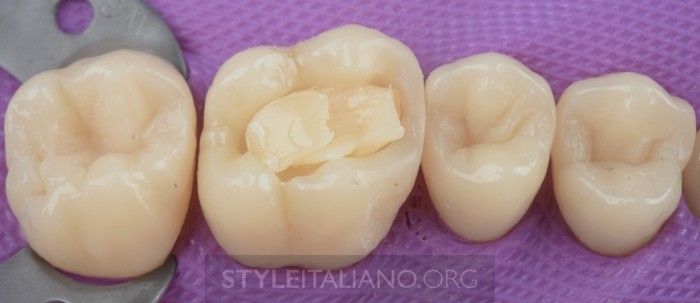
Photo 21. – We use the Brilliant Ever glow (Coltene) composite, which is easy to polish.
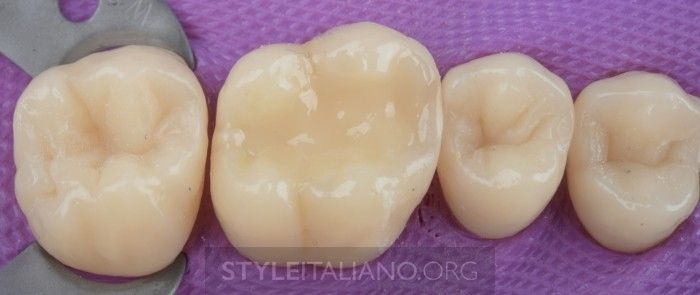
Photo 22. – Occlusal surface after applying the composite (Condensa (LM Arte) and Compo Brush (Smile Line) instruments were used).
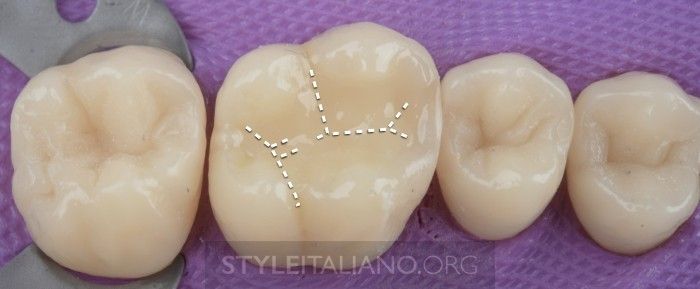
Photo 23 – Time to follow nature's GPS! The chewing surface is modeled along the marked lines. Today we have the new FMT tool from Styleitaliano, thanks to which the modeling takes only 2 minutes.
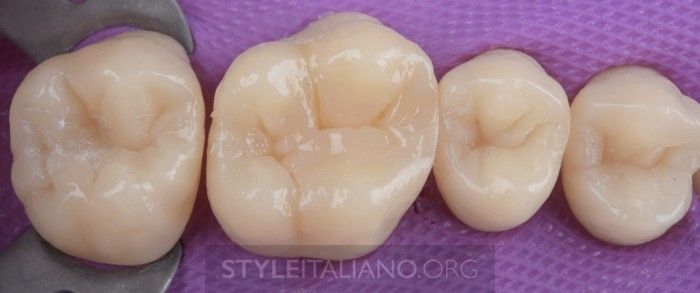
Photo 24. – A maximum of 1-2 minutes was spent on modeling. The main line technique using FMT will be described in another article.
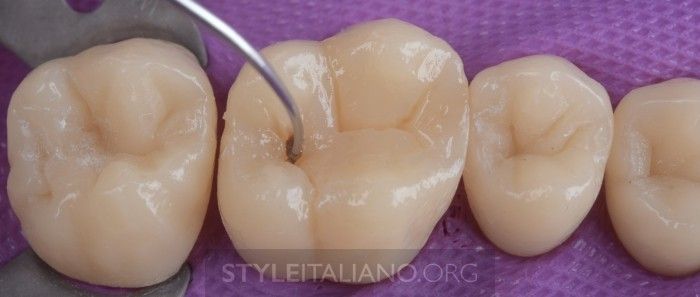
Photo 25. – Creating spots using Fissura (LM Arte).

Photo 26. – The final polymerization with glycerin should last at least 1 minute, this will get rid of the oxygen-inhibited layer.
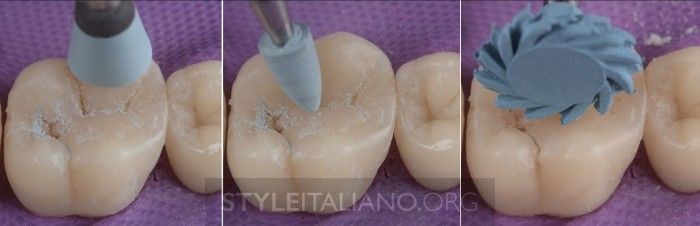
Photo 27 – Finishing begins with abrasive silicone heads for cusps and fissures. We finish the processing at low speeds and without using pastes (Diatech Polishers by Coltene).
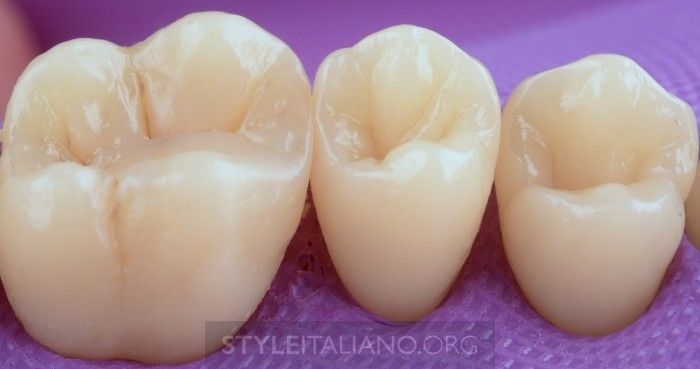
Photo 28. – Final view of the restoration, contact surface.
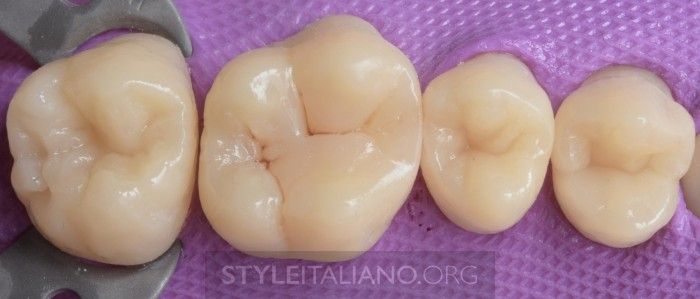
Photo 29. – Final view of the restoration, chewing surface.
conclusions
The ability to measure the thickness of the restoration provides advantages in the daily practice of the dentist, speeds up the work process, and makes it more predictable. Using the tool allows you to spend less time performing restorations.
About aesthetic guidelines for restoration at the webinar The concept of additive restoration techniques .
http://www.styleitaliano.org/