Polarized dental photography
Machine translation
Original article is written in RU language (link to read it) .
Today, almost every dentist is interested in aesthetic dentistry, and at the moment, every dentist wants to master the art of dental photography. This skill gives you the opportunity to showcase your work among colleagues and on social networks. The camera is a tool for documenting clinical cases.
Online training will help you learn the basics and learn the most effective dental photography techniques . Dental Photography Course .
In the past, dentists sought to develop their practical skills and improve their theoretical knowledge, thereby achieving increasingly successful results. But they never thought that they could demonstrate their achievements to other dentists.
Today, dental photography is considered an important part of aesthetic and conservative dentistry and is an everyday practice. Every dentist should know about it and be able to take photographs under any circumstances.
First you need to understand the basics. I would like to note that general photography differs from dental photography, because... it is more specific, it obeys certain rules. For example, dental portrait photography can be used to analyze a patient's face and smile.
Classification of dental photography:

Figure 1. Brief description of polarized dental photography.

Figure 2. Polarizers can be divided into two types: Linear polarisers and Circular polarisers. This article presents the theory and describes techniques for using linear polarizers in an accessible form.
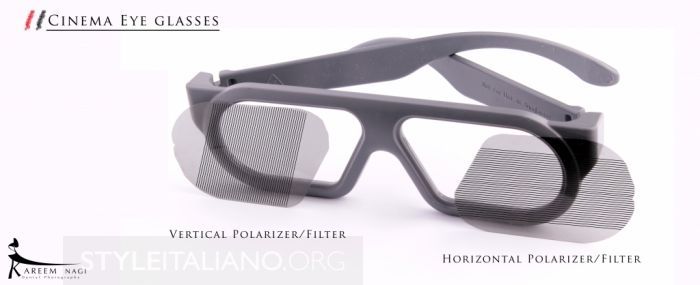
Figure 3. These glasses are one example of linear polarizers. The glasses in the frame are located perpendicular to each other (one is vertical, the other is horizontal).
- The glasses are placed perpendicularly, and the brain converts these two different images into one three-dimensional (3D). When you watch a 3D movie, make sure that your interpupillary line is parallel to the plane of the floor. This will allow you to enjoy the 3D image in the best possible way.

Figure 4. When removing polarizers from the frame, you can observe two situations: the lines are parallel - the light passes, the lines are perpendicular - the light does not pass.
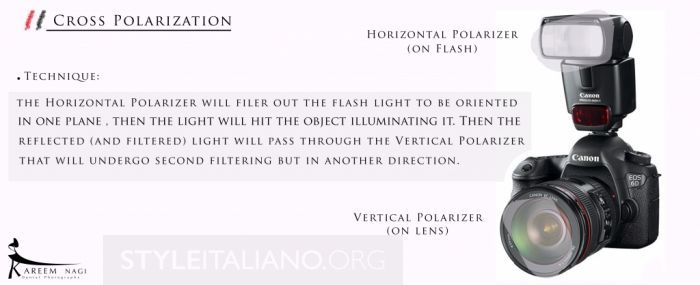
Figure 5. One polarizer is placed on the lens, the other is on the flash.
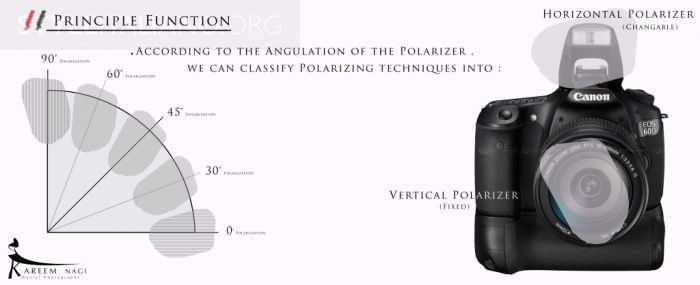
Figure 6. 90 degree polarizers allow the maximum amount of polarized light to pass through, 0 degree polarizers block all light.

Figure 7. This photograph was taken under neutral lighting conditions.

Figure 8. Polarization 0 degrees (True Cross polarization); polarizers are strictly perpendicular to each other.

Figure 9. Polarizers are located at an angle of 45 degrees (Partial Cross Polarization).

Figure 10. Polarization 90 degrees, polarizers located in parallel (False Cross polarization).

Figure 11. Comparison of 0 degrees and 90 degrees.

Figure 12. Polarization at 30 degrees.

Figure 13. Polarization at 60 degrees.
Below are some examples of photographs taken using different polarization methods:

Figure 14. This photo was taken by Amr Eldib using 60 degree polarization.

Figure 15. This photograph (angiogenesis, microvessels) was taken using the 30-degree polarization method.
The webinar Digital Documentation and Dental Photography is devoted to the importance of dental photography and the basic principles of photography.
http://www.styleitaliano.org/
