Treatment of anterior tooth fractures
Machine translation
Original article is written in RU language (link to read it) .
A crown fracture is a common injury to the anterior teeth. This clinical case describes a new conservative approach in the treatment of complex double fracture of anterior teeth: endodontic treatment followed by attachment of tooth fragments using a pin. A conservative approach can lead to successful treatment if the patient is young. Revascularization in the treatment of teeth with wide root canals and open apices is common, and restoration using natural tooth fragments is a quick, simple and esthetic procedure.
Detailed protocol for the treatment of a tooth fracture at the webinar Treatment of a horizontal tooth root fracture .
This clinical case describes a difficult situation when the tooth fracture line reaches the level of the gum. This complicates treatment, especially considering the task at hand - reattachment of natural tooth fragments. The use of an adhesive system may interfere with the attachment of fragments. In this article we share tips and tricks that will greatly simplify manipulations.
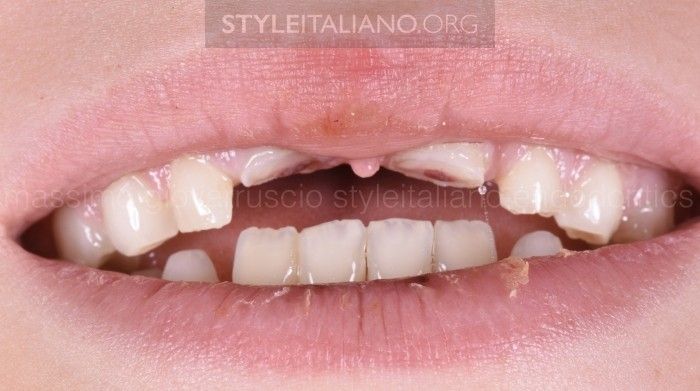
Photo 1
An 11-year-old patient suffered fractures of teeth 11 and 21 as a result of an accident. The injury caused a complete high horizontal fracture of both teeth to the level of the gum, affecting the enamel, dentin and pulp.
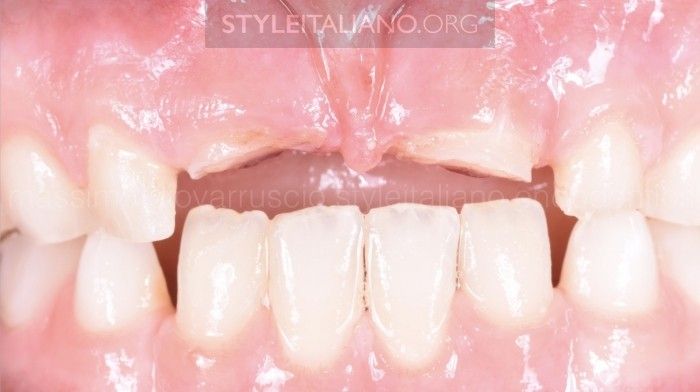
Photo 2
In accordance with the treatment protocols described in the literature, the patient was diagnosed with a complicated fracture of the crown of teeth 11 and 21.
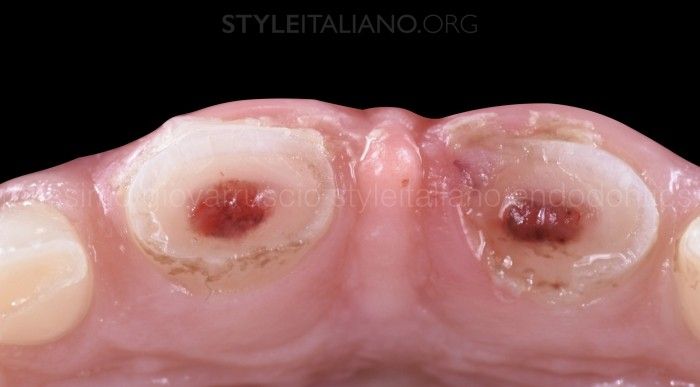
Photo 3
Horizontal fracture exposing the pulp in both teeth.
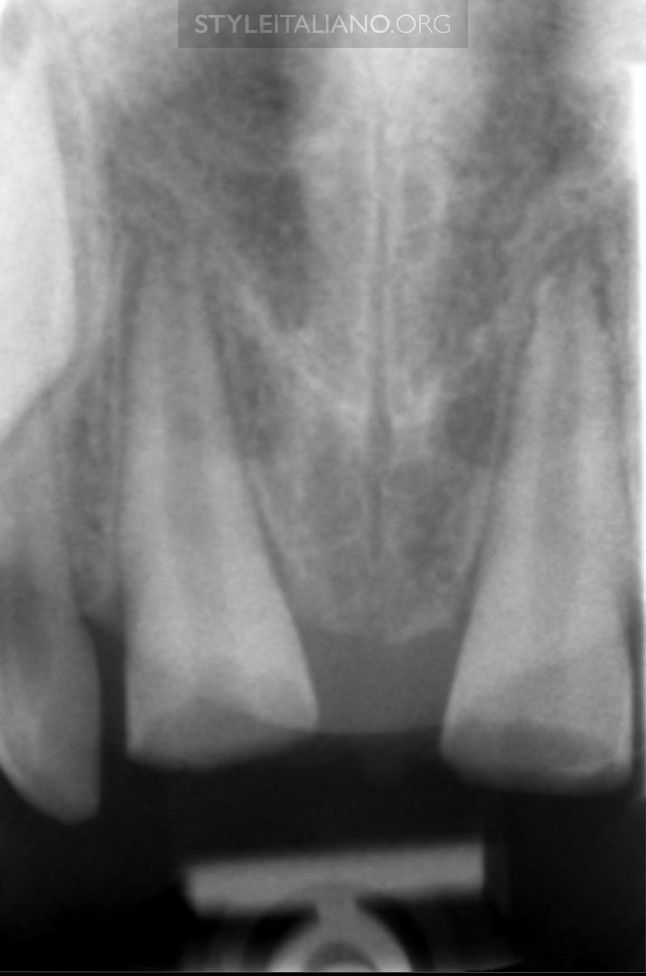
Photo 4
The x-ray shows wide root canals of teeth 11 and 21 with unformed roots and fractures to the level of the gums.
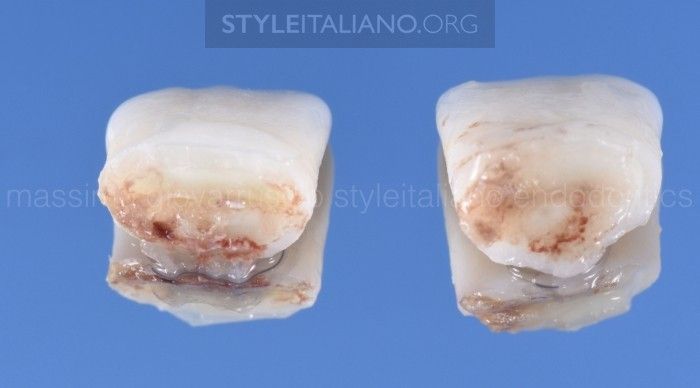
Photo 5
The patient's father is a dentist, so he was able to save the broken fragments of teeth. He tried to fix the fragments with a composite, but this was unsuccessful due to the deep fracture. For complicated crown fractures, the best option is to reattach the broken tooth fragment using adhesive and composite without preparation. But in this case, endodontic treatment is necessary before dental restoration. The provided fragments were stored in distilled water during treatment.
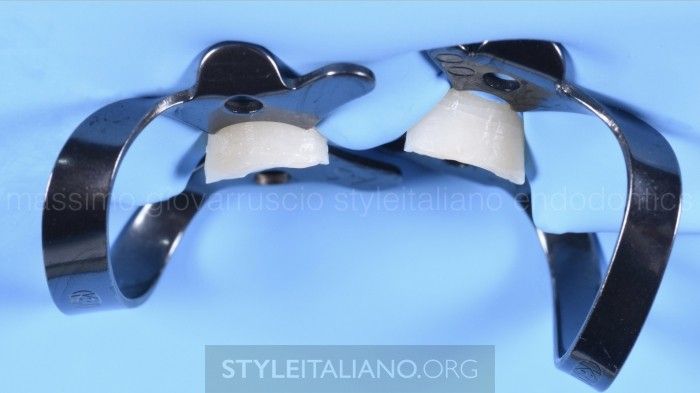
Photo 6
To install clasps and isolate the surgical field, areas of the gingival margin were trimmed with an electrosurgical handpiece.
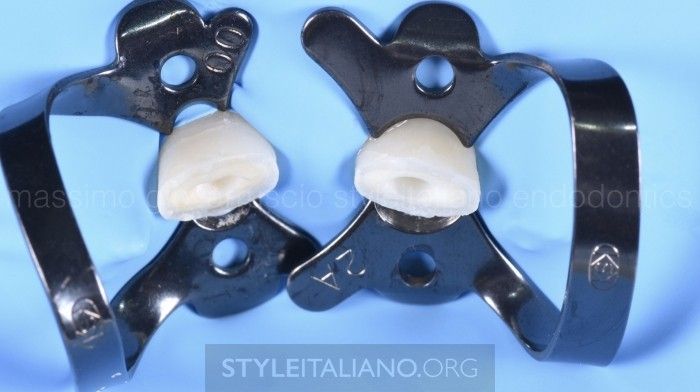
Photo 7
After the installation of the rubber dam, endodontic treatment of teeth 11 and 21 was carried out using MTA, taking into account the open apexes of the roots of the teeth.
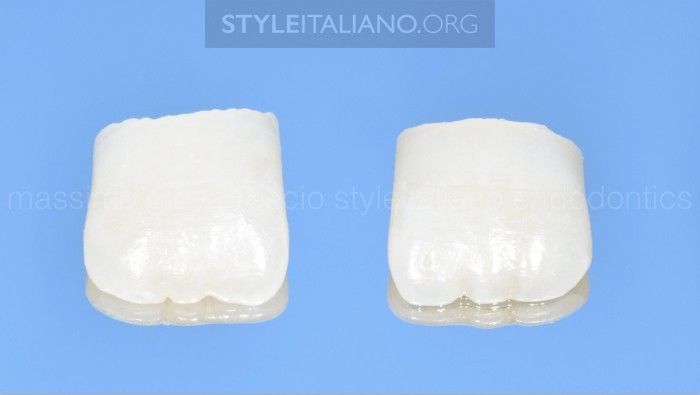
Photo 8
The broken fragments were cleaned in 0.9% sodium hypochlorite solution and then treated with 0.2% chlorhexidine. After this, the fragments are cleaned using polishers and paste to completely remove the previously applied composite.
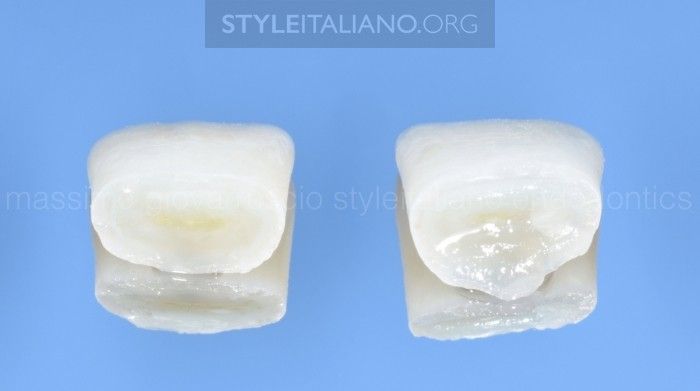
Photo 9
The tooth fragments are cleaned and prepared for attachment.
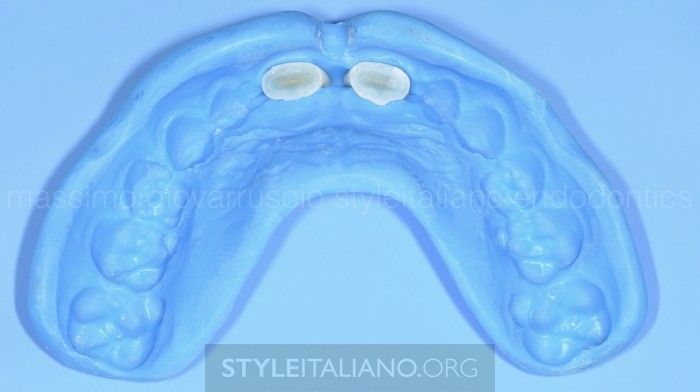
Photo 10
Previously, the patient wore a mouth guard, which fit the fragments perfectly.
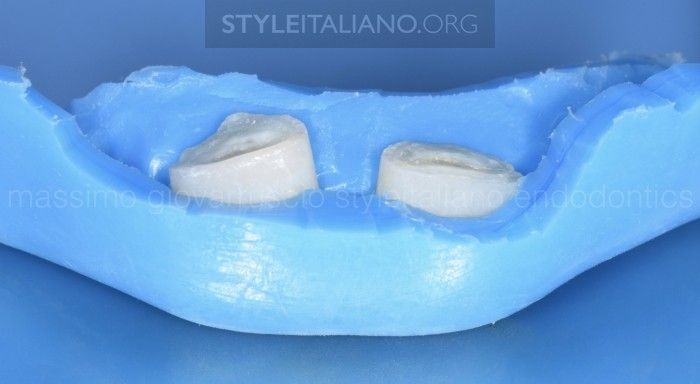
Photo 11
Using a tray, the fragments were repositioned and were ready for reattachment.
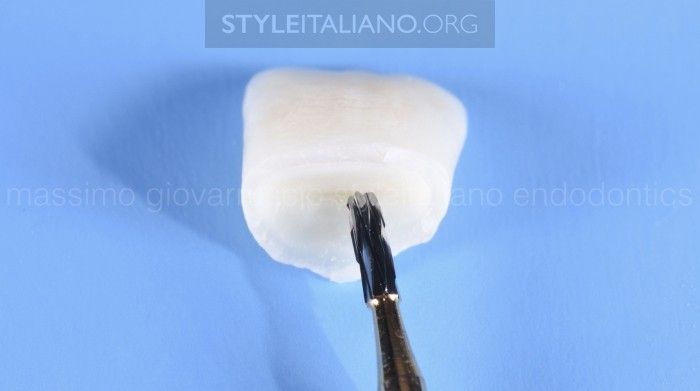
Photo 12
At this stage, the fragment is prepared with a carbide bur to obtain the necessary space for the fiberglass pin.
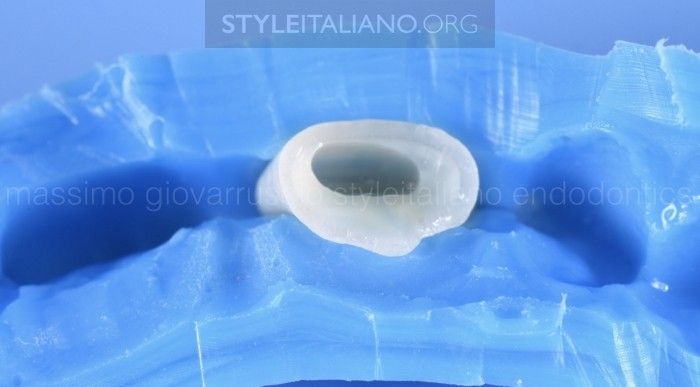
Photo 13
Carbide bur was chosen to avoid fragment damage as it has better cutting performance than diamond. It is extremely important to select the correct pin size in accordance with the depth of the canal and intracoronal space. In the case described, a medium-sized glass fiber post (HFO, Micerium) was selected, which was reduced and processed with diamond burs until its correct passive fit in the tooth fragment was achieved.
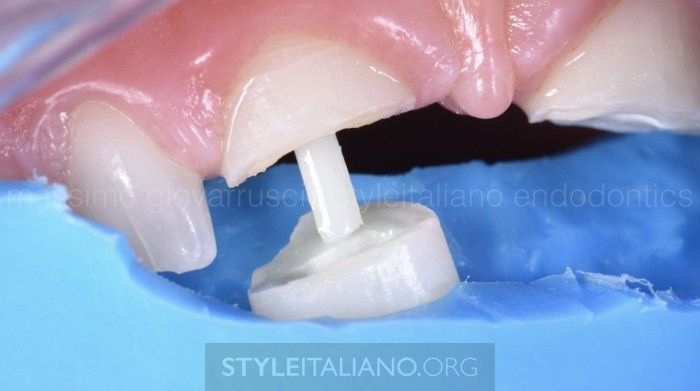
Photo 14
Fitting is the most important stage of the entire treatment. The fragment with the pin is fitted and the marginal fit is checked. The fit of the pin in the canal and fragment must be perfect without any obstructions.
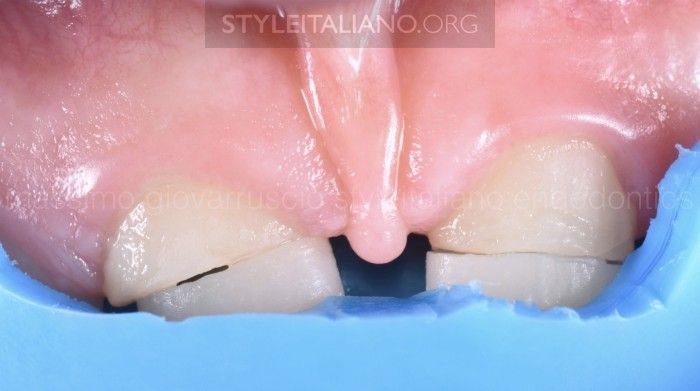
Photo 15
Fragment adaptation is incomplete due to loss of enamel and dentin, but reattachment of natural tooth fragments remains the best treatment option.
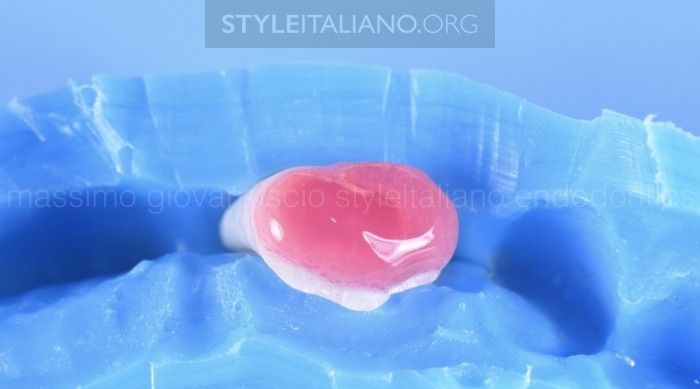
Photo 16
Etching the fragments with 37% phosphoric acid for 15 seconds, followed by washing.
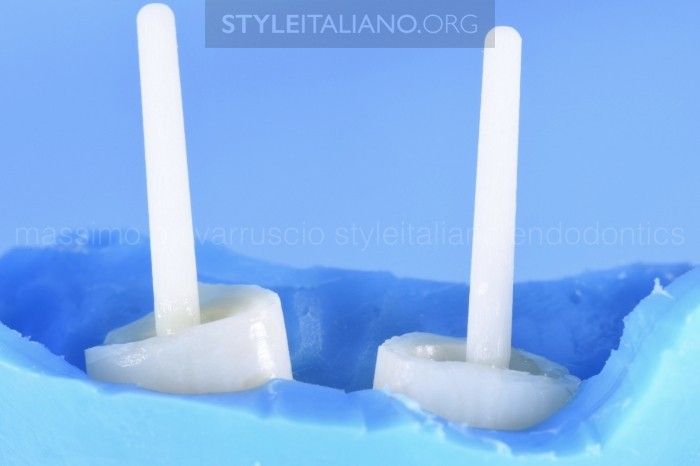
Photo 17
The glass fiber pins in the tooth fragments were permanently cemented with a dual-curing composite.
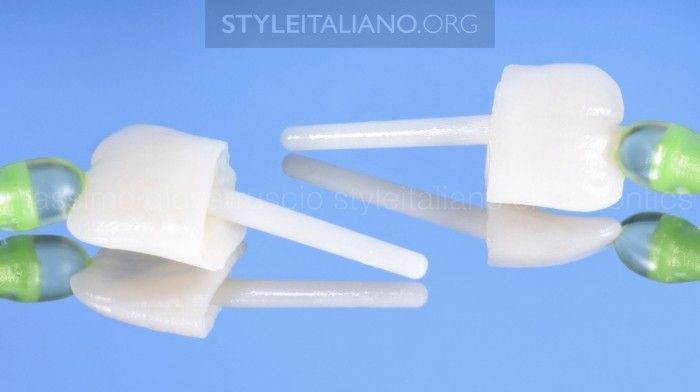
Photo 18
The fragments are installed on holders to facilitate further manipulations. Both fragments are ready to be attached.
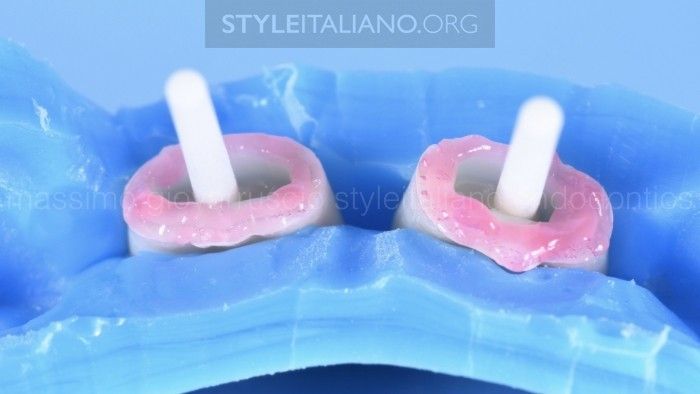
Photo 19
Fragments with pins fixed in them are etched with 37% phosphoric acid for 15 seconds and washed.
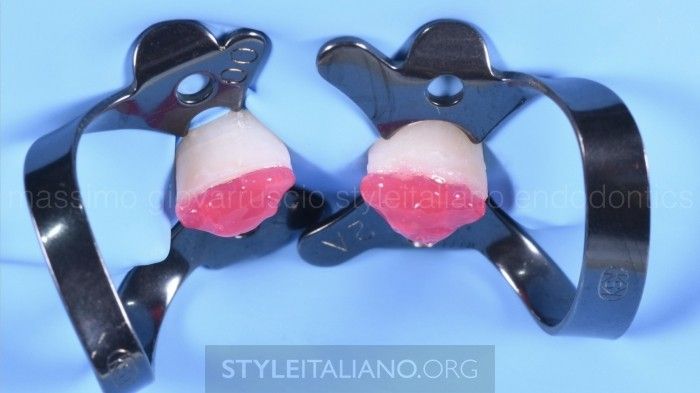
Photo 20
Etching and rinsing teeth. The surfaces were sandblasted, then enamel and dentin were etched for 15 seconds with 37% phosphoric acid and washed.
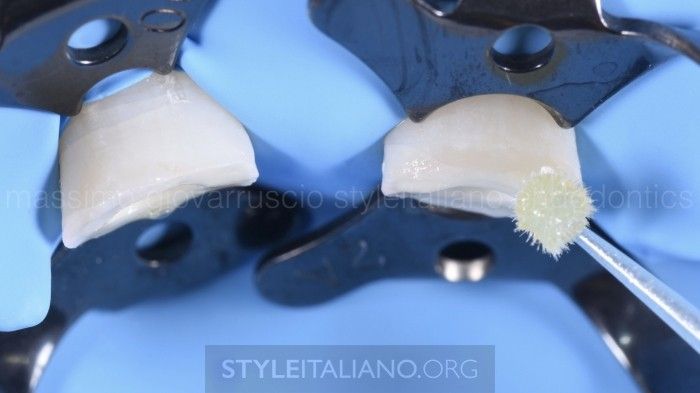
Photo 21
Several layers of primer were applied to the teeth and fragments, after which everything was thoroughly dried. Then adhesive is applied to the surface and photopolymerization is carried out for 1 minute.
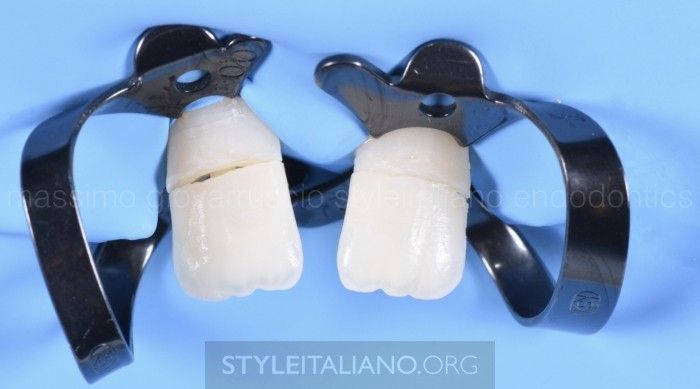
Photo 22
Fitting. Before fixing to the composite, the fit of both fragments was re-checked.
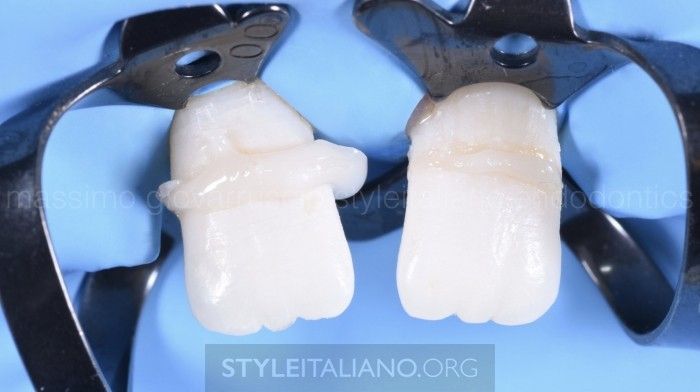
Photo 23
A dual-curing composite is placed in the canal and along the entire surface of the fracture line the fragments are placed in place and adjusted. After the self-curing of the composite is completed, the restoration is photopolymerized for 20 seconds in a soft mode, and then for 1 minute on the vestibular and palatal sides under glycerin gel to prevent the formation of an inhibited layer. Grinding and polishing was carried out using brushes and diamond paste.
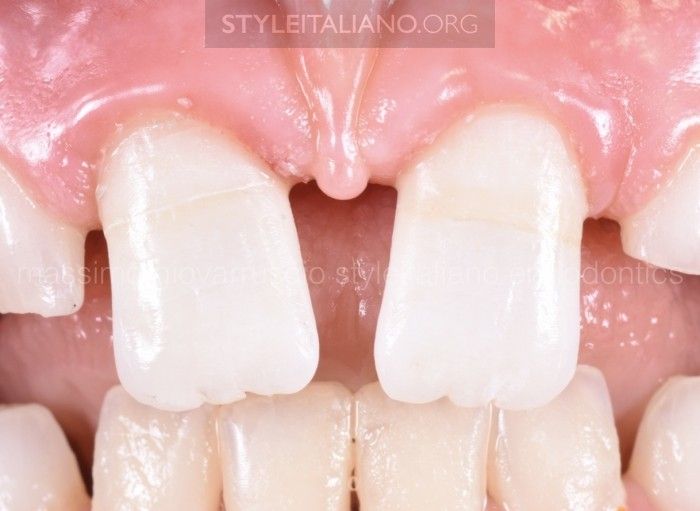
Photo 24
The result after removing the rubber dam, grinding and polishing. We need to wait for both fragments to rehydrate.
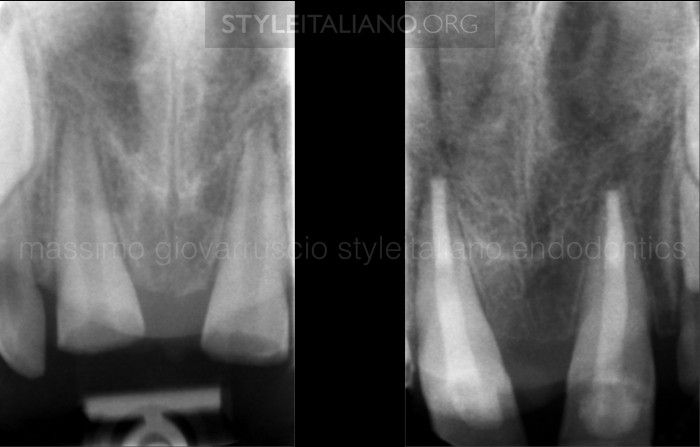
Photo 25
The postoperative radiograph shows high-quality apical obturation of the MTA and good fit of the pins and tooth fragments.
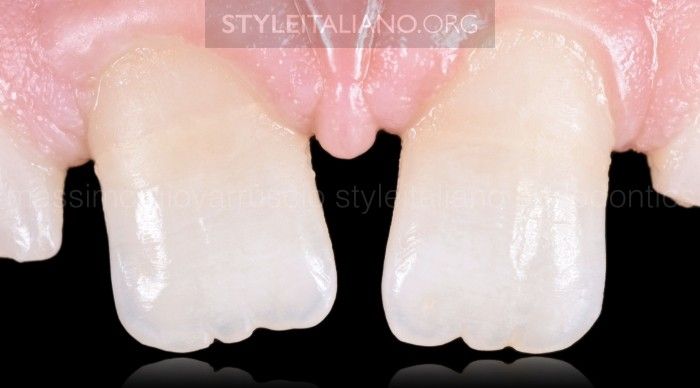
Photo 26
Control after 4 months. After fixation of the fragments, preparation can be carried out, grinding the vestibular surface in the area of the fracture line and masking it with a composite to improve aesthetics. The final result 8 months after treatment showed good adaptation and excellent aesthetic results.
Conclusion
When preserving a fragment of a natural tooth after a fracture, its fixation using adhesive protocols is very effective in obtaining a strong, durable and aesthetic result. Disadvantages of the procedure may be debonding of the fragment and its incomplete rehydration, which leads to color inconsistency.
Learn more about the use of fiberglass posts in the webinar Intracanal adhesion. How to extend the service life of intracanal pins, avoiding problems with adhesive fixation .
http://www.styleitaliano.org/
