
Teeth removal techniques
Machine translation
Original article is written in RU language (link to read it) .
Tooth extraction is the most common procedure performed by every practicing dental surgeon. Like any other surgical intervention, this procedure has its own characteristics.
This surgical intervention is accompanied by a violation of the integrity of the mucous membrane, circular ligament of the tooth, periosteum, vessels, nerves and bone structure of the socket.
Learn more about this topic in the webinar Dental removal techniques .
It is also important to take into account the fact that despite the minimal trauma of the operation, it entails significant changes in the human body. These are not only psycho-emotional disorders caused by the patient’s fear of the manipulation itself, as well as the environment of the surgical room, but also direct disruption of the functioning of some body systems. Eg:
of cardio-vascular system,
central nervous system,
endocrine.
The operation of tooth extraction, in addition to general changes, also causes local anatomical and functional disorders, since the dentoalveolar system functions as a single whole, the absence of just one tooth leads to a change in the functioning of the entire system.
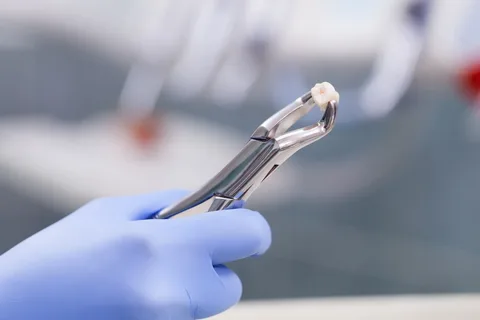
Rice. 1. Extracted tooth.
Anatomical and functional disorders
the integrity of the alveolar process is compromised,
occlusal relationships with antagonist teeth are disrupted,
chewing efficiency decreases (directly proportional to the number of teeth removed),
speech change,
cosmetic defect.
The development and constant improvement of treatment methods and techniques makes it possible to preserve teeth as much as possible, even in quite difficult clinical situations, when just a few years ago they would have been subject to mandatory removal. But we should not forget about the need for timely elimination of foci of chronic infection in order to prevent dissemination to nearby tissues and organs.
Based on all of the above, we can conclude that tooth extraction should be performed according to strict indications, in a gentle manner, taking into account all possible consequences and complications.
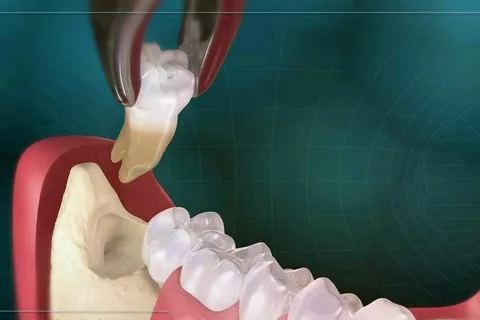
Rice. 2. Tooth traction.
Removal techniques
The position of the patient in the dental chair during the procedure is half-sitting or half-lying.
At the first stage, adequate anesthesia is performed, the choice is made individually, it is determined by the general condition of the patient, a history of allergic reactions, the volume of the proposed intervention and local status.
The position of the patient in the chair if the removal of the upper tooth is planned:
the back of the dental chair is reclined,
the patient's head is slightly thrown back,
The tooth to be removed is located at the level of the surgeon's shoulder joint.
Position of the patient in the chair if the lower tooth is planned to be removed:
the chair is lowered so that the oral cavity is at the level of the surgeon’s elbow joint,
The patient's head is fixed so that it is placed straight or tilted slightly anteriorly.
The surgeon's free left hand is used to provide free access to the surgical field and protect nearby soft tissues from mechanical damage from instruments during tooth dislocation.
When anesthesia has set in, the surgeon has taken the correct position, moved away the nearby tissues for a better view, it is necessary to exfoliate the gingival margin and circular ligament of the tooth, and it is important to do this to a depth of at least 10 mm. Then you can begin the actual removal.
Tooth extraction technique using forceps
For each group of teeth, a dental surgeon has specially shaped forceps in his arsenal. Their structural elements are identical: cheeks (working part), lock and jaws (handles), distinctive characteristics lie in small details. There are universal forceps that a doctor can use to remove different teeth and roots, and there are those that are suitable only for a specific clinical situation, for one tooth.
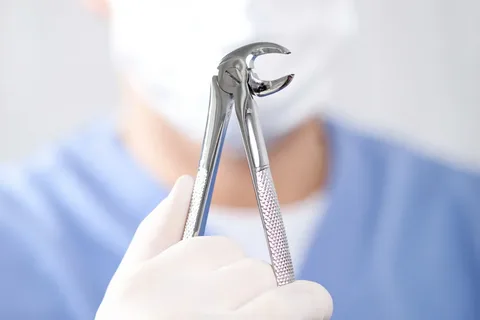
Rice. 3. Beak-shaped forceps, curved along the edge.
Techniques for holding forceps
The tongs are placed in the right hand, and there are several options for holding the tongs.
First option
Both handles of the forceps are held by the hand, with the exception of the little finger and ring fingers, which are placed between the handles in order to push the jaws apart with them if necessary.
Second option
The thumb grips the handle of the tongs, and the little finger and ring fingers hold the opposite handle.
Criteria for choosing forceps
Forceps with a cheek width of 7.5 mm are indicated for removing teeth with a wide clinical crown and molars, and forceps with a smaller width are indicated for teeth with a small clinical crown width: incisors, premolars, canines.
Most forceps are equipped with the same cheeks, rounded or sharp, and are used to remove teeth located on both the right and left. But there are forceps designed to remove teeth on one side only. So, the forceps for removing the upper wisdom tooth are selected in such a way that the pointed cheek is located vestibular.
The length of the cheeks and handles of the forceps is determined by the position of the tooth. For the upper front teeth, the short cheeks of straight forceps are suitable. Whereas for the upper chewing teeth, special S-shaped forceps are used.
Bayonets are specialized pliers with elongated converging cheeks and handles resembling a bayonet. Bayonettes are used to remove the roots of the upper teeth, regardless of their group affiliation; they are also convenient to use if it is necessary to remove roots in the anterior part of the lower jaw.
Beak-shaped forceps are indicated for removing teeth of the lower jaw; their design features include bending along an edge or along a plane. The latter option involves use for inflammatory contracture, when the patient cannot fully open his mouth.
The roots of the lower jaw teeth are removed using beak-shaped forceps with converging cheeks.
Tooth extraction protocol
As with any surgical procedure, it is very important to follow the strict procedure described below.
The first step is to apply the forceps; this is done by holding the forceps open, excluding the gums from getting under the cheeks.
Next, the forceps move smoothly, as deep as possible; it is important to ensure that the cheeks move strictly along the longitudinal axis of the tooth.
The third step is closing the forceps, that is, securely fixing the tooth, while applying moderate pressure on the tooth so as not to break it, but also to prevent the forceps from slipping.
Dislocation.
Tooth traction.
Tooth dislocation is the most critical stage of the operation. It is carried out by pendulum-like swaying in the vestibulo-oral direction with a gradual increase in the amplitude of movements. It is very important to ensure that the cheeks of the forceps hold the tooth tightly during the dislocation process and do not slide along its surface.
Tooth extraction technique using elevators
Straight elevator
The straight elevator is used to remove the roots of the upper teeth; it can be used to remove the lower wisdom tooth.
The straight elevator is held with the whole hand, only the index finger is placed on the cheek.
The position of the patient and the surgeon does not change.
The cheek of the elevator is wedged between the roots and the edge of the alveoli, rotational movements are made, the cheek penetrates deeper and the root is gradually pushed out.

Rice. 4. Elevator.
Lecluse bayonet elevator
It is a type of straight elevator - a massive handle connected at a right angle to a bayonet-shaped intermediate part. The cheek is pointed. Designed for lower wisdom teeth.
Side elevators
The cheeks of these instruments are curved along the edge at an angle of 60–80°, and are used to remove the roots of lower teeth.
The position of the patient and the surgeon does not change.
The elevator is held with the entire hand, the index finger is placed on the cheek.
The concave surface is always directed towards the root of the tooth being removed.
Removing teeth using drills
Indications for this surgical intervention:
retention and dystopia of the tooth being removed;
hypercementosis;
fracture of the crown during the use of another tooth extraction technique.
Technique
Mandatory adherence to asepsis.
Adequate pain relief.
Carbide cutters and burs are used, and cooling with sterile saline is required.
The choice of surgical access, the incision line is determined by the location of the tooth.
The mucoperiosteal flap is peeled off, perforation is made and a section of the cortical plate is removed, and the root or crown of the impacted tooth is exposed.
The roots are removed with forceps or an elevator.
Sharp edges of the bone must be smoothed.
Stitching.
Wound management under iodoform turunda, regular dressings.
Removal of sutures on the seventh day.
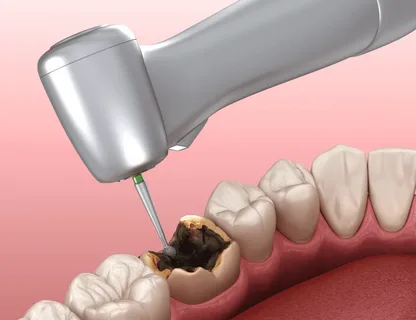
Rice. 5. Using a drill to remove a badly damaged tooth.
If you liked this article, there is even more relevant information in the online lesson Qualified tooth extraction .