Surgical crown lengthening for distal restorations
Machine translation
Original article is written in RU language (link to read it) .
Today, more and more often, the technique of raising the deep subgingival margin (Deep Margin Elevation) is used for distal restorations. It is performed in clinical situations where it will be necessary to perform bone correction surgery and surgical crown lengthening.
Learn more about surgical crown lengthening in the webinar Surgical crown lengthening and vertical preparation to restore severely damaged teeth .
The deep subgingival margin elevation procedure, recently introduced by Prof. Pascal Magne, Dr. Didier Dietsky and Dr. Roberto Sprafico, is used in borderline clinical situations where rubber dam isolation is difficult but still possible; in cases where it is necessary to facilitate impression taking and subsequent isolation for bonding, and, importantly, in those clinical situations where the biological width of the periodontium is still present.
The concept of biological width, postulated by Gargiulo et al in 1961, is a fundamental requirement when performing restorations and prosthetics. The biological width must be observed both when performing restorations and prosthetics, otherwise there is a high risk of creating iatrogenic periodontal pockets.
This article demonstrates the technique using simple and easily repeatable illustrations without performing DMA. The procedure consists of the following steps. First, the carious cavity is prepared to prepare the cervical edge, which should no longer move apically. Then - an operation to place the bone crest 3 mm below the already prepared cervical edge. And finally, the restoration itself. Carrying out surgery before preparing the cervical edge is a big mistake, because... often results in the need to perform DMA.
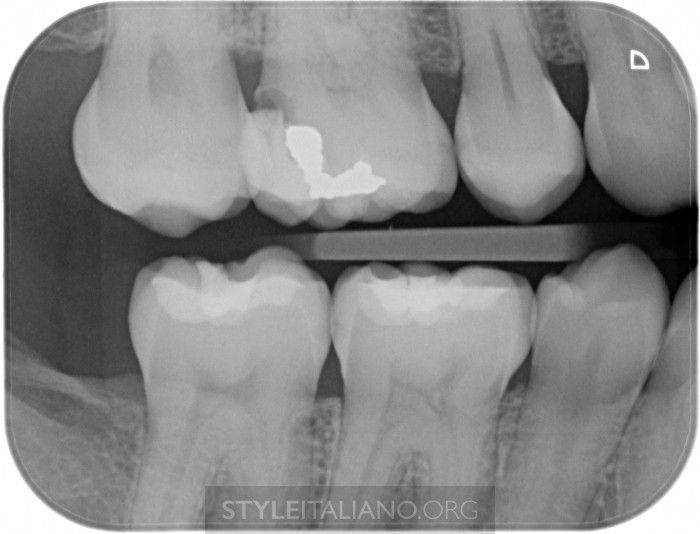
Photo 1 – Bitewing before treatment. Large carious cavity on the distal surface 1.6.
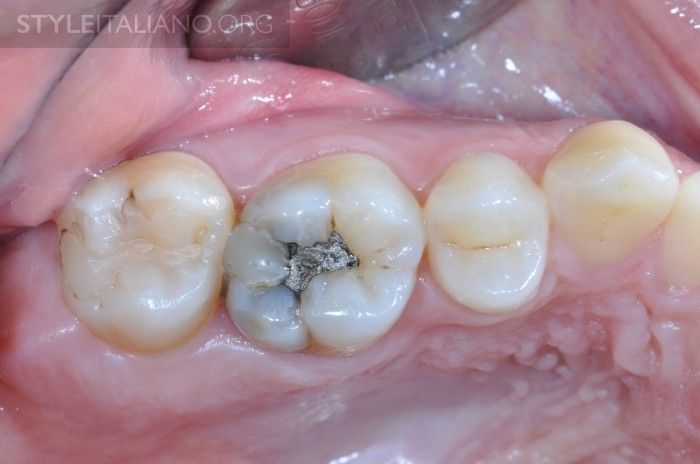
Photo 2 – In the oral cavity.
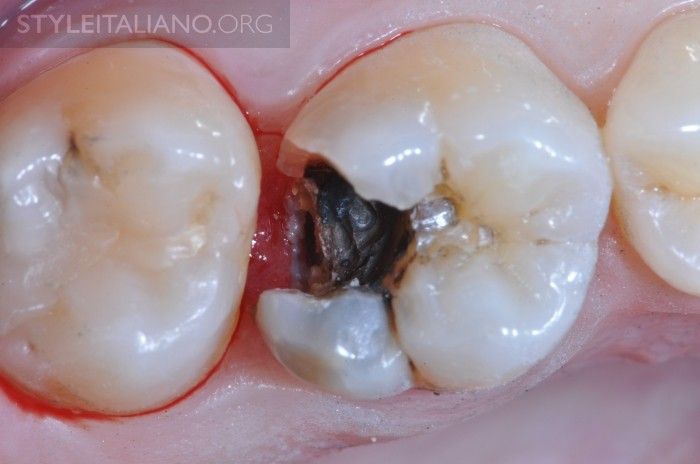
Photo 3 – After preparation, the need for surgical lengthening of the crown becomes obvious.
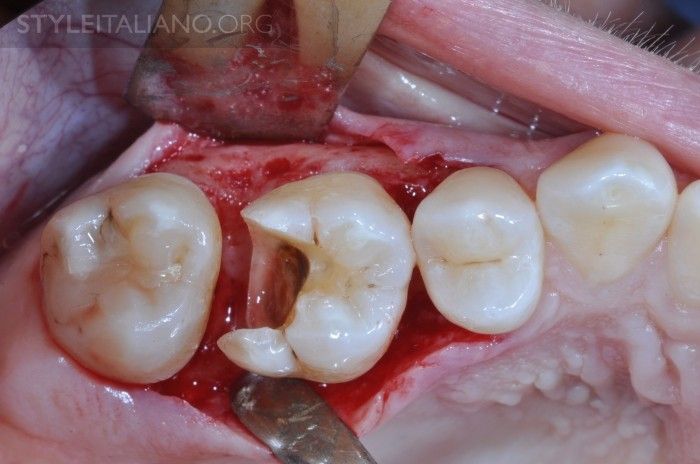
Photo 4 – Preparation of the carious cavity, distal cervical edge and surgical lengthening.
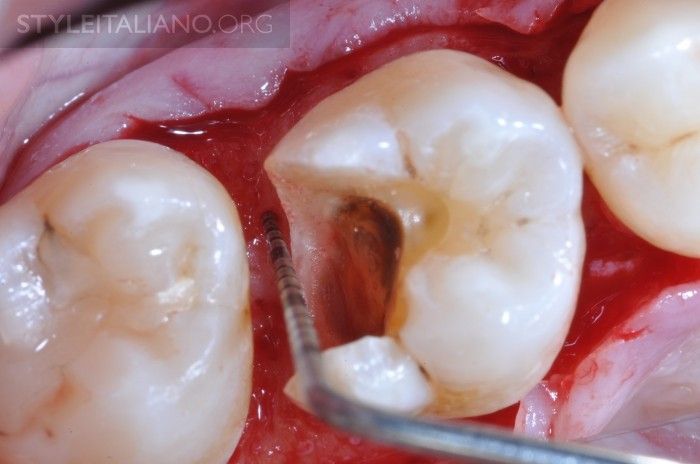
Photo 5 – It is necessary that the bone crest is 3 mm below the cervical part of the tooth crown.
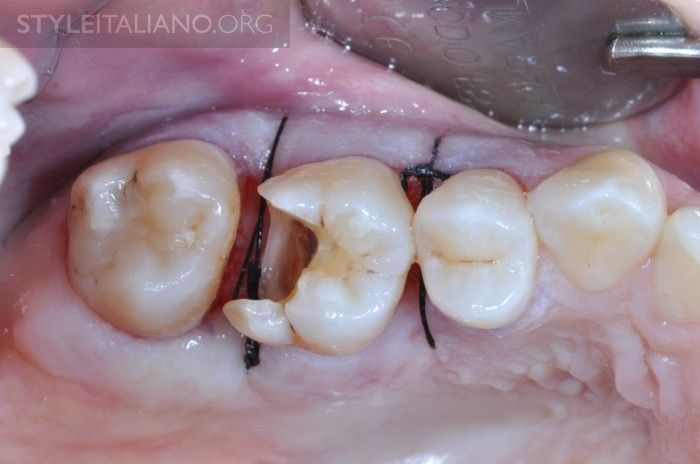
Photo 6 – Stitching.
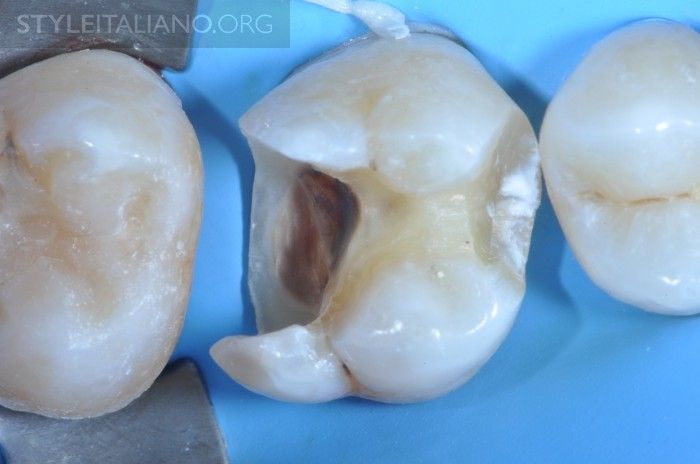
Photo 7 – Insulation using rubber dam. Note the good isolation obtained from the surgical procedure.
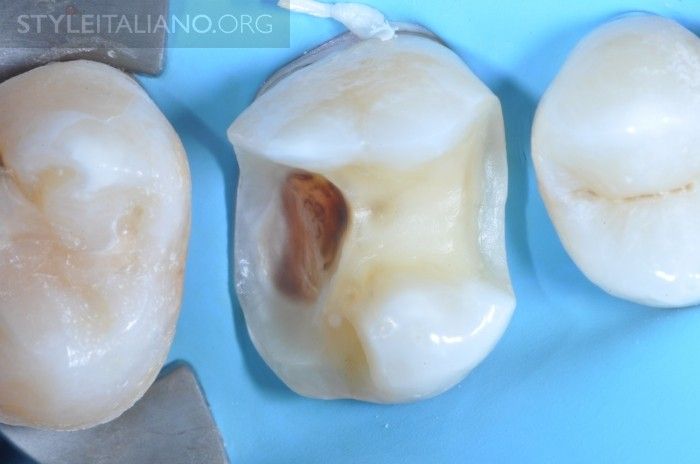
Figure 8 – The thickness of the palatal and distal cusps was less than 2 mm, so they were removed. In fact, we removed all bumps thinner than 2 mm. Advice: when preparing for a composite onlay inlay, the height must be reduced by 2 mm, for a lithium disilicate inlay - by 1 mm.
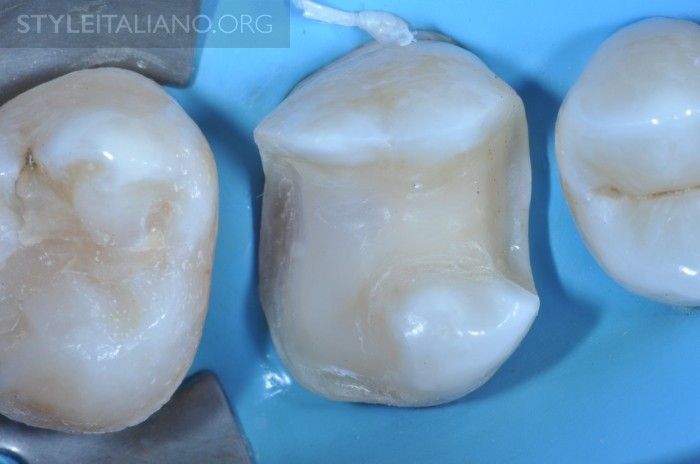
Photo 9 – Build-up, sealing of dentinal tubules, preparation for onlay inlay was carried out. Advice. Clean the dentin with glycine powder and disinfect it with chlorhexidine 2%. Then etch the enamel for 20 seconds and apply a universal self-etch adhesive to the dentin and enamel. This will allow you to avoid post-operative soreness.
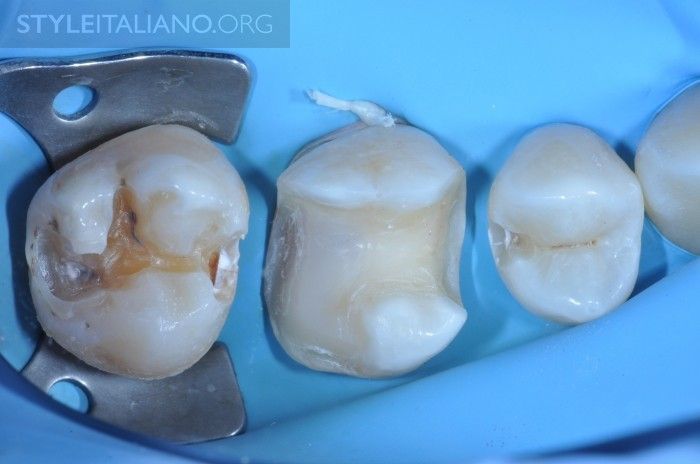
Photo 10 - Only at this stage can we prepare and restore with direct restorations 1.5 and 1.7. Advice: do not do this earlier so as not to damage the restoration during the preparation of tooth 1.6 under onlay.
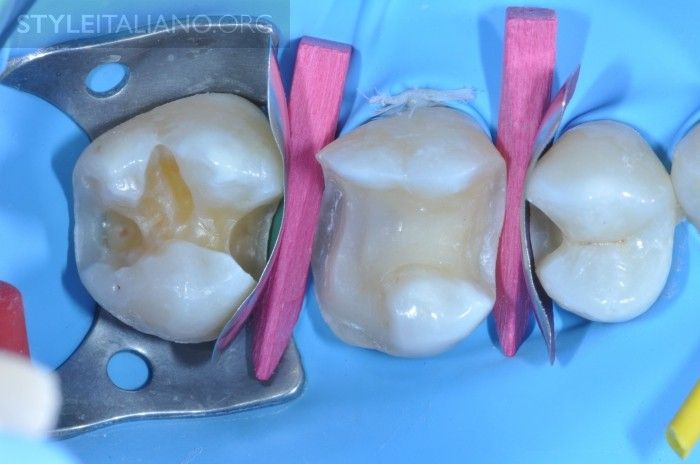
Photo 11 – Installation of sectional matrices and wooden wedges.
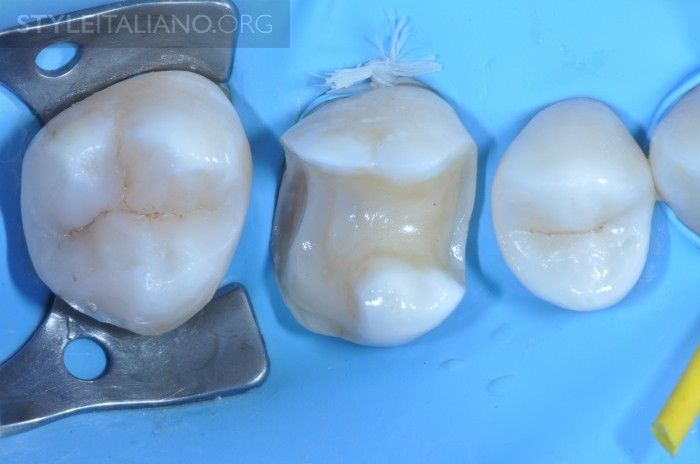
Photo 12 – Direct restorations on 1.5 and 1.7 are made in A2 shade, with brown stain added to increase the perception of depth. Finishing and polishing has been carried out. Tip 1: Use a universal self-etching bond using the selective etch technique. This will ensure the best result without any post-operative sensitivity. Tip 2: For perfect control of the working field and the absence of blood or saliva in it, finishing of restorations should be carried out in a rubber dam.
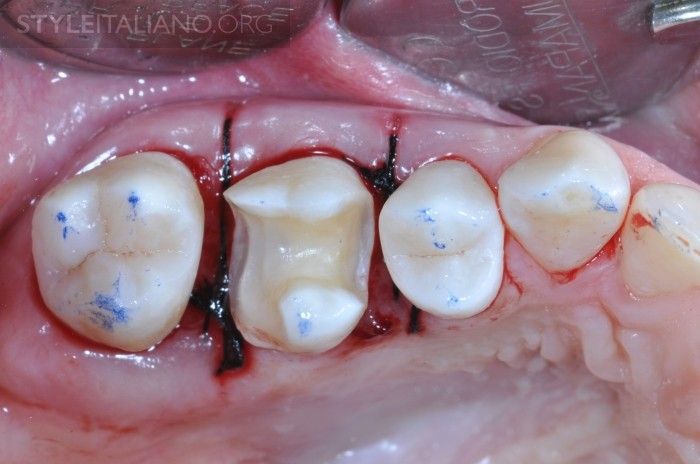
Photo 13 – Occlusal contacts are checked before impressions are taken and no corrections are required. Tip: Be sure to check the occlusal relationship and make corrections if necessary before taking impressions.
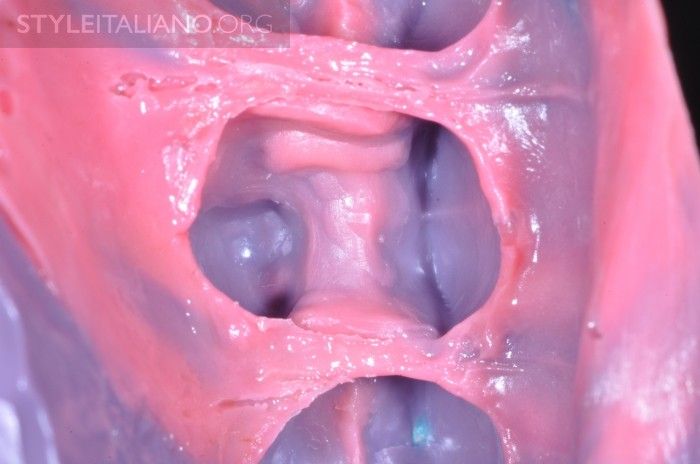
Photo 14 – Imprint. Advice: to get a result with the least distortion, it is better to make a one-stage, two-phase impression.
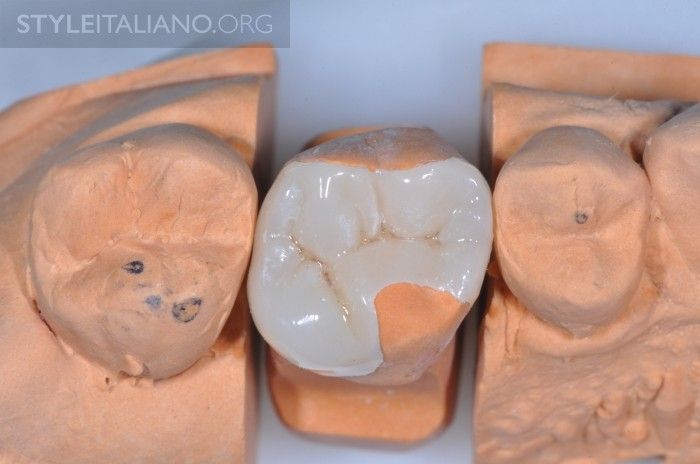
Photo 15 – Composite onlay tab on the model.
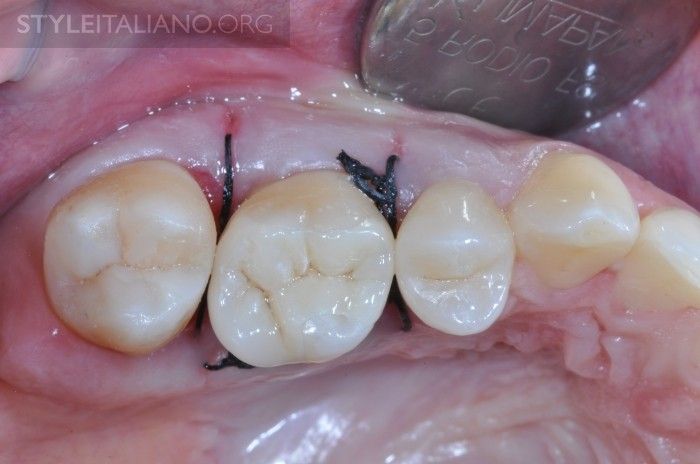
Photo 16 – After 48 hours, the insert is fitted without a rubber dam. The stitches are still not removed.
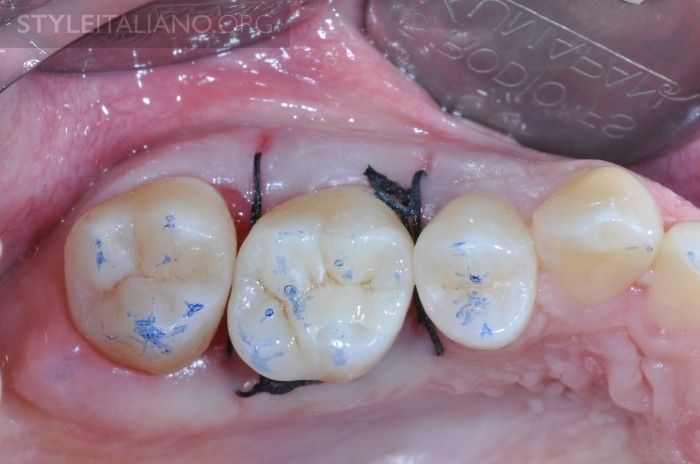
Photo 17 – Checking occlusion.
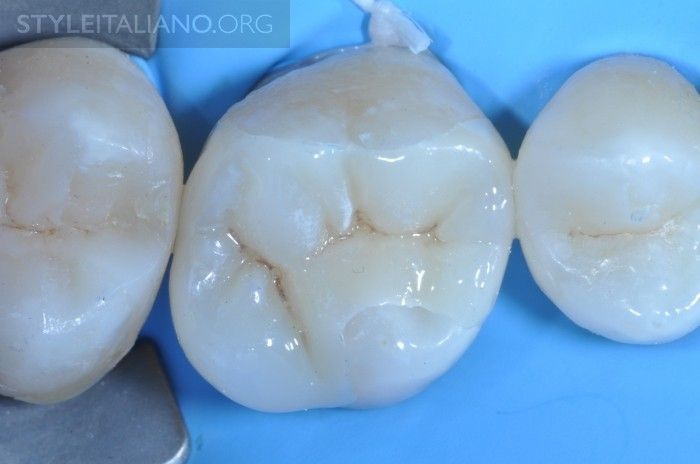
Photo 18 – Setting up the rubber dam, fitting the inlay already in the rubber dam WITHOUT bonding.
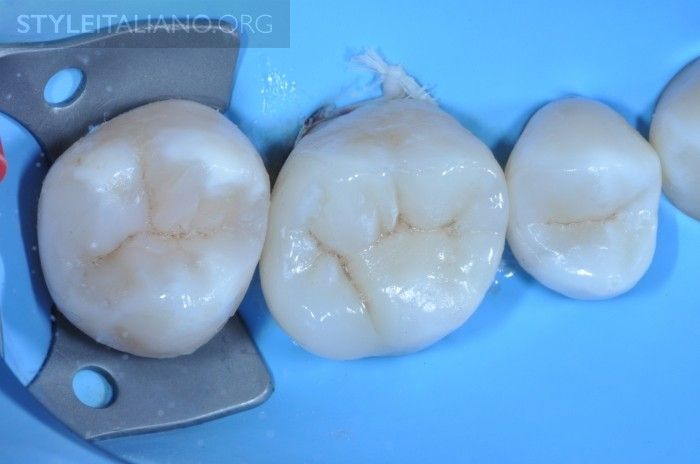
Photo 19 – Fixing, finishing and polishing.
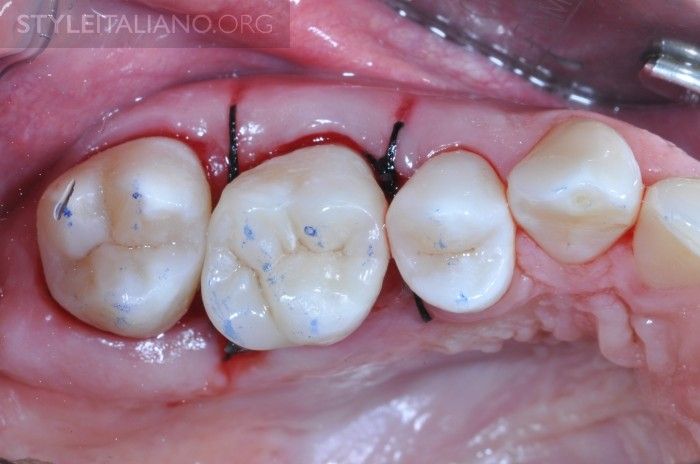
Photo 20 - Checking the occlusion after fixing the inlay demonstrates that there is no need for correction.
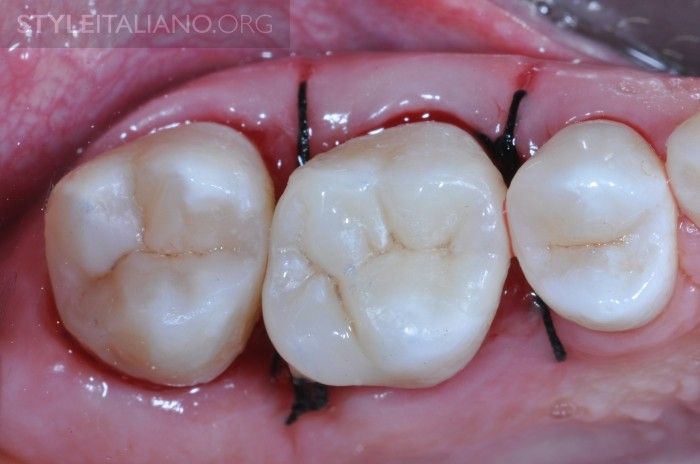
Photo 21 – Final inspection of three restorations.
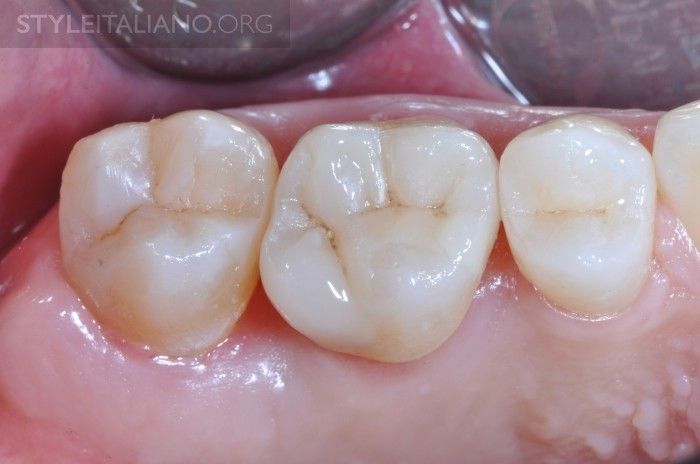
Photo 22 – Two weeks after surgery, good integration of restorations 1.5 1.6 1.7.
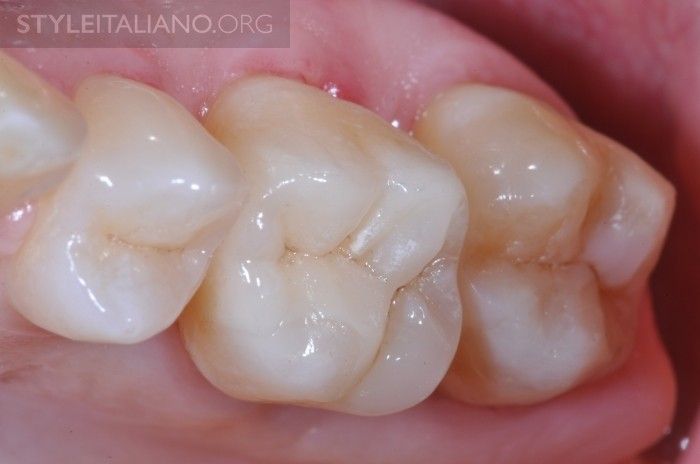
Photo 23 – Details of morphology and anatomy 1.5 1.6 1.7.
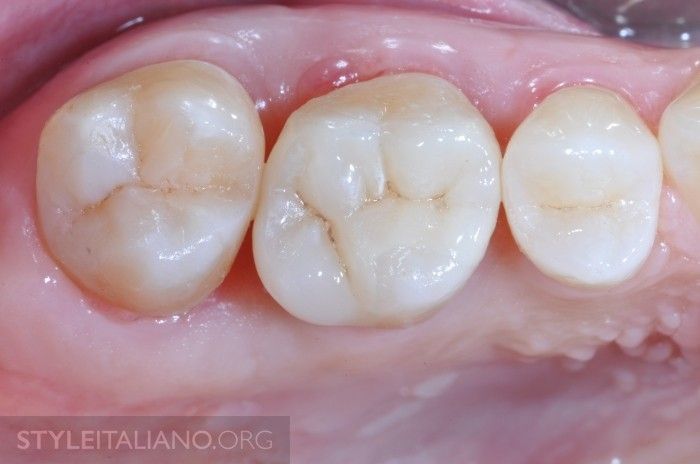
Photo 24 - Details of restorations. The tissues heal, but full recovery will occur in six months.
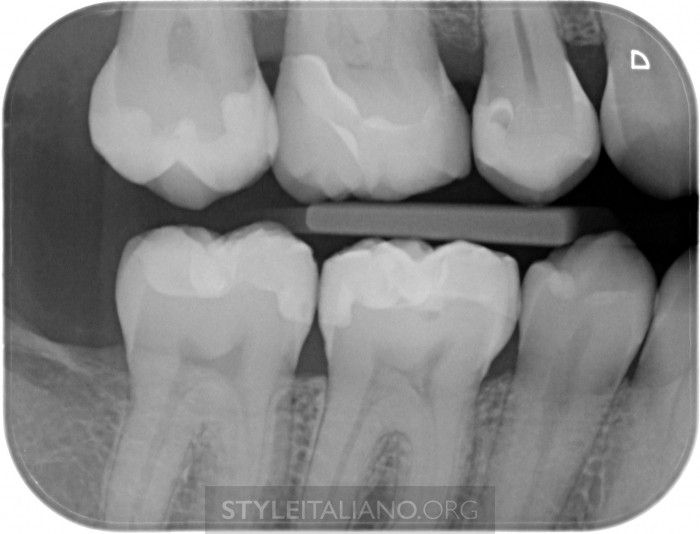
Photo 25 - Final X-ray. Good accuracy of the restorations was shown.
conclusions
To restore means to restore the function and aesthetics of our patients’ teeth. The restoration must be done accurately and accurately, and also last a long time. To get good results, you need to follow simple rules and protocols without any flights of fancy.
If these rules are feasible, predictable and applicable, the required results will be achieved.
Universal adhesives are currently showing excellent results. This is not the future of adhesion, but the present, so use them without fear or doubt.
More up-to-date information about preparing cavities for onlay tabs in the webinar Minimally invasive preparation for Overlay and Onlay .
http://www.styleitaliano.org/
