
New materials for the treatment of tooth wear
Machine translation
Original article is written in RU language (link to read it) , IT language (link to read it) .
To treat tooth wear, it is necessary to restore lost tooth tissue. In the last decade, innovative dental materials have been used for these purposes, such as ceramic reinforced composites and resin infiltrated ceramics.
Learn more about tooth abrasion at the webinar Digital protocol for the treatment of pathological abrasion .
This article presents a clinical case of the treatment of tooth wear, describing the workflow and materials used.
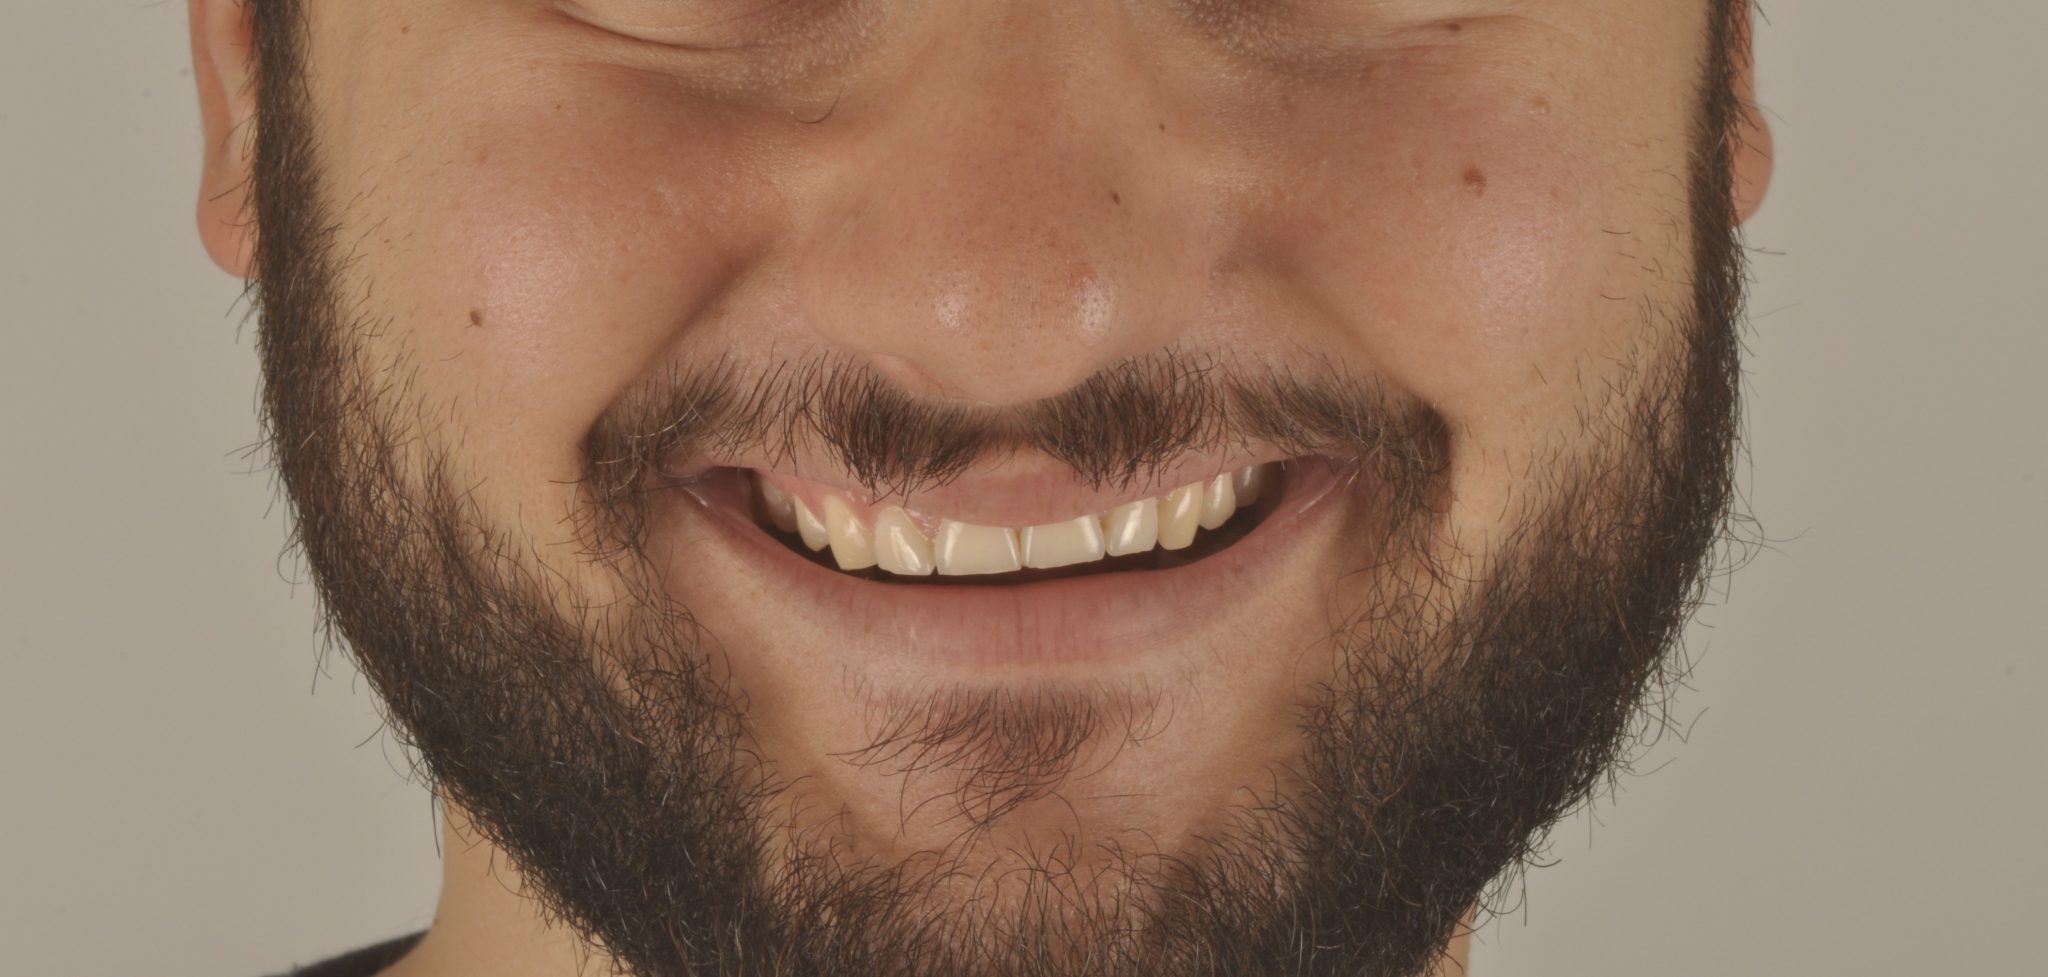
Picture 1
The young man complained of tooth hypersensitivity when eating, especially in the lateral areas. The examination revealed erosion, curvature of the smile line and tooth axes, and shortening of the crowns.
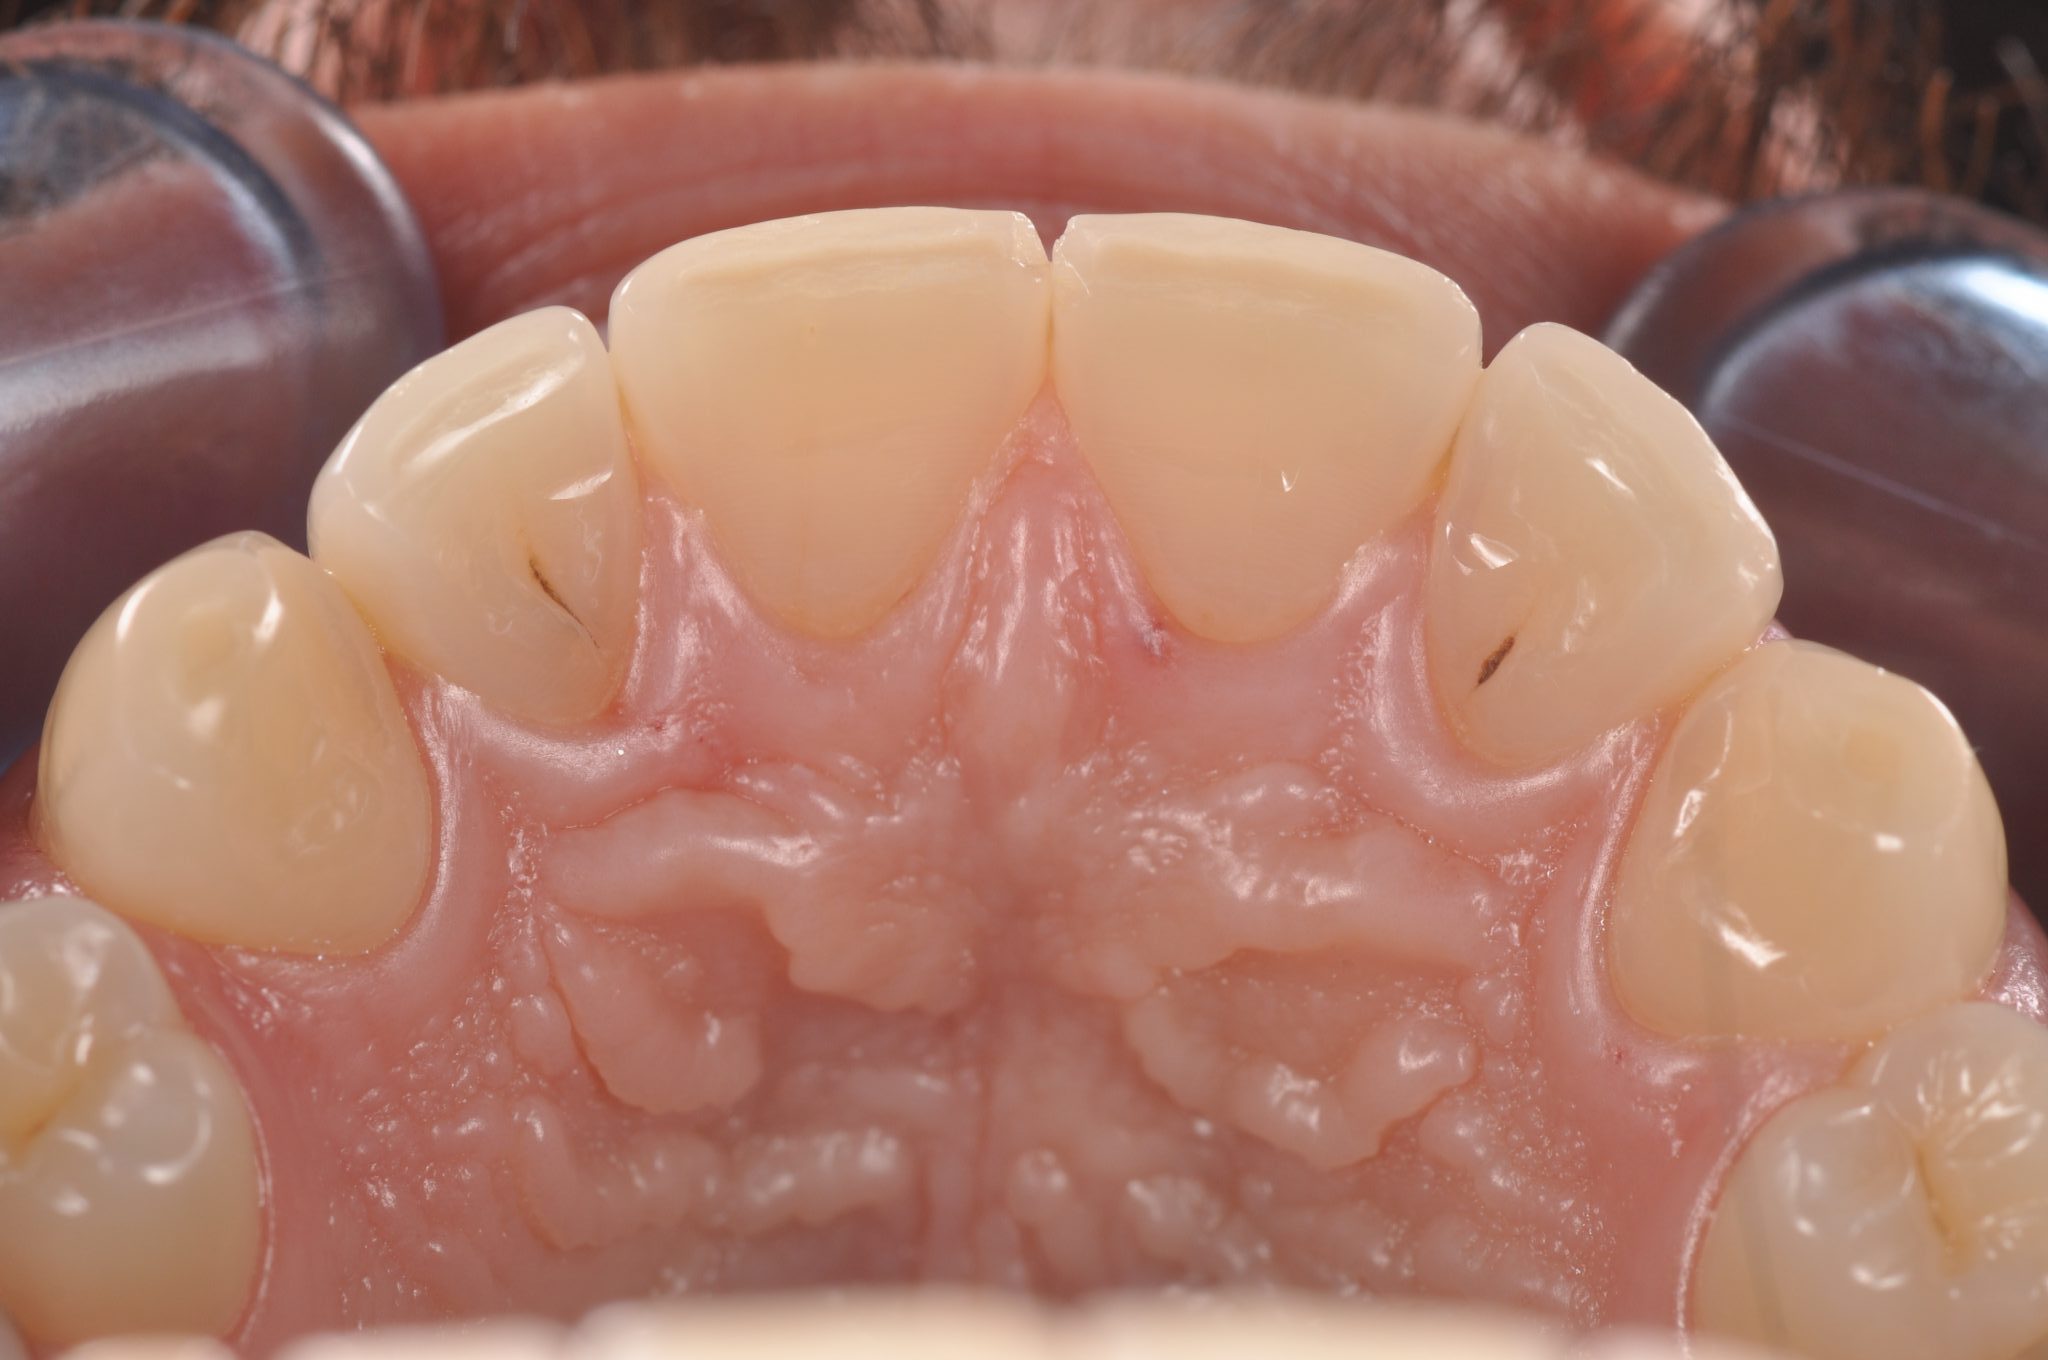
Figure 2
View from the palatal side: partial loss of enamel due to frequent consumption of soft drinks (tea, coffee, juices and nectars, carbonated water, lemonade).
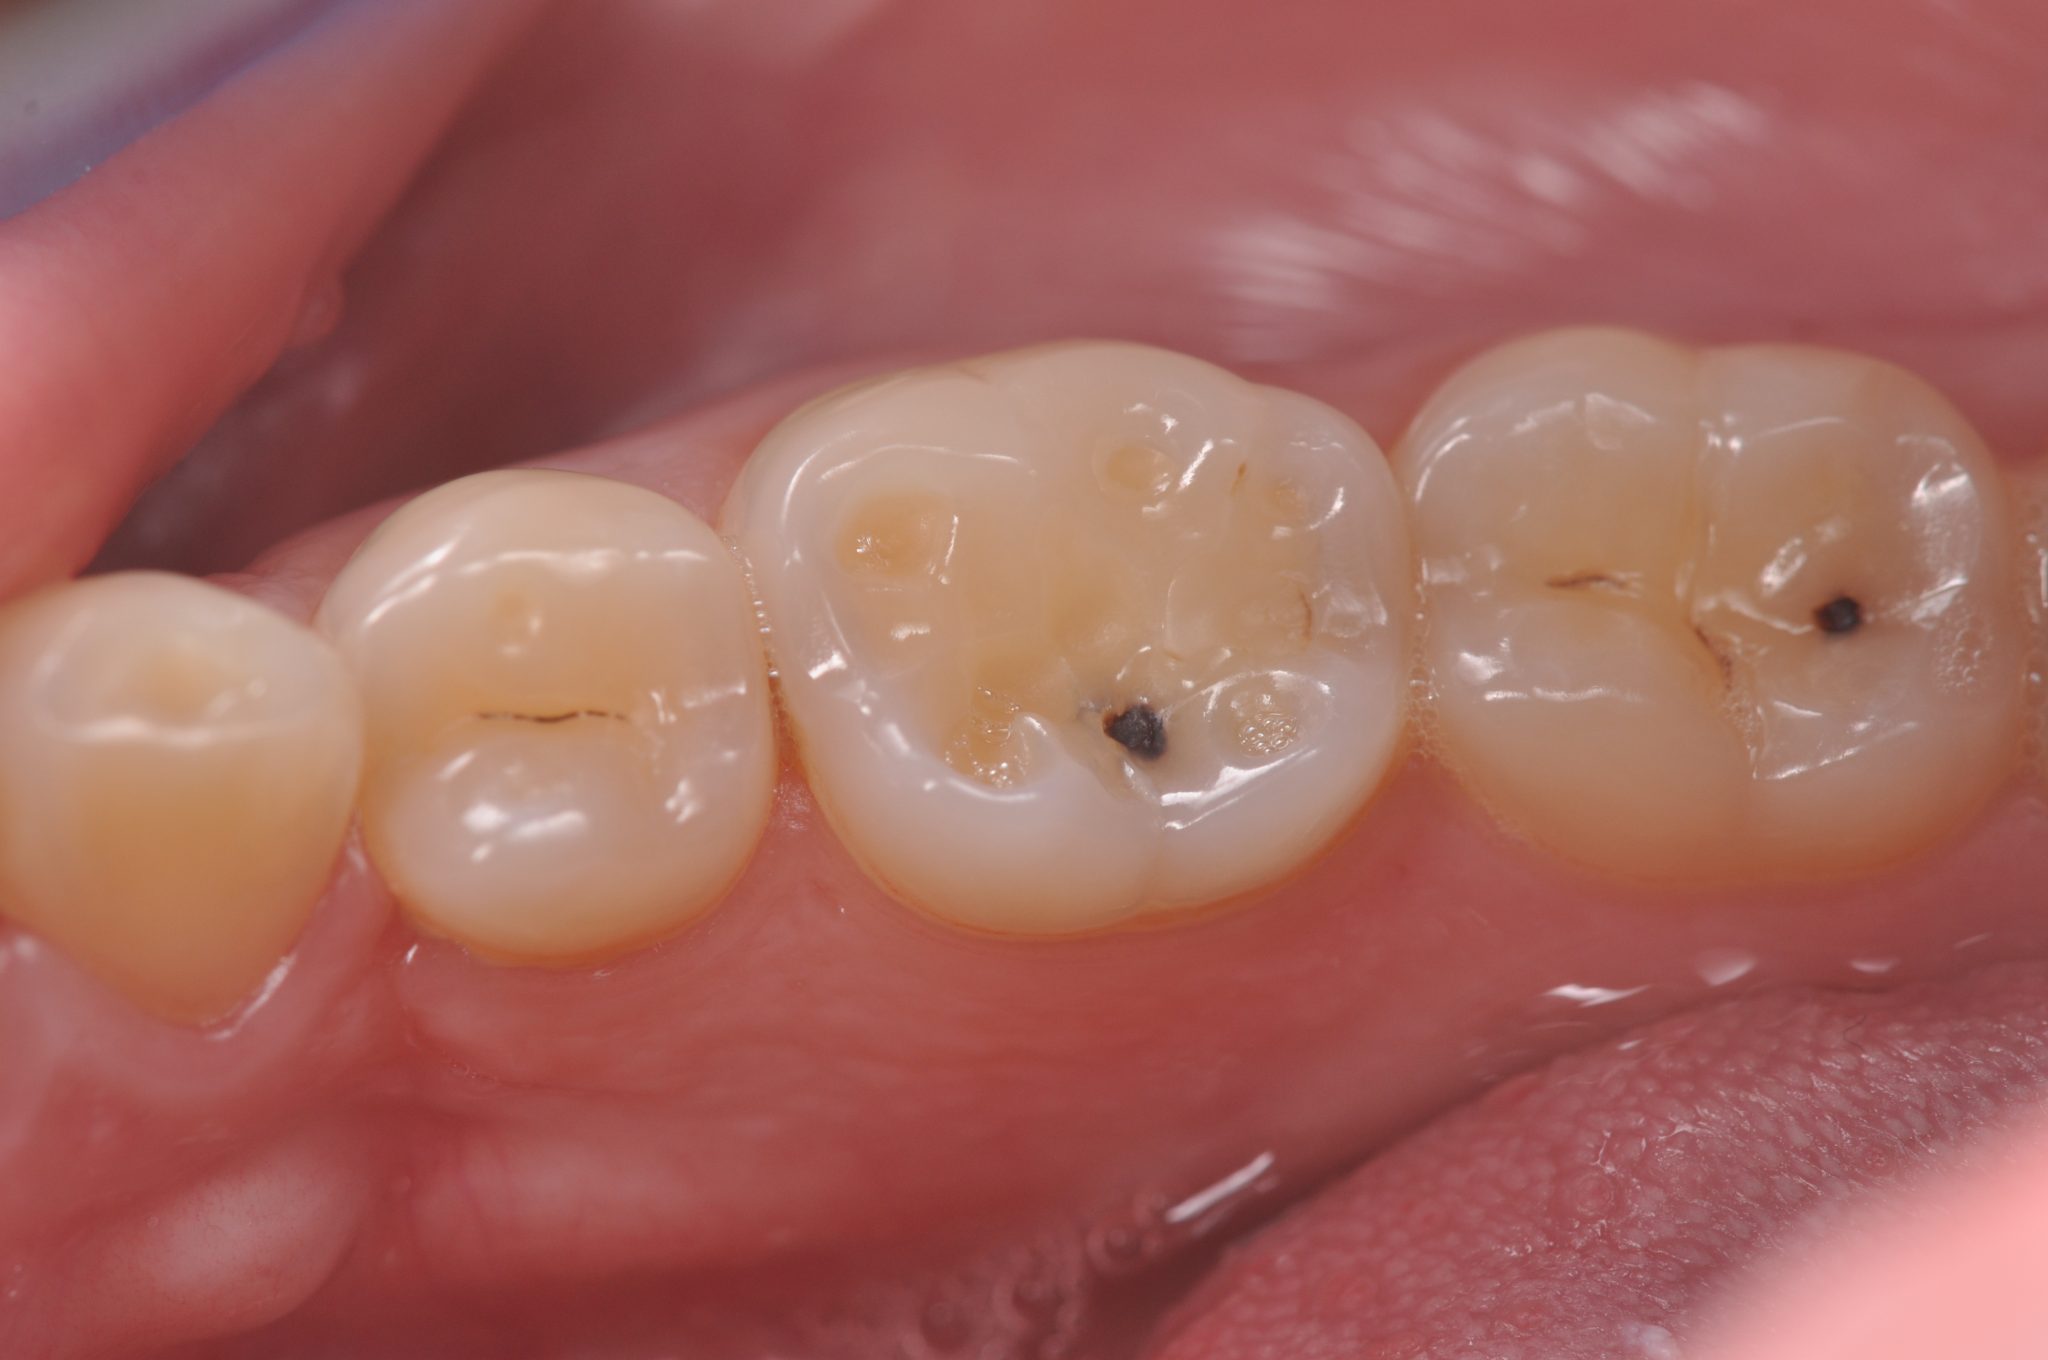
Figure 3
Complete loss of enamel on the occlusal surface due to erosion and abrasion (except for the peripheral part).
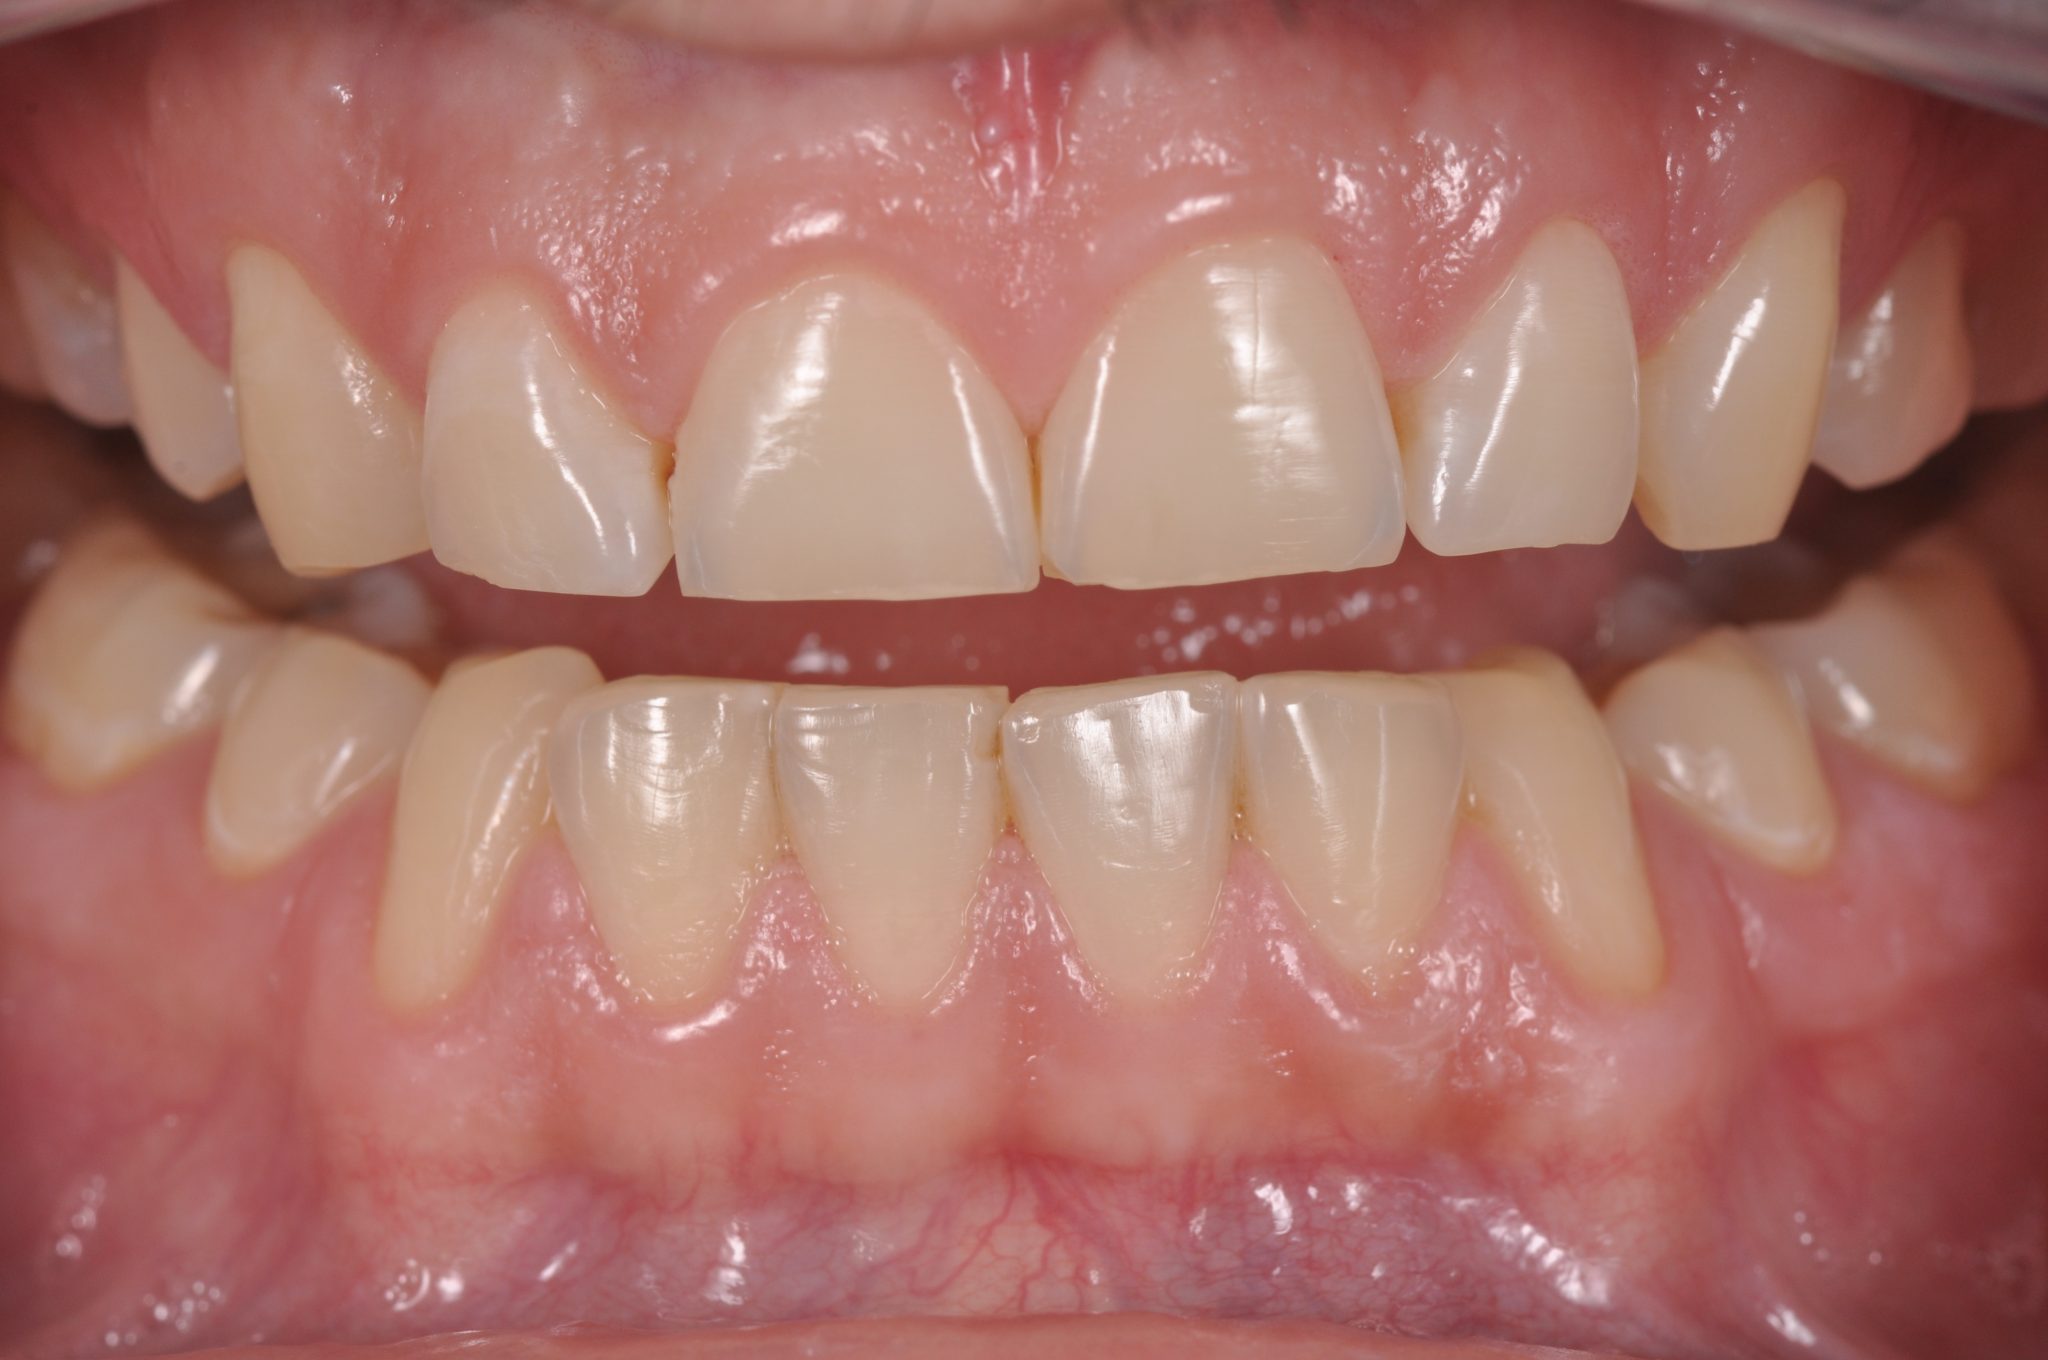
Figure 4
The abrasion process involves the dentition of both the upper and lower jaws:
- in the upper jaw, there was a shortening of the crowns of the frontal group of teeth and a curvature of the smile line, therefore only 8 anterior teeth were included in treatment planning;
- in the lower dentition the situation is the opposite; in the lateral sections, abrasion of the chewing surfaces has occurred, the patient complains of sensitivity. In the anterior part, no pathology is noted, therefore, only the chewing teeth should be treated.
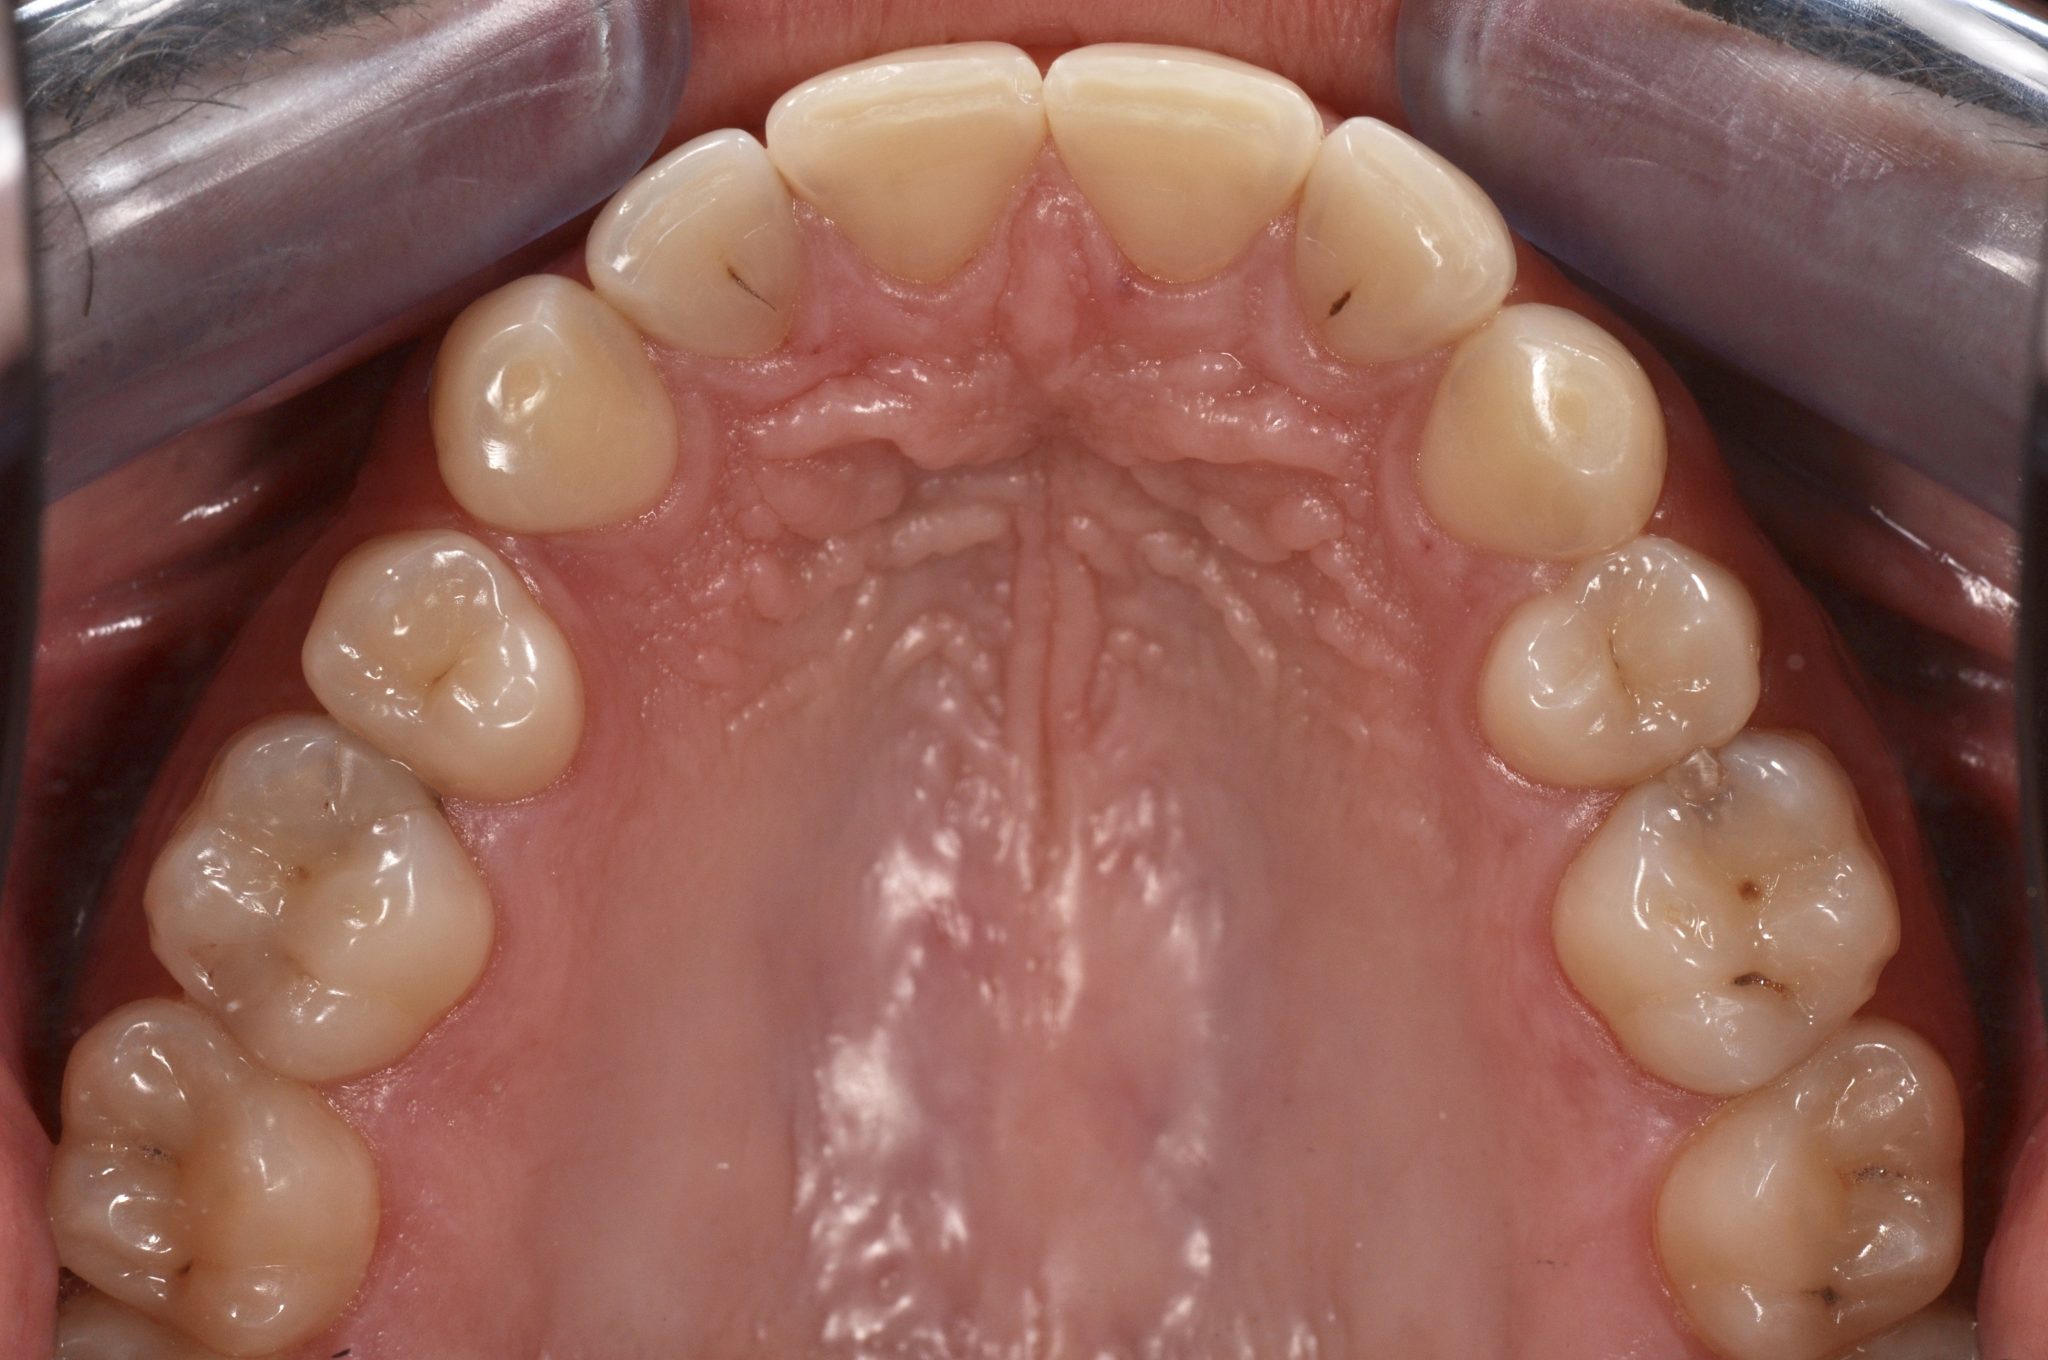
Figure 5
The carious cavities of teeth 16 and 26 will be restored using inlays. Palatal veneers will be made for teeth 13-23, and buccal veneers for teeth 14-24.
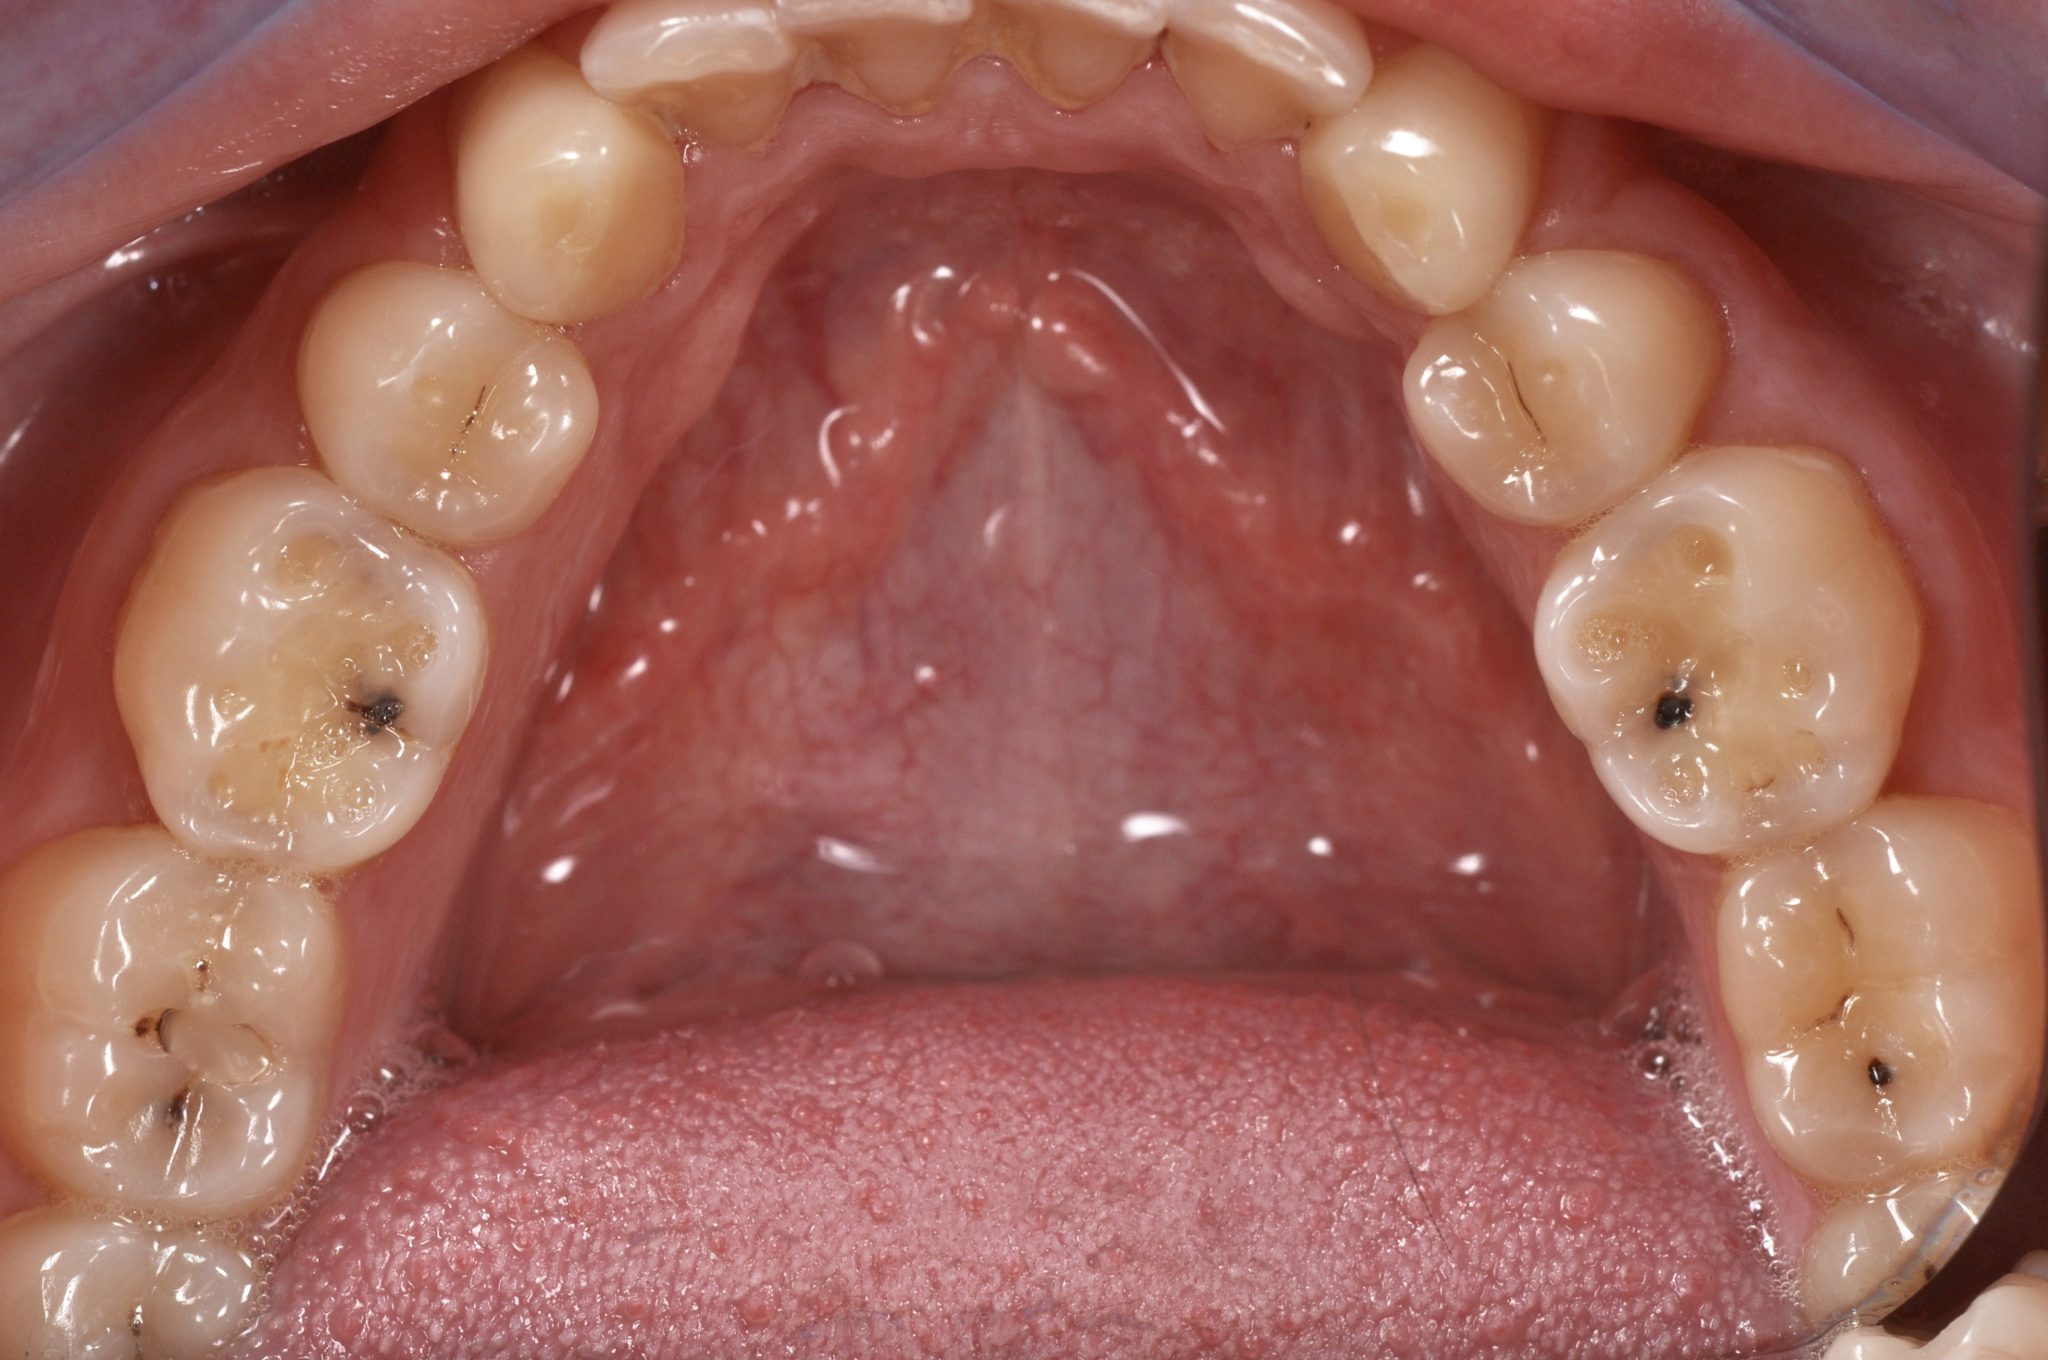
Figure 6
Dentition of the lower jaw: treatment of caries of 4 molars, production of veneers on the occlusal surface of teeth 35-37 and 45-47.
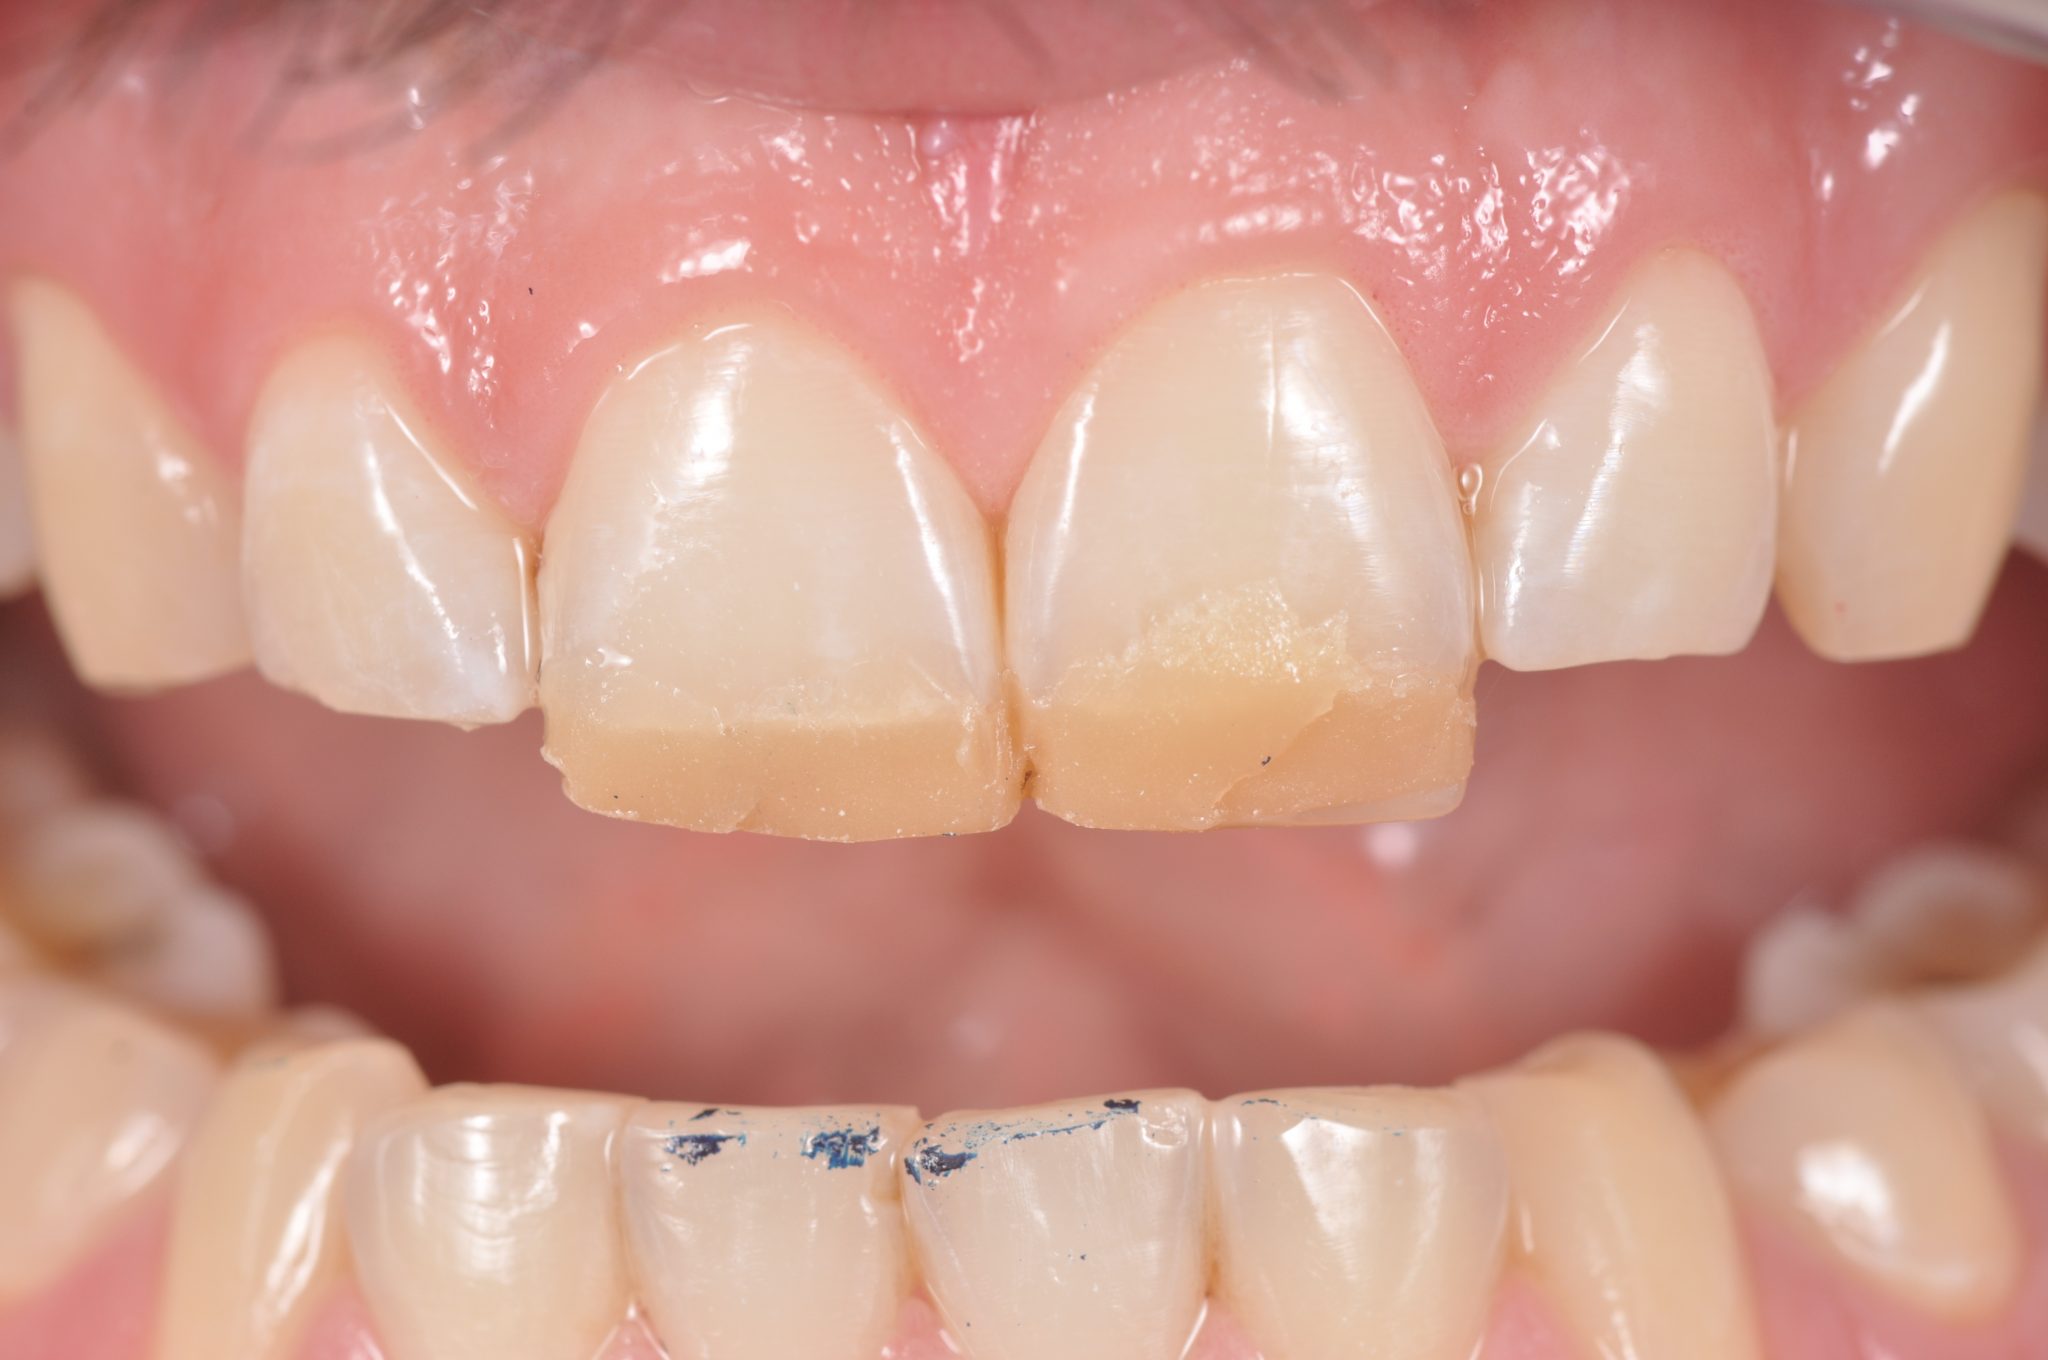
Figure 7
Before Wax Up, to test directly in the patient's mouth, it is always recommended to build up the incisal edges of the teeth using a composite. This is necessary in order to provide the technician with a frame for the Wax Up with a preliminary alginate impression.

Figure 8
We increase the height of occlusion by covering the palatal surface of the upper central incisors with a composite. We orient the patient's jaws to the centric relation position to establish a new bite height.
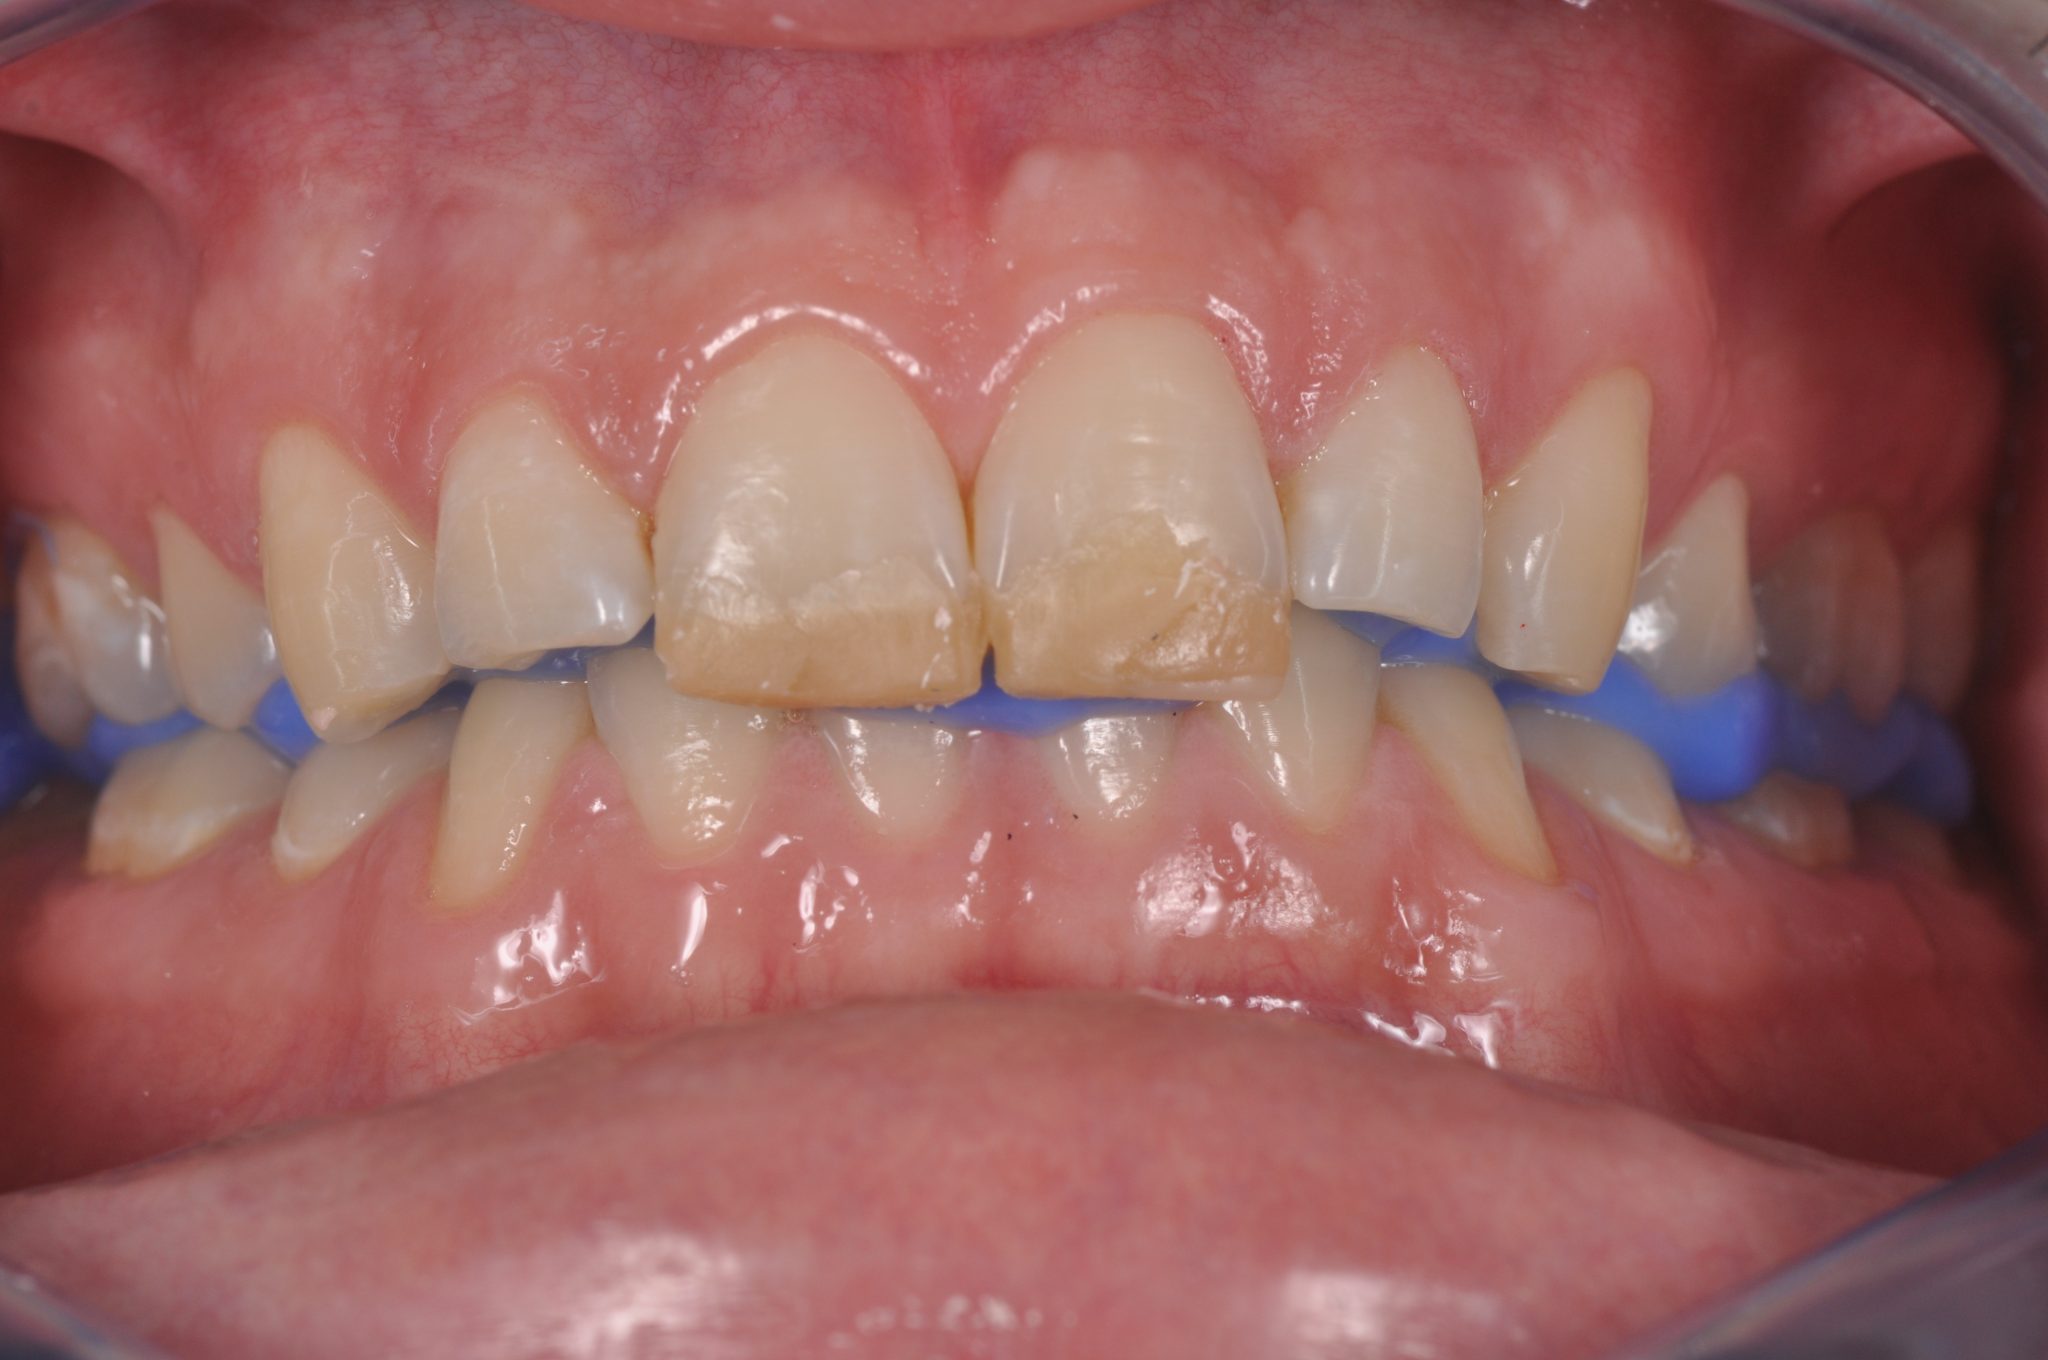
Figure 9
Once the new bite has been checked for available space - anterior and posterior - it is registered using a chemically cured composite (Luxabite, DMG) specially formulated for easy and accurate occlusion registration.
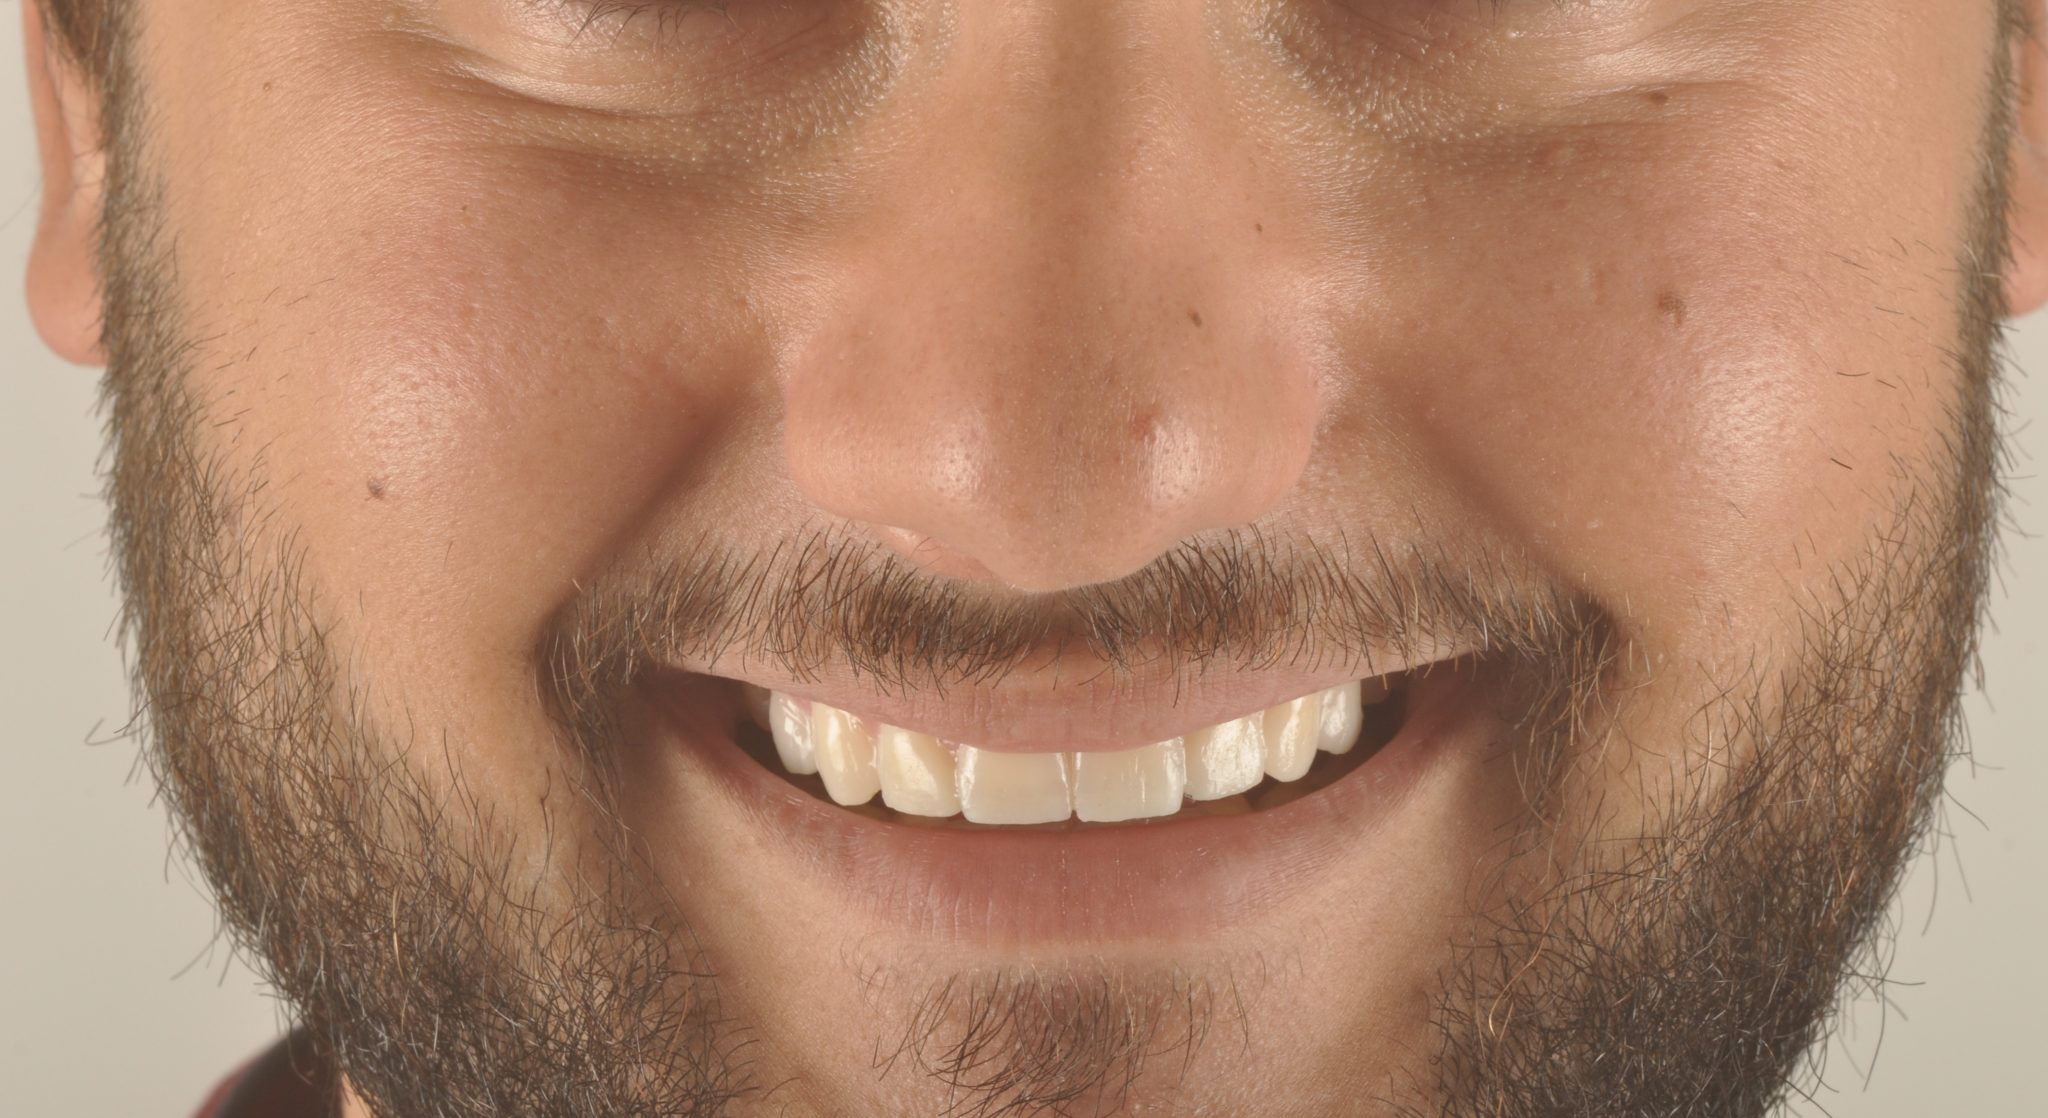
Figure 10
After sending the data to the technician, we restore the dentition using the Wax Up and mock up method using bis-acrylic plastic (Luxatemp Star A1, DMG). In this way, esthetics and occlusion are checked.

Figure 11
Improving proportions and smile lines.
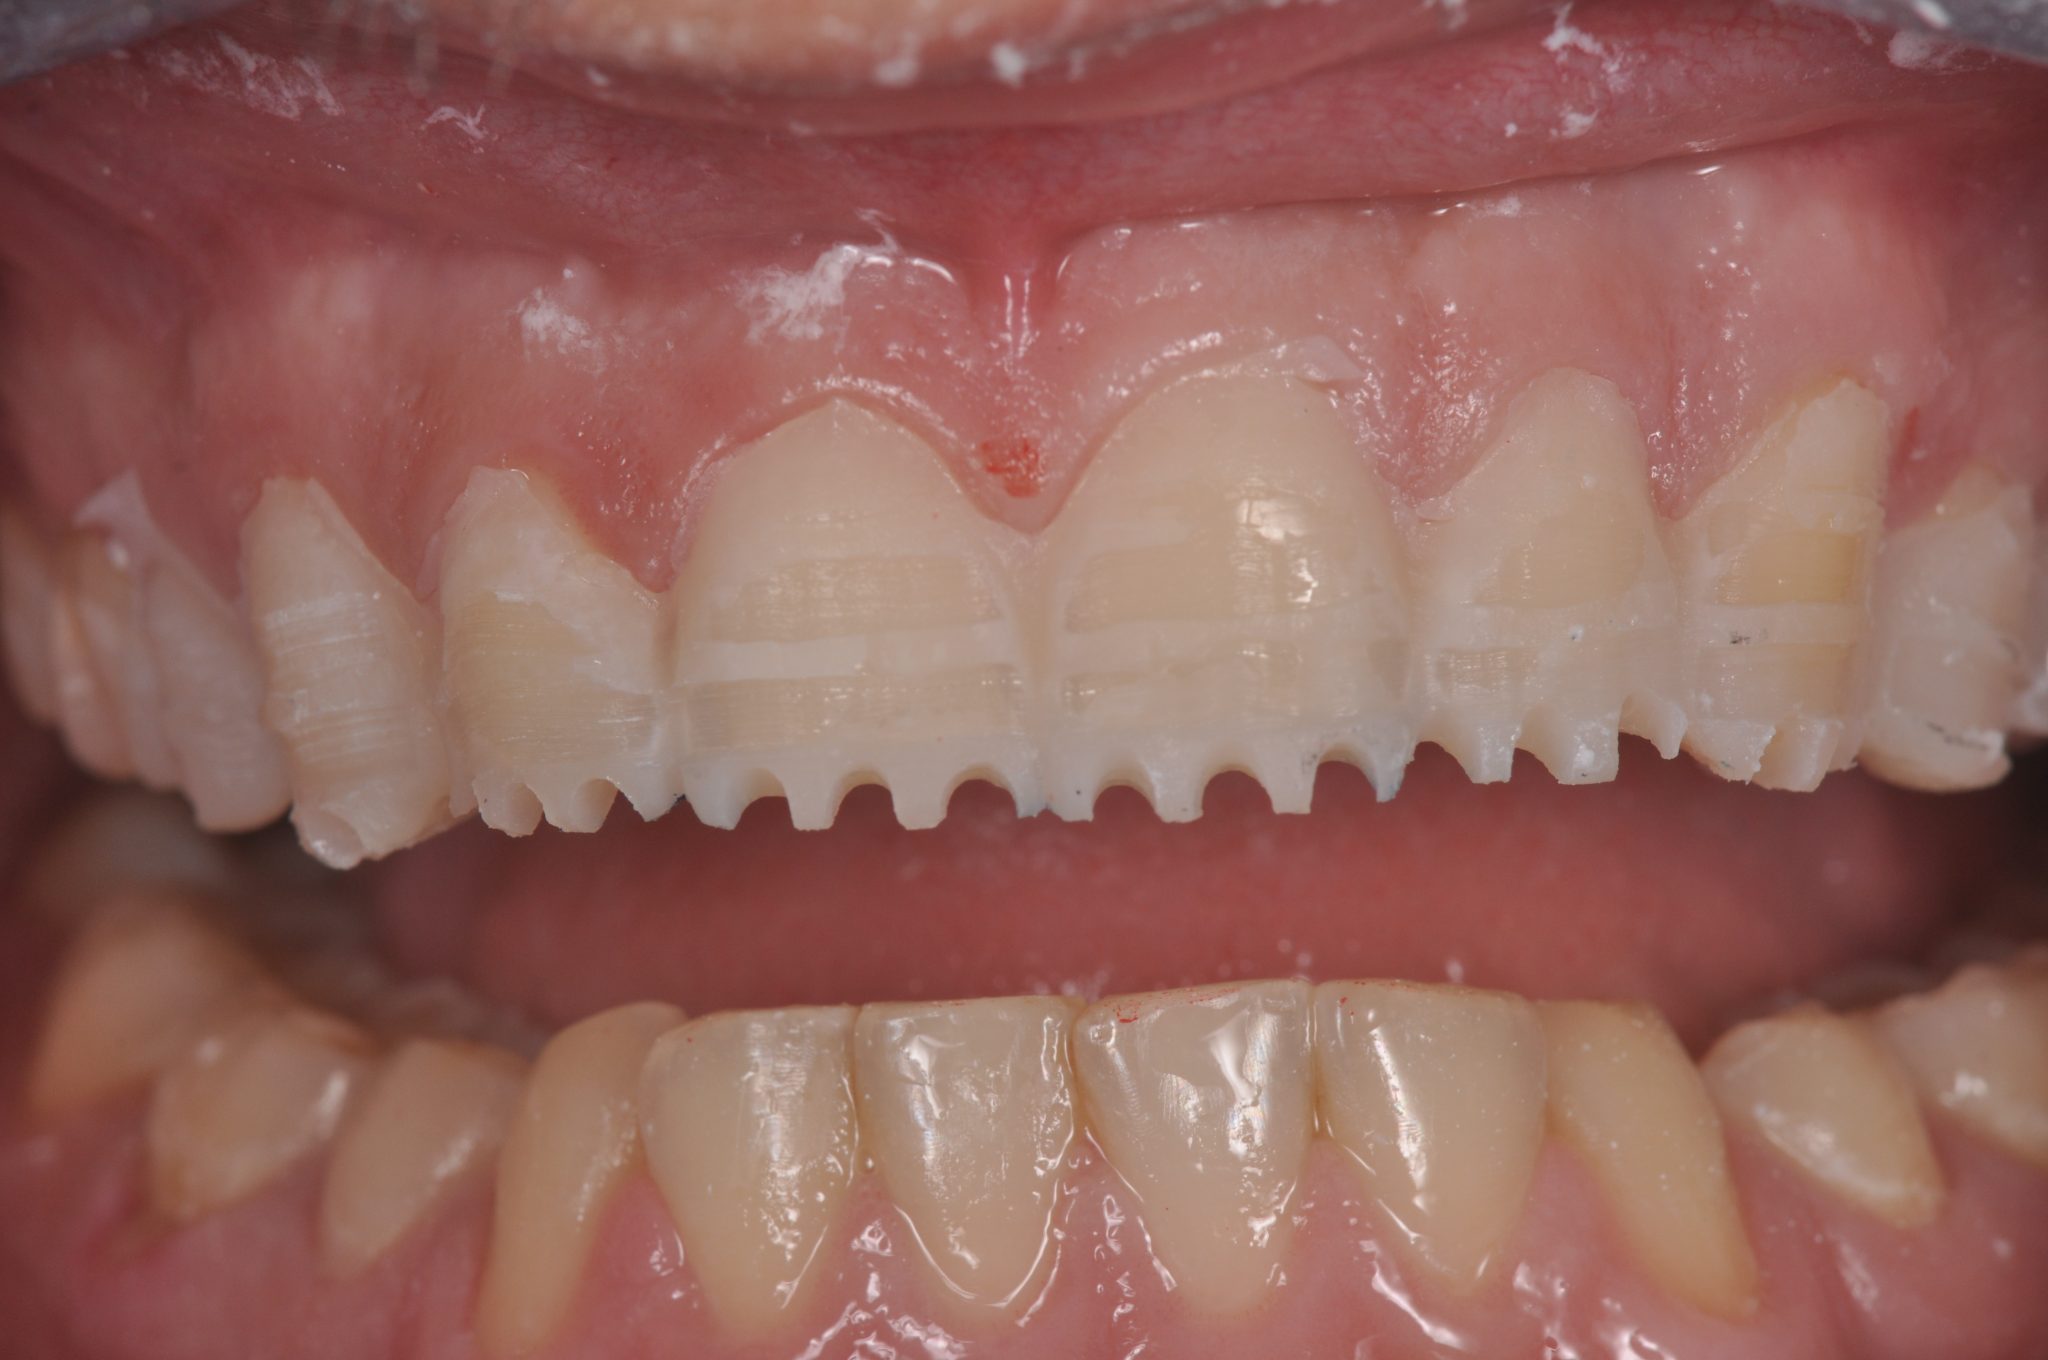
Figure 12
For minimal invasiveness, we prepare according to the G. Gurel method.
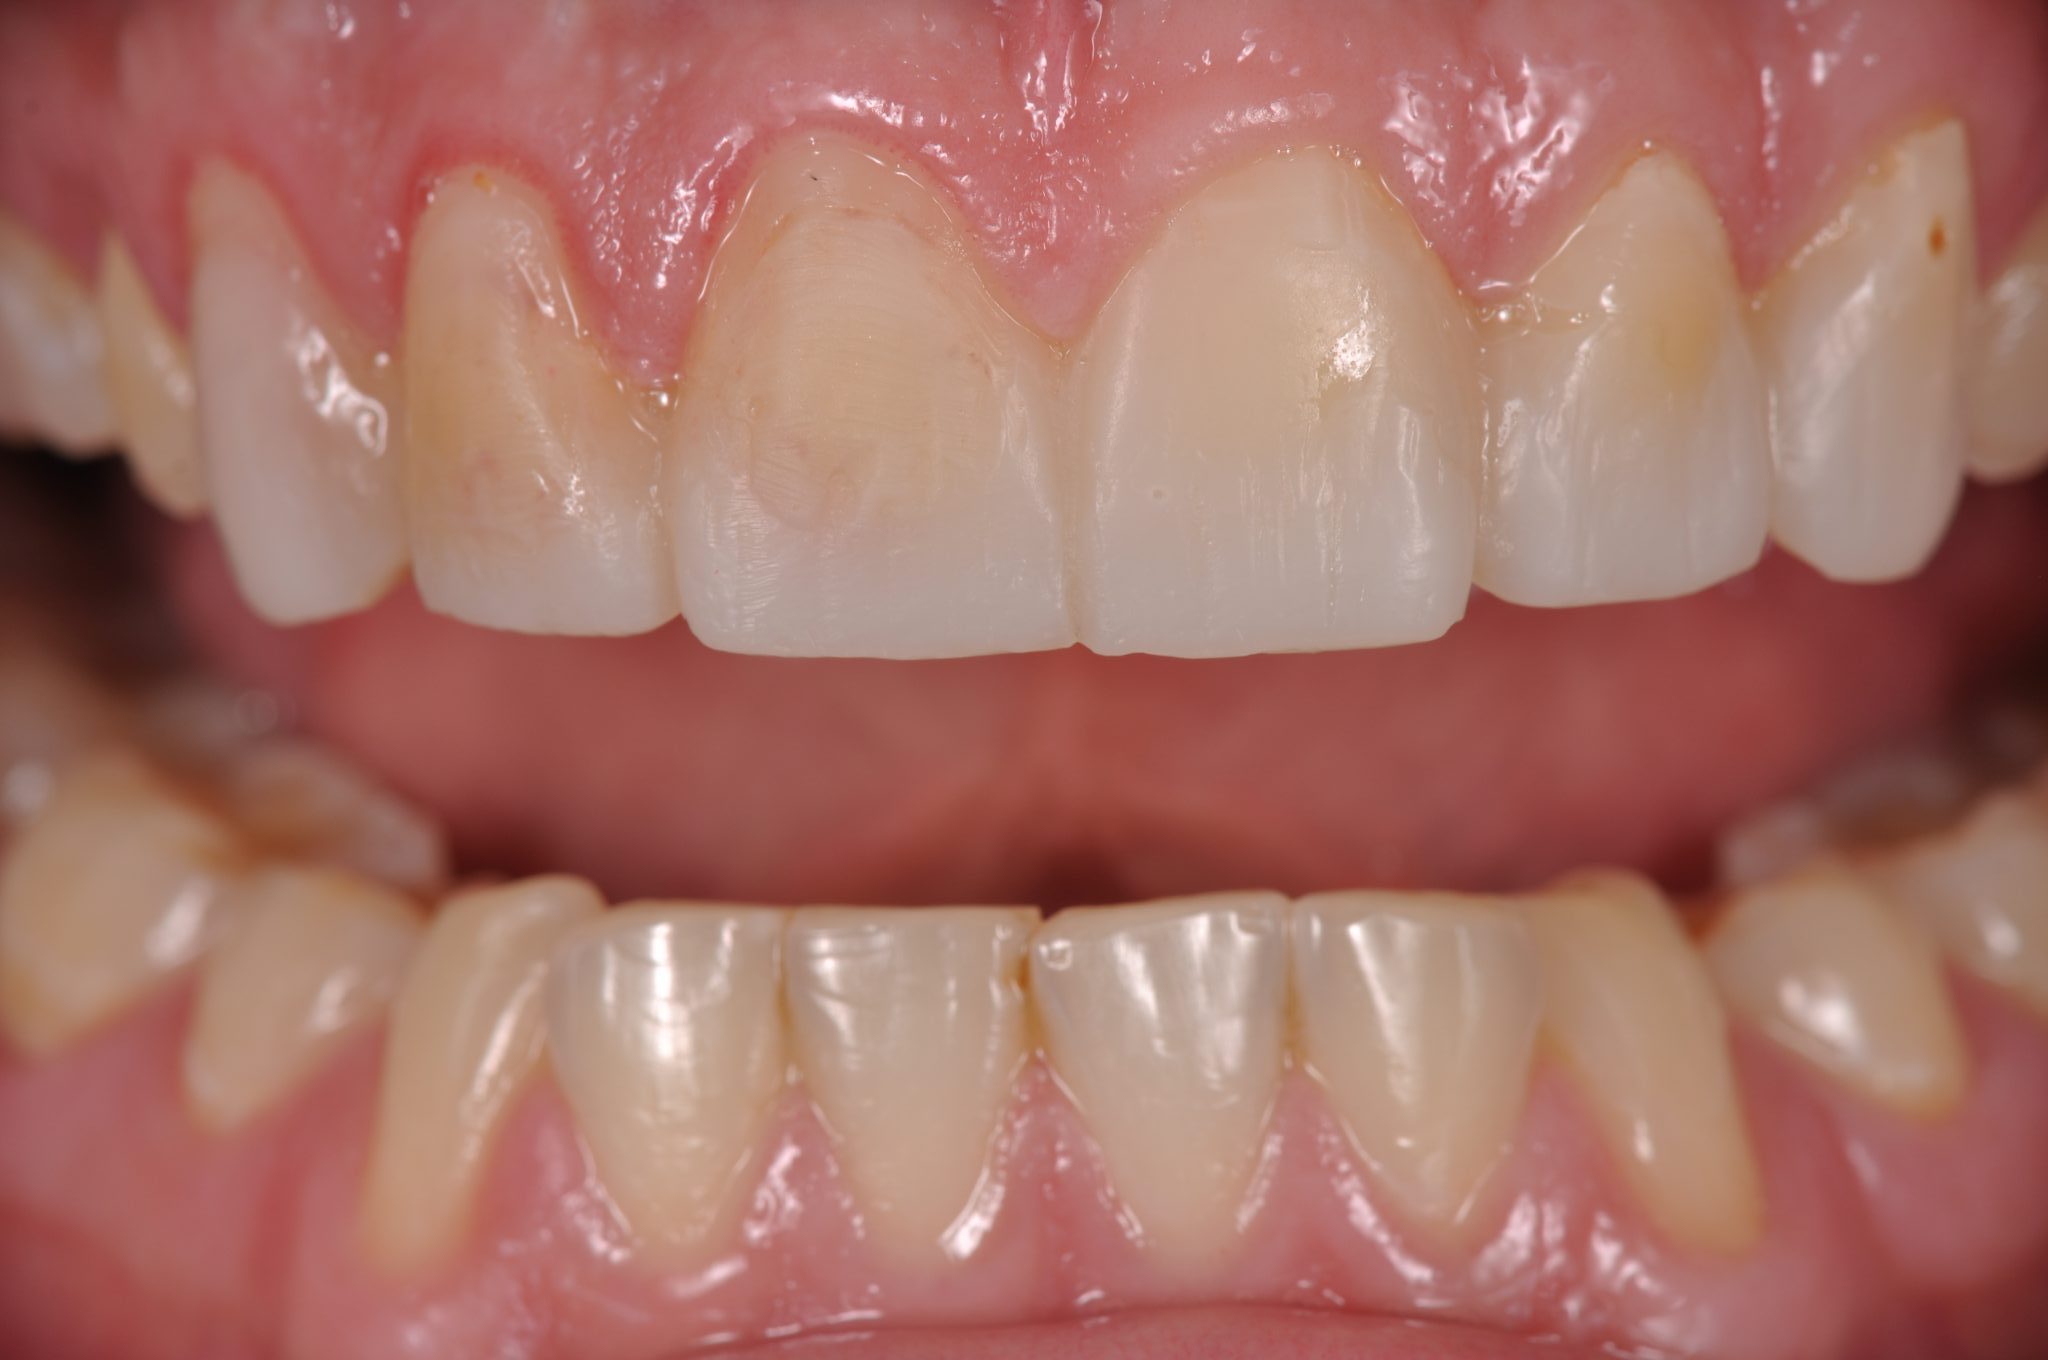
Figure 13
Temporary restorations are made using the same impression and material that was used for the mock up (Luxatemp Star A1 bis-acrylic resin, DMG). A gingivectomy was performed to lengthen the crowns of teeth 11, 12 and 13.
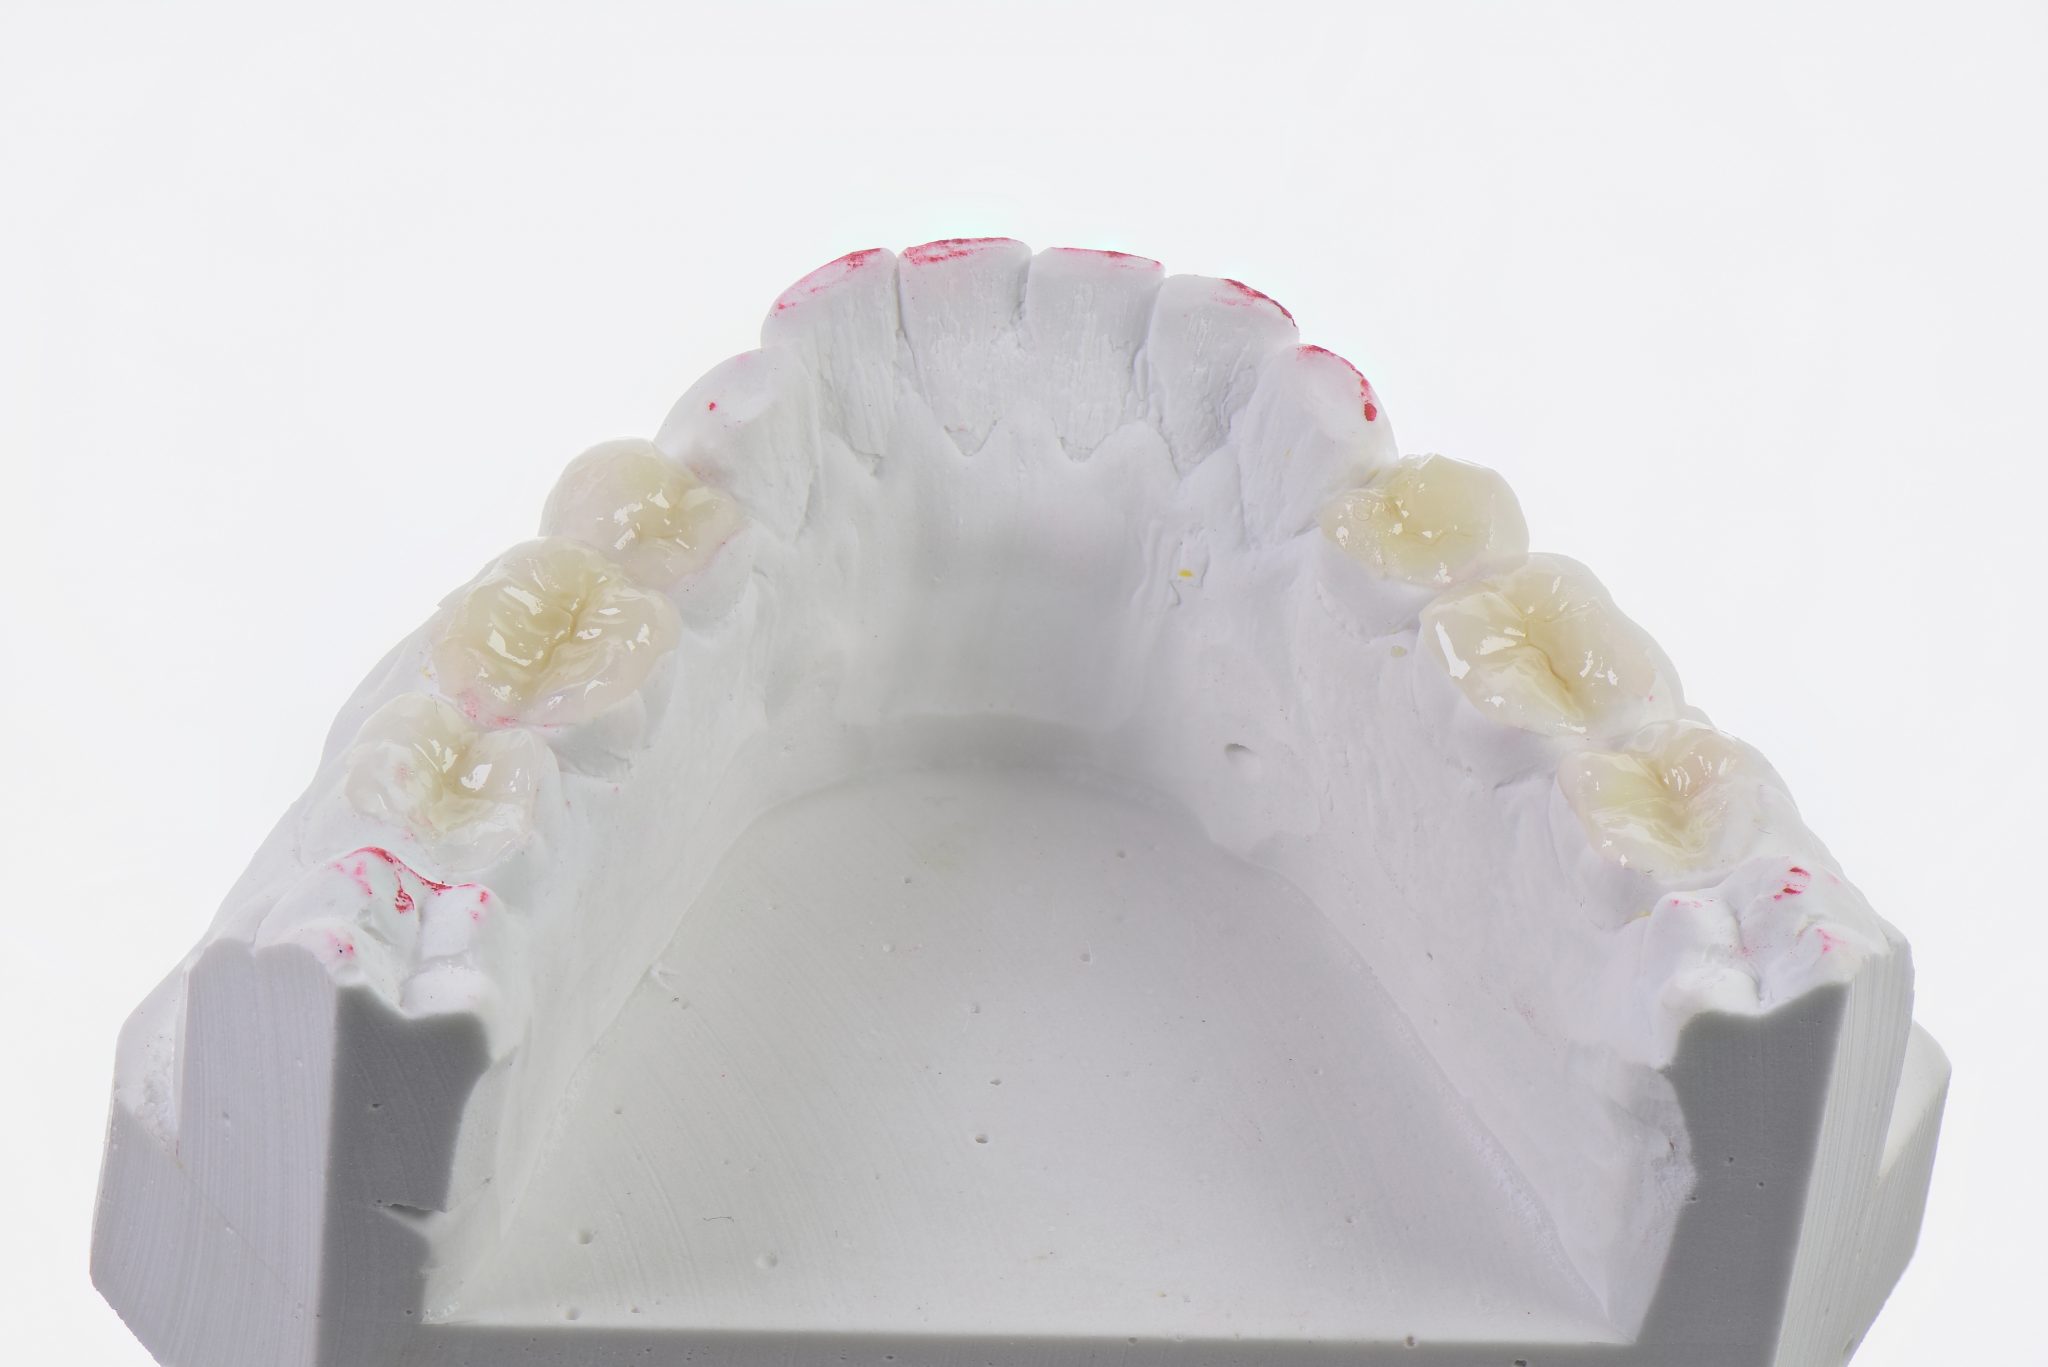
Figure 14
Work from the laboratory: occlusal veneers.
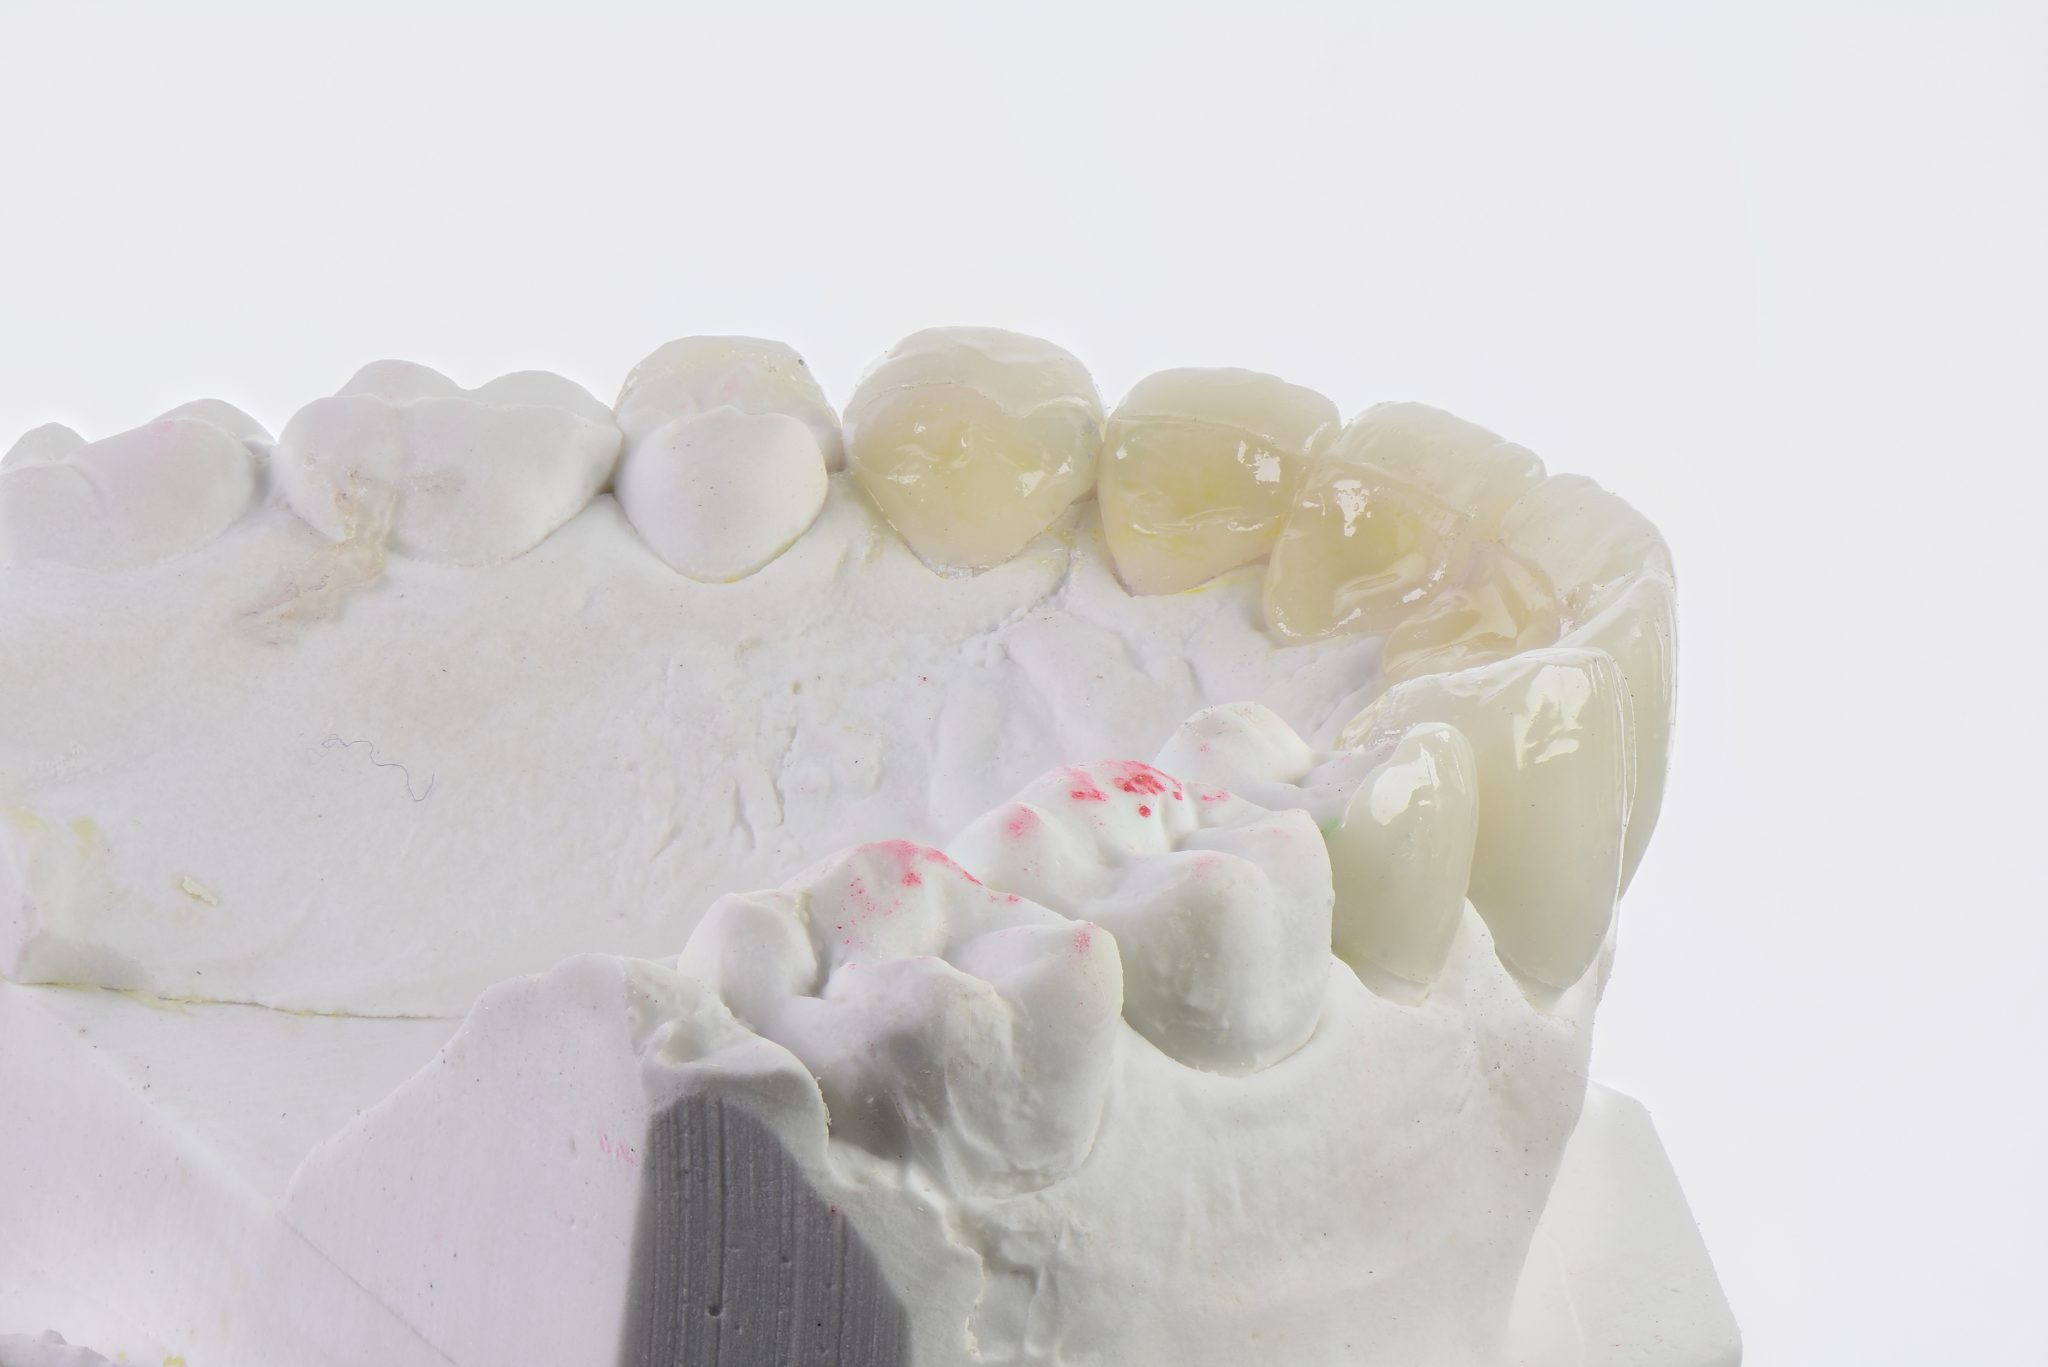
Figure 15
Work received from the laboratory. Palatal and cheek veneers were made.
Functional veneers (palatal and occlusal) were made from a new generation of composite blocks.
For the manufacture of cheek veneers, lithium disilicate (emax LT) was used.
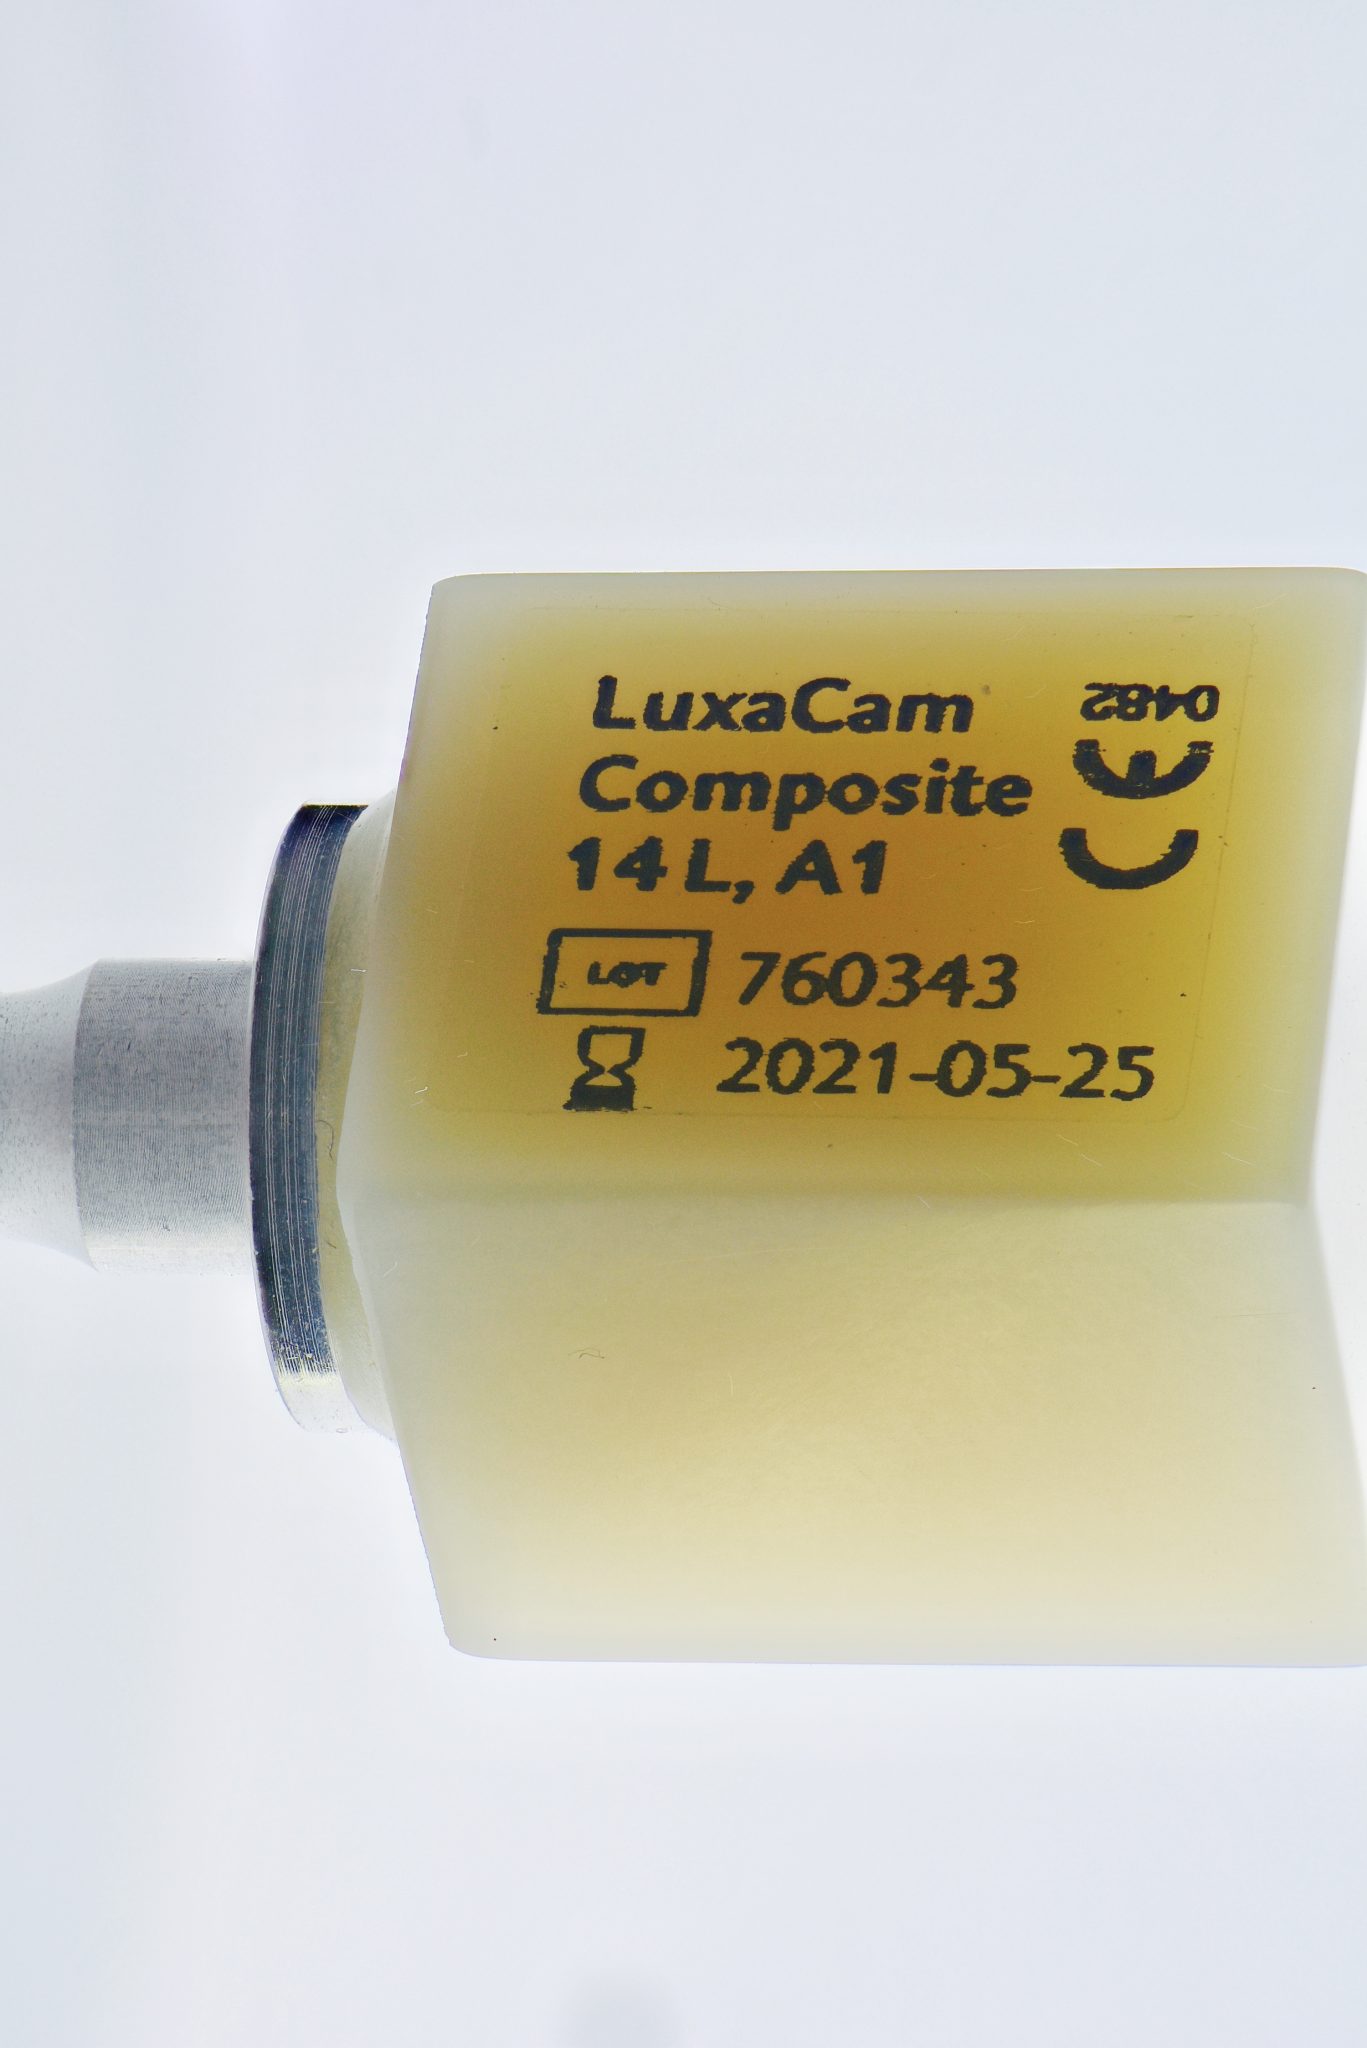
Figure 16
Composite CAD CAM block: the physical properties of this material are intermediate between the properties of ceramic and hybrid materials.
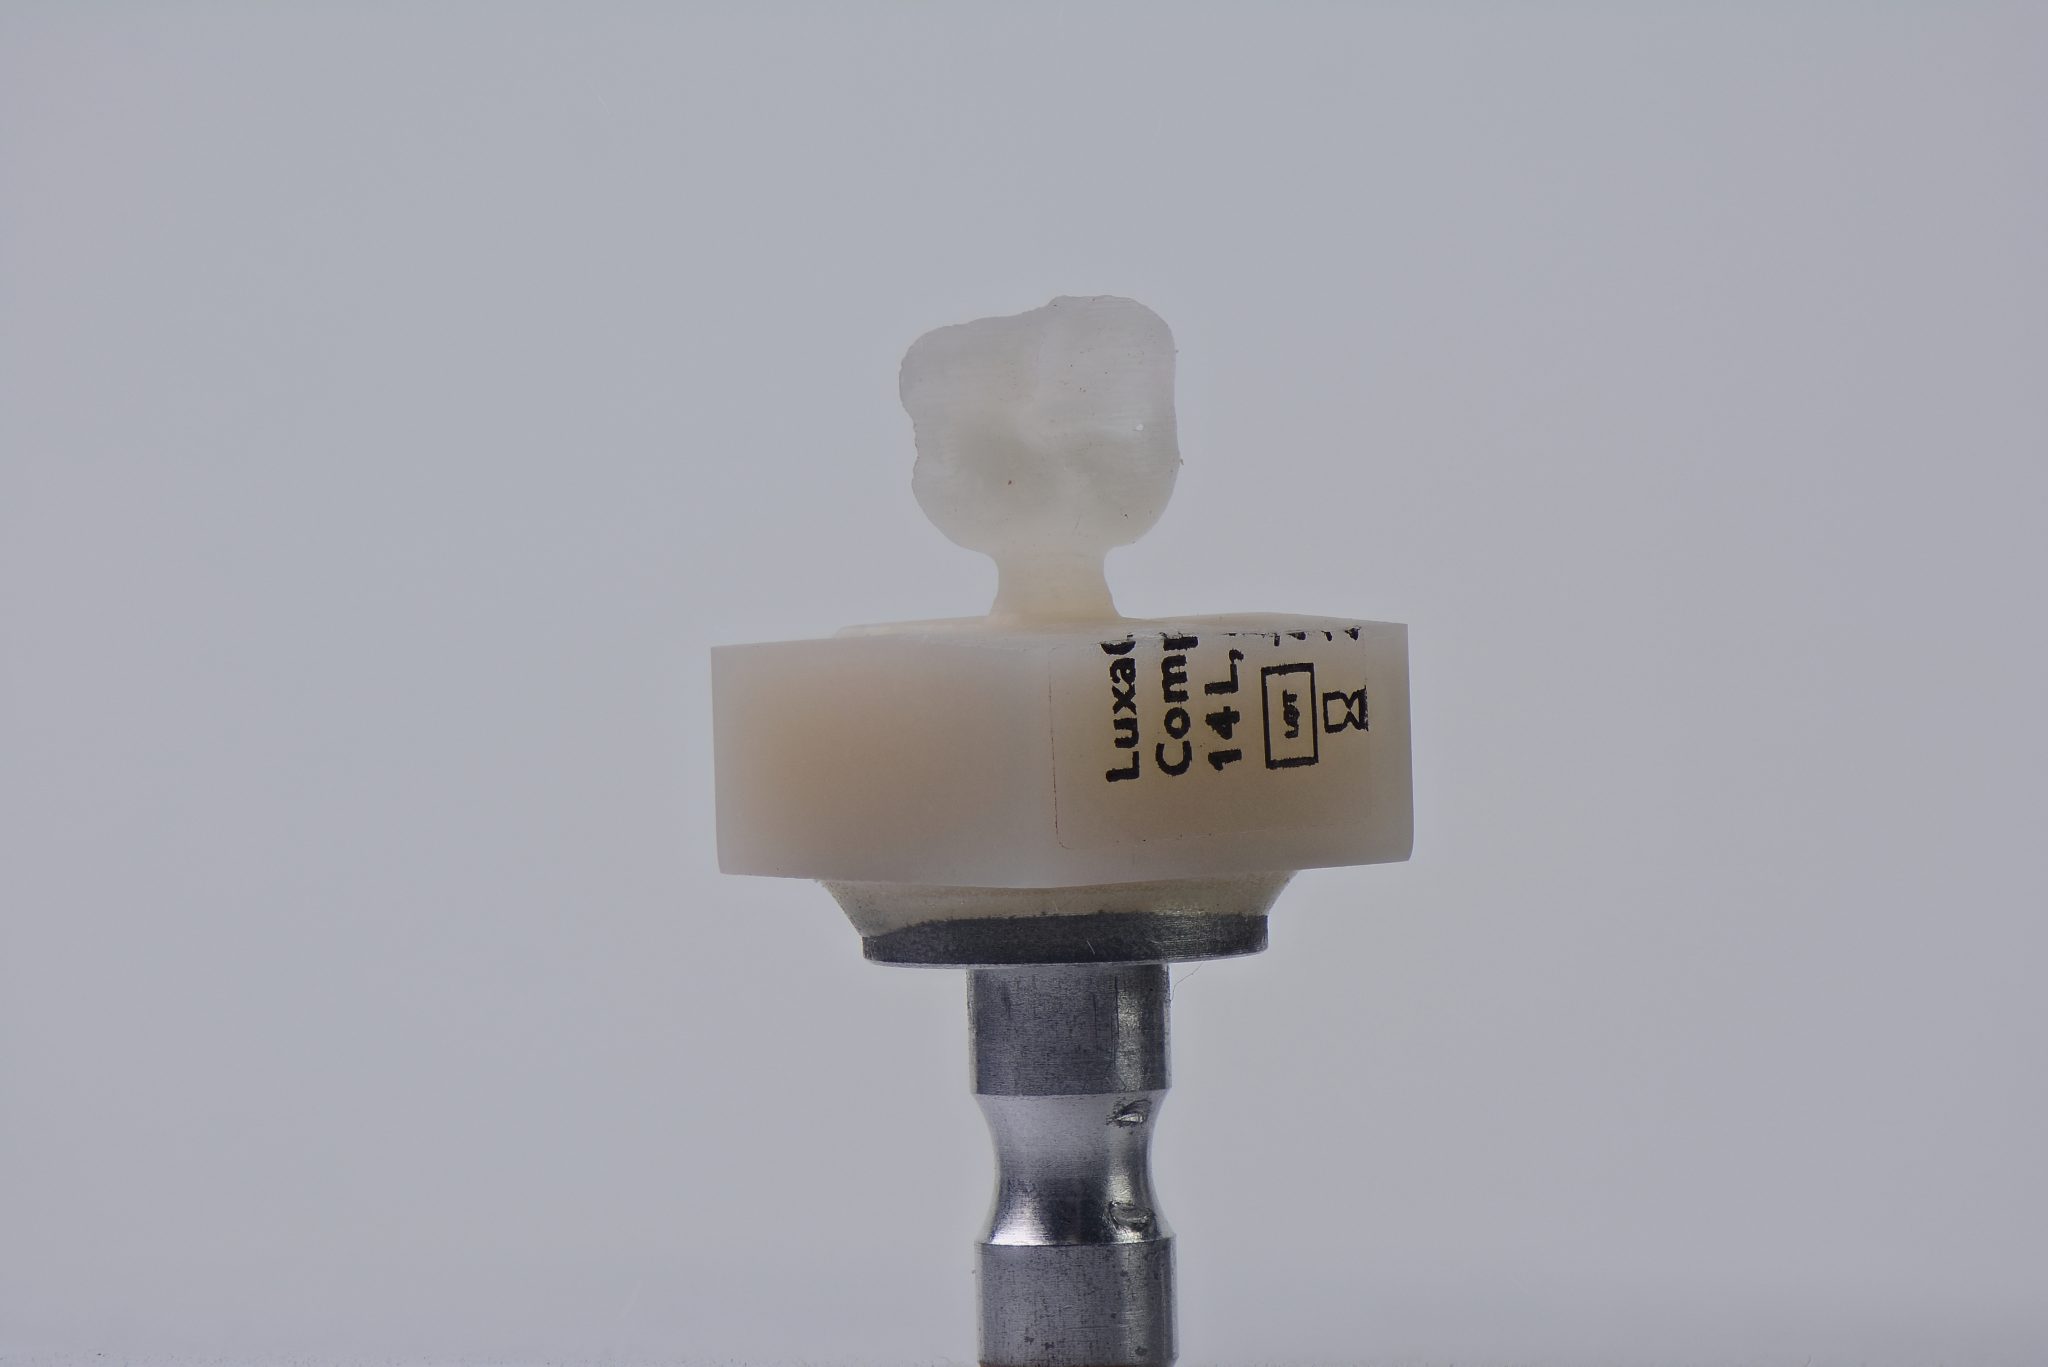
Figure 17
Two main reasons for choosing a composite block (Luxacam composite, DMG):
- material millability up to 0.5 mm;
- The wear of this material corresponds to the wear of enamel, which must be taken into account in this clinical case due to the parafunction present in the patient.
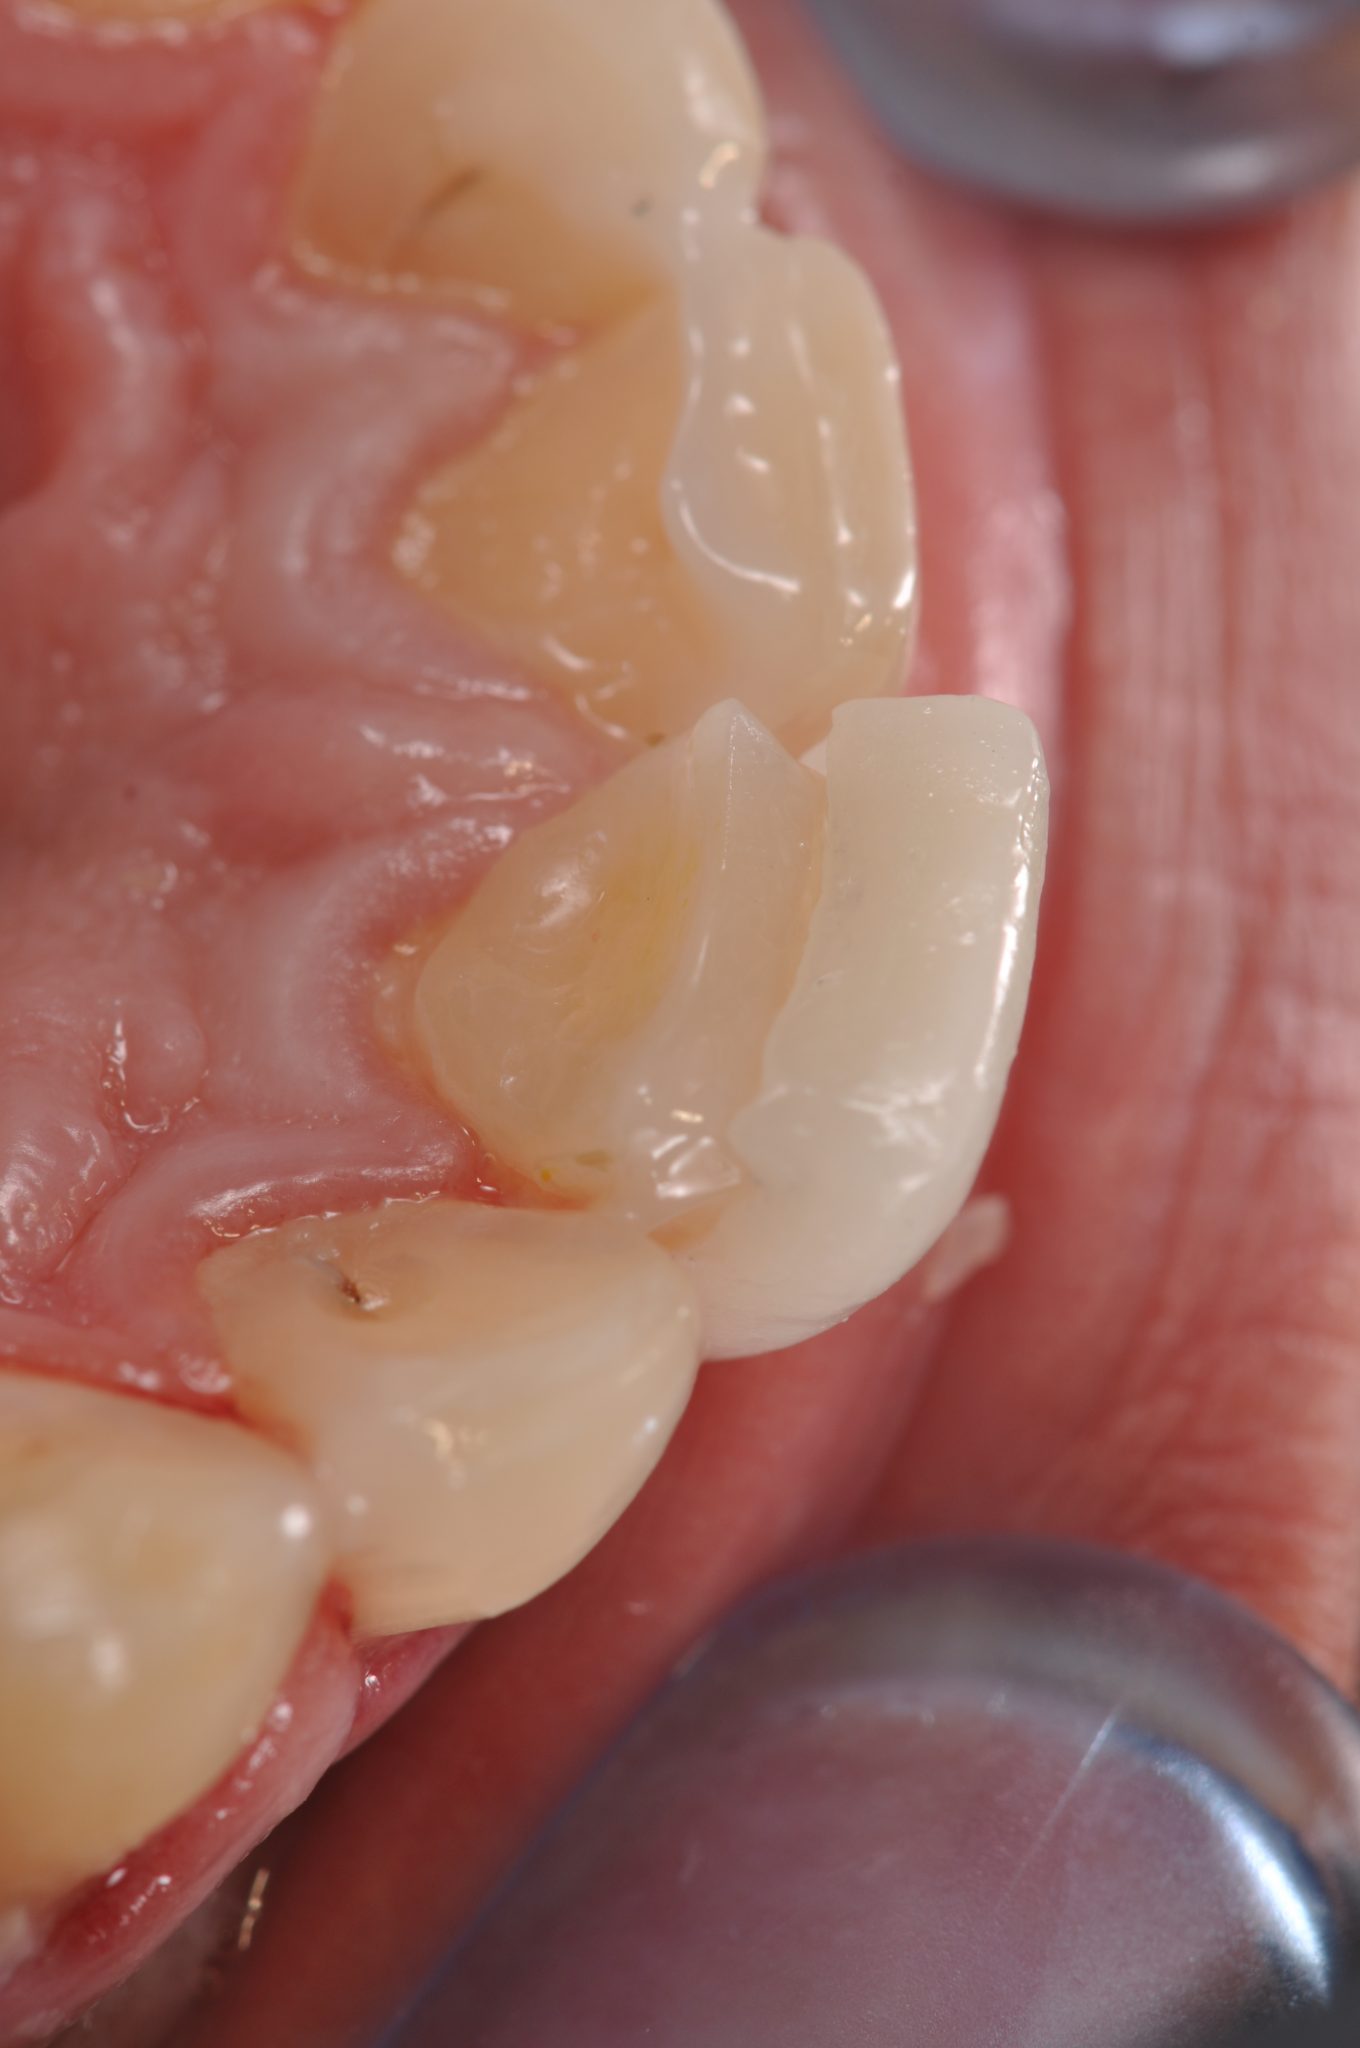
Figure 18
Trial sandwich restoration in the anterior section (Vitique veneer, DMG).
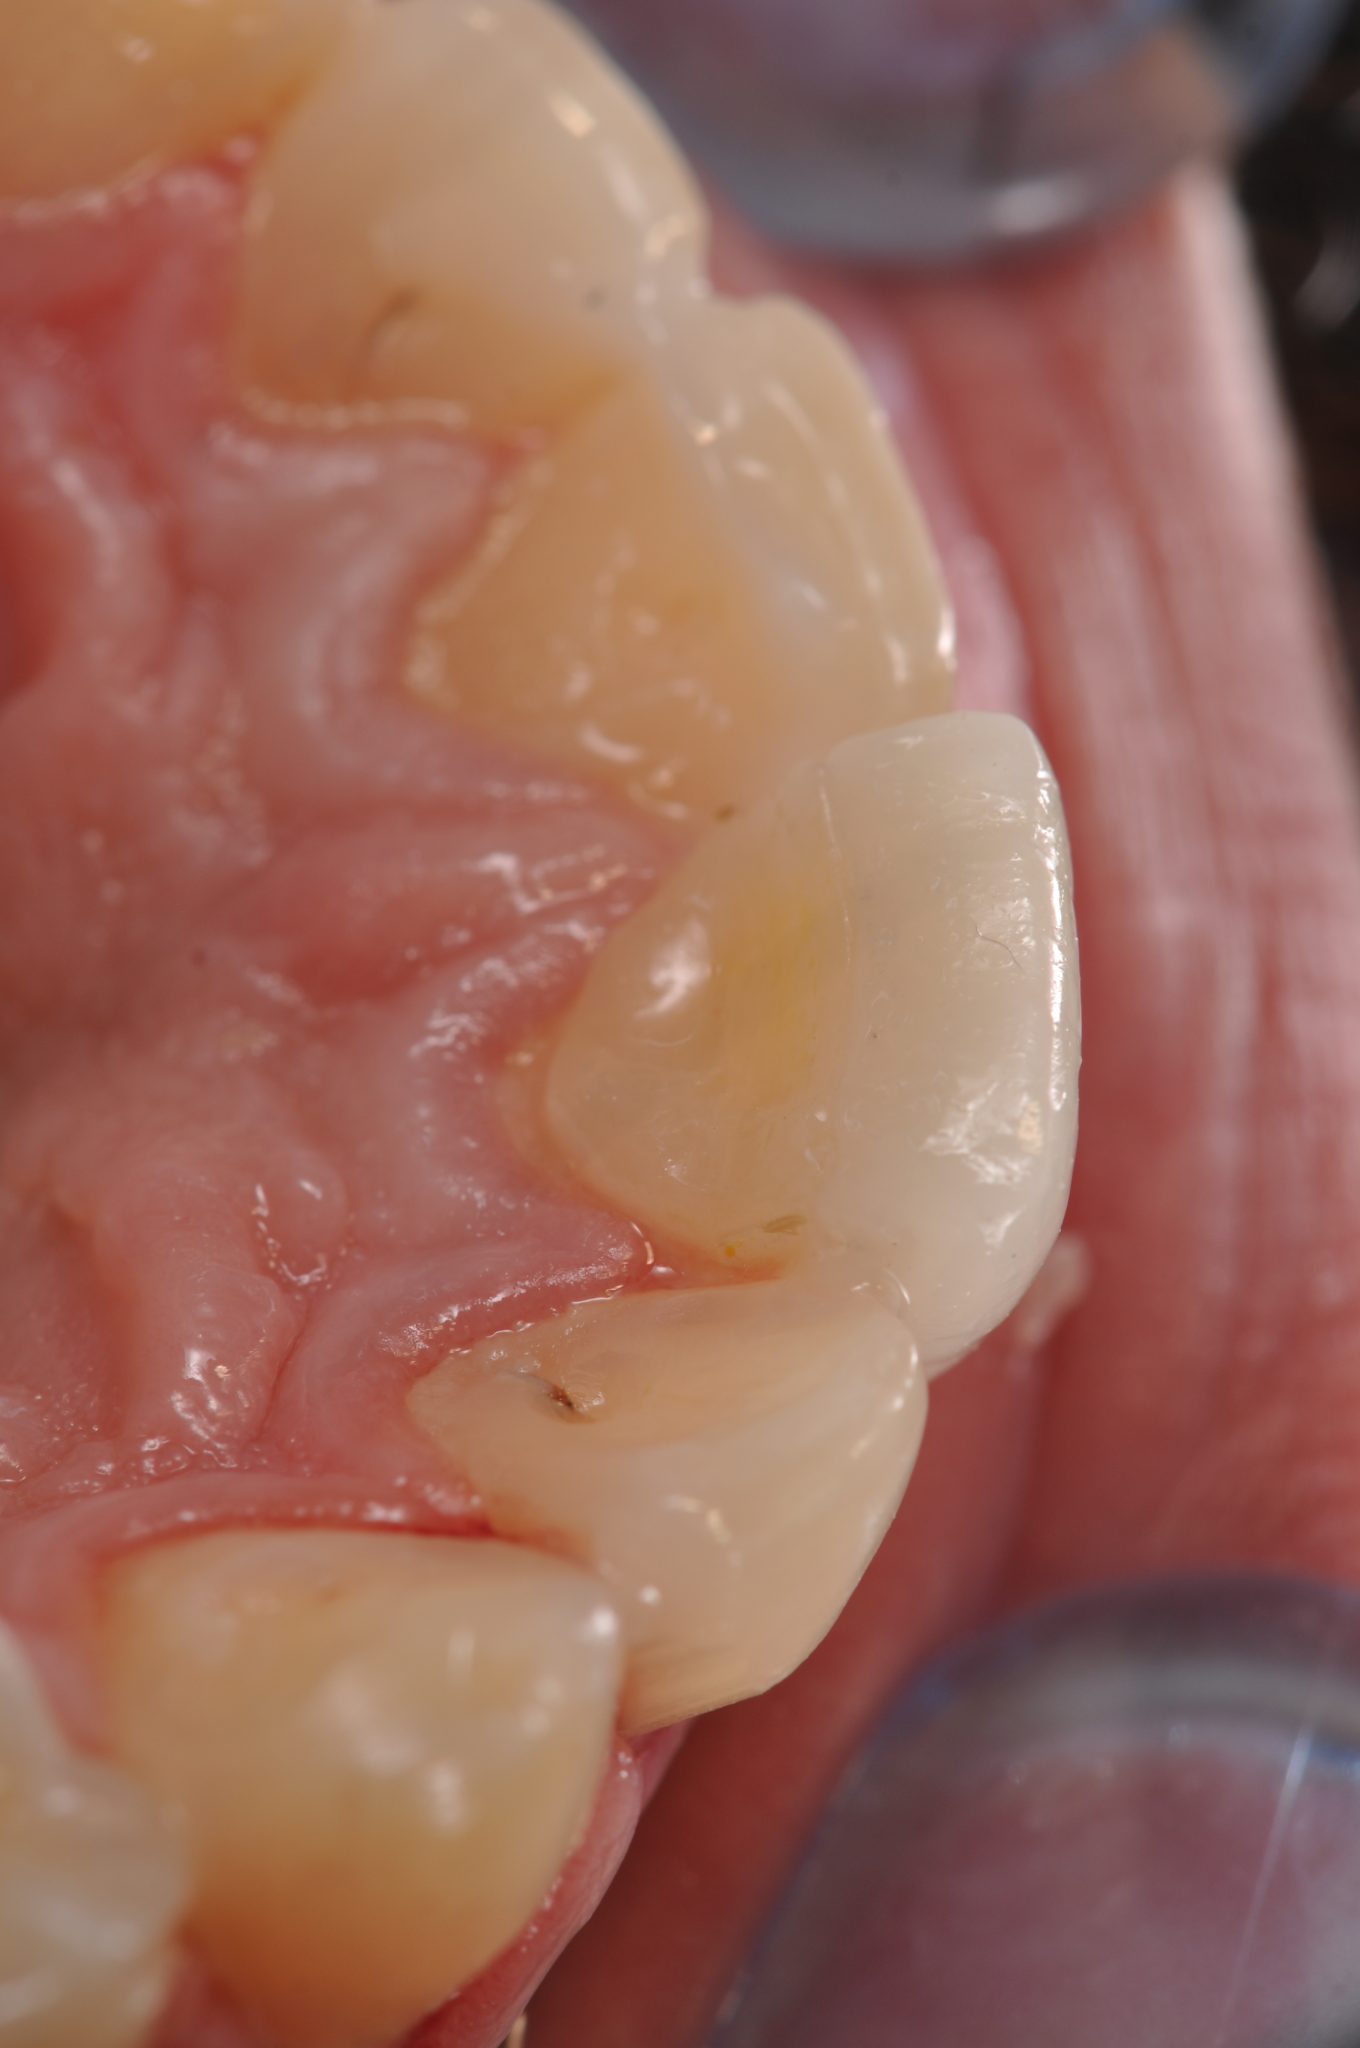
Figure 19
After simultaneous adhesive fixation of both veneers.
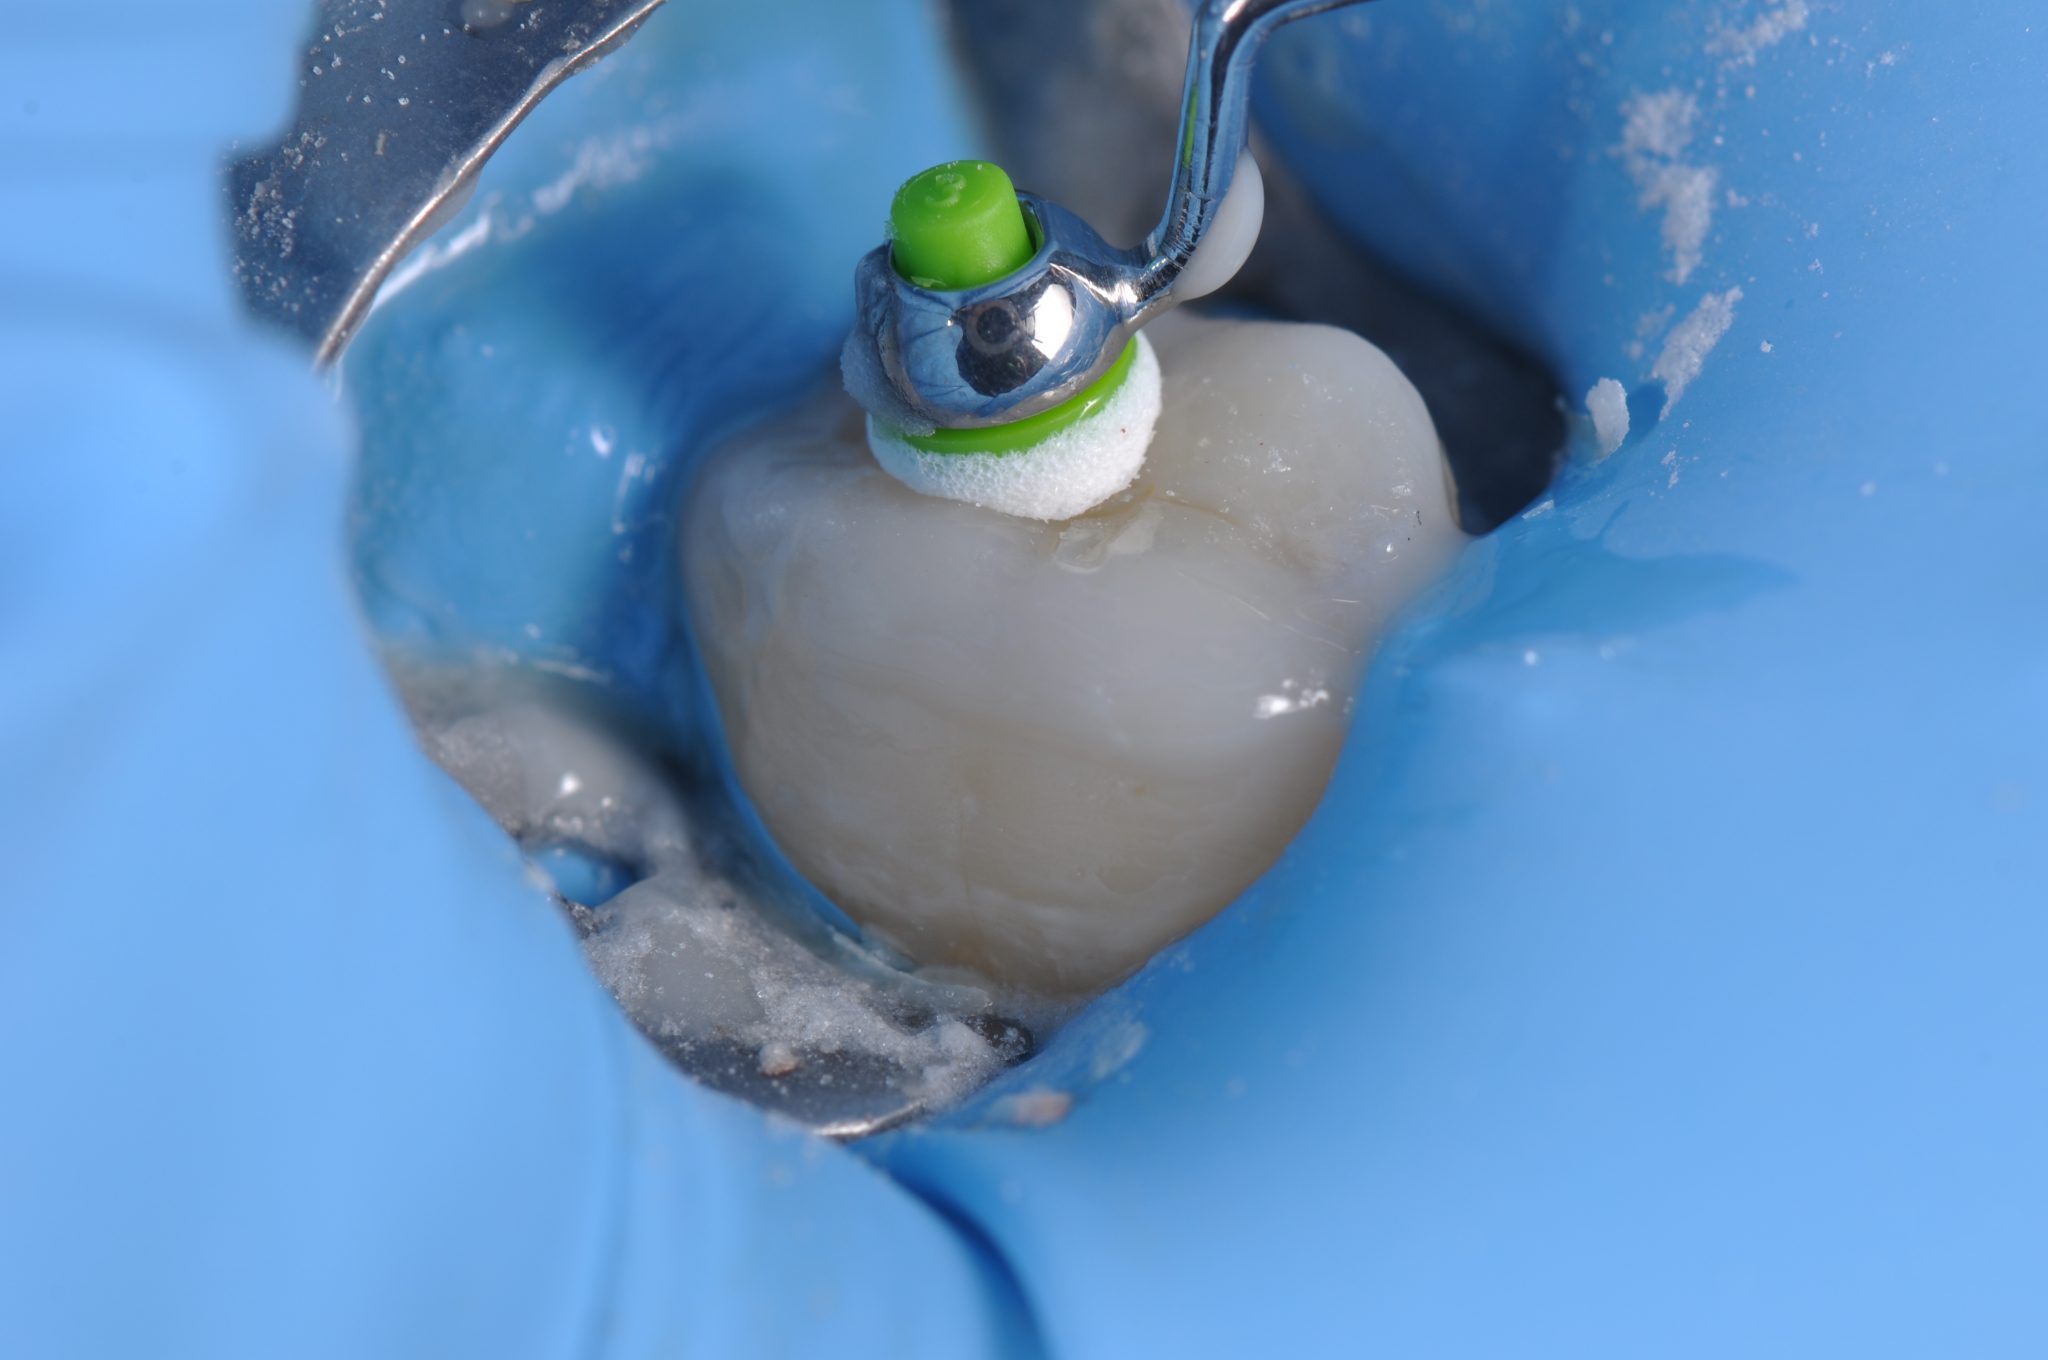
Figure 20
Isolation with rubber dam during fixation of occlusal veneers.
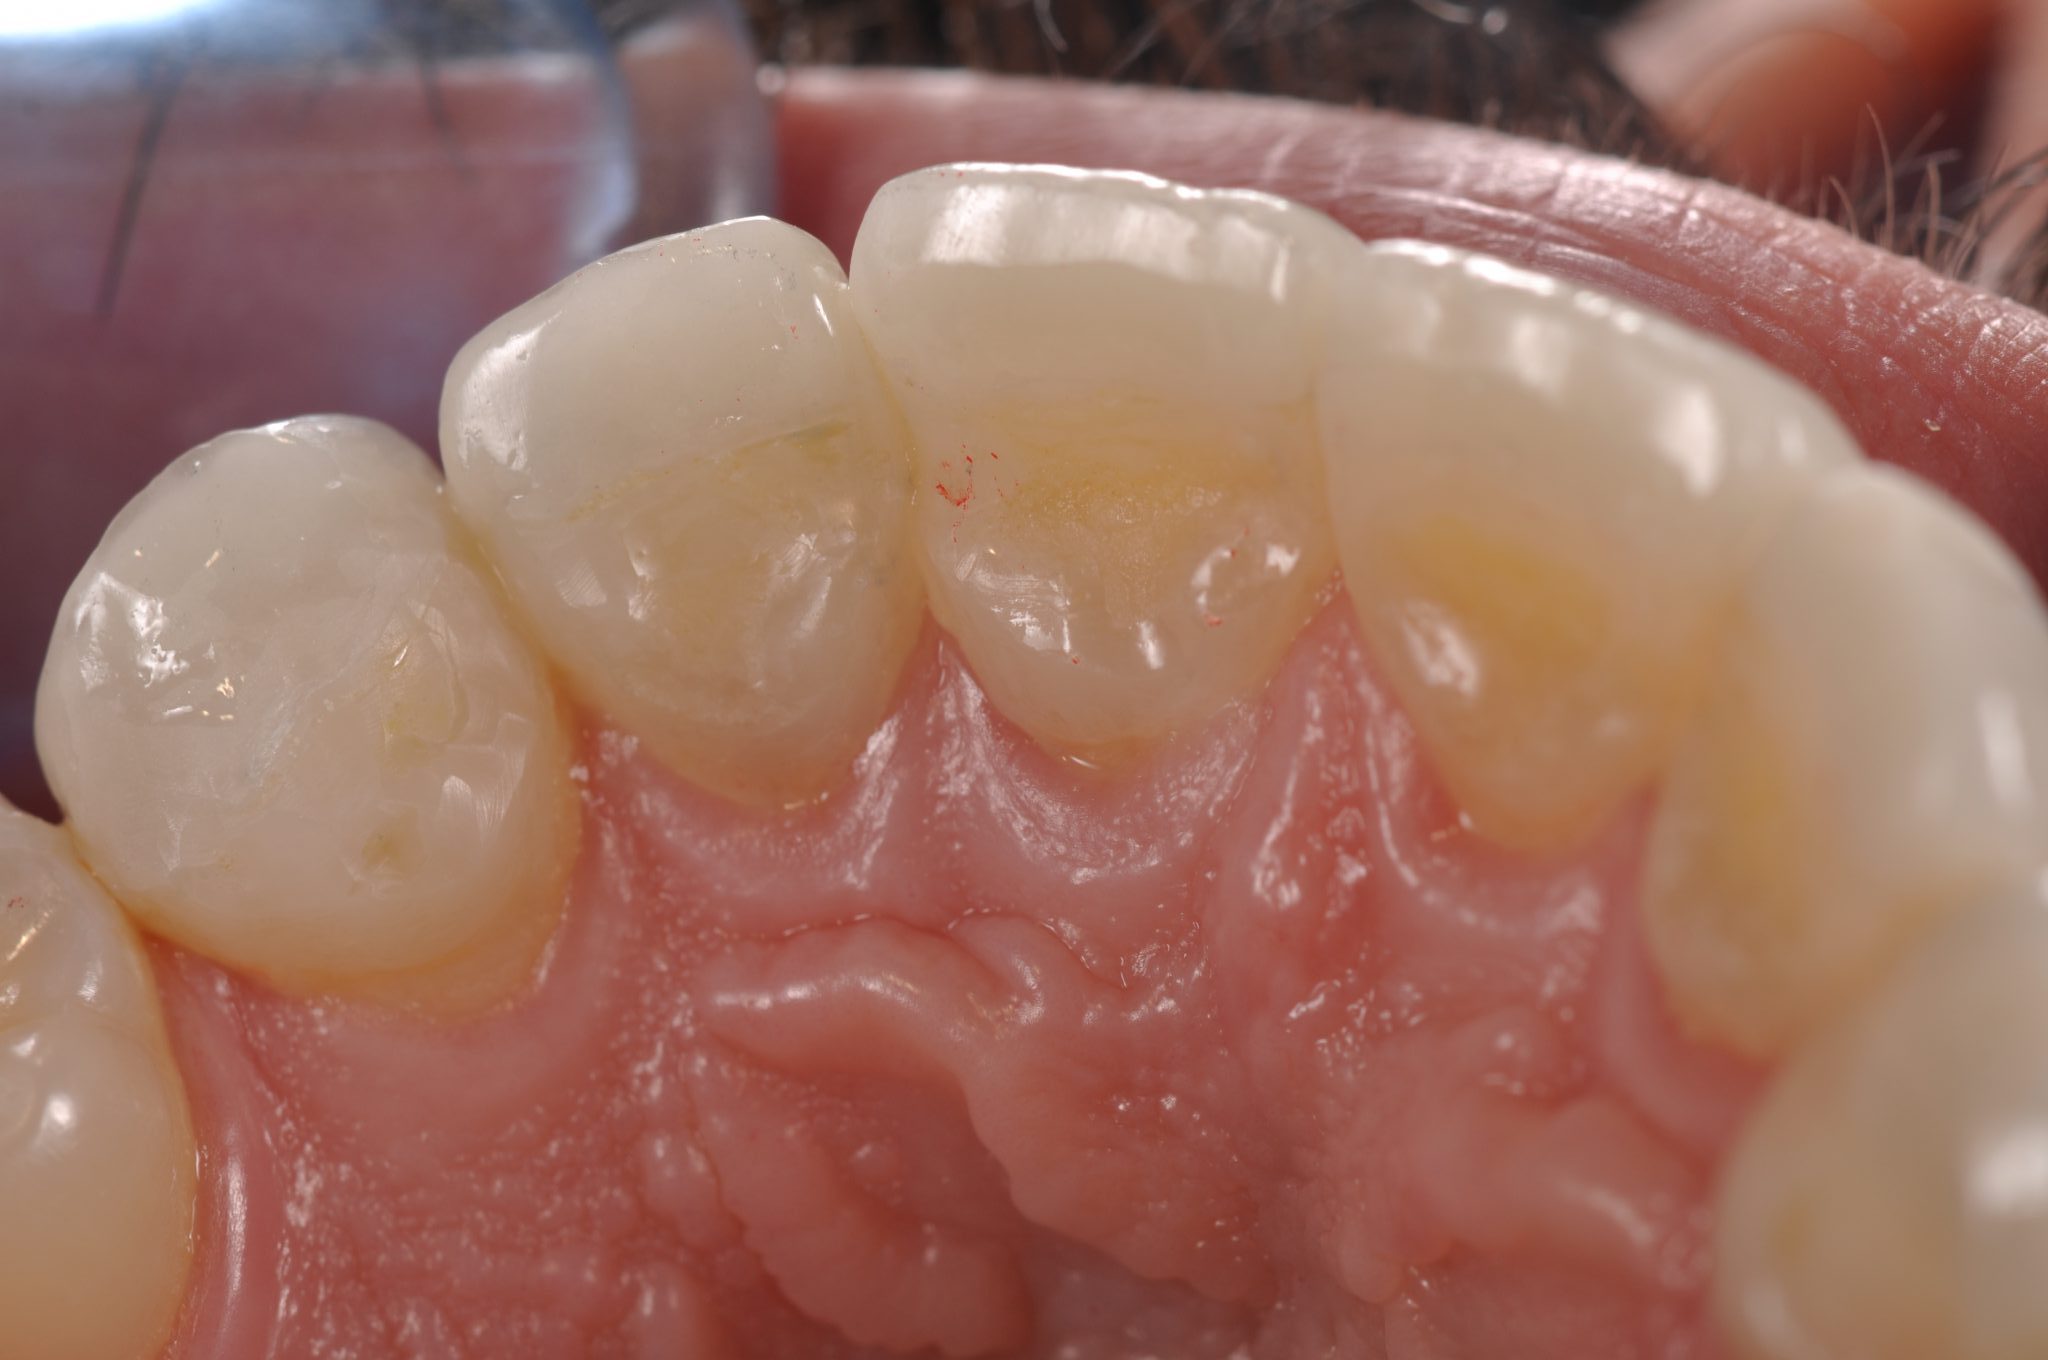
Figure 21
Palatal veneers (made of composite material DMG Luxacam).
Mimicry of the material is noted.
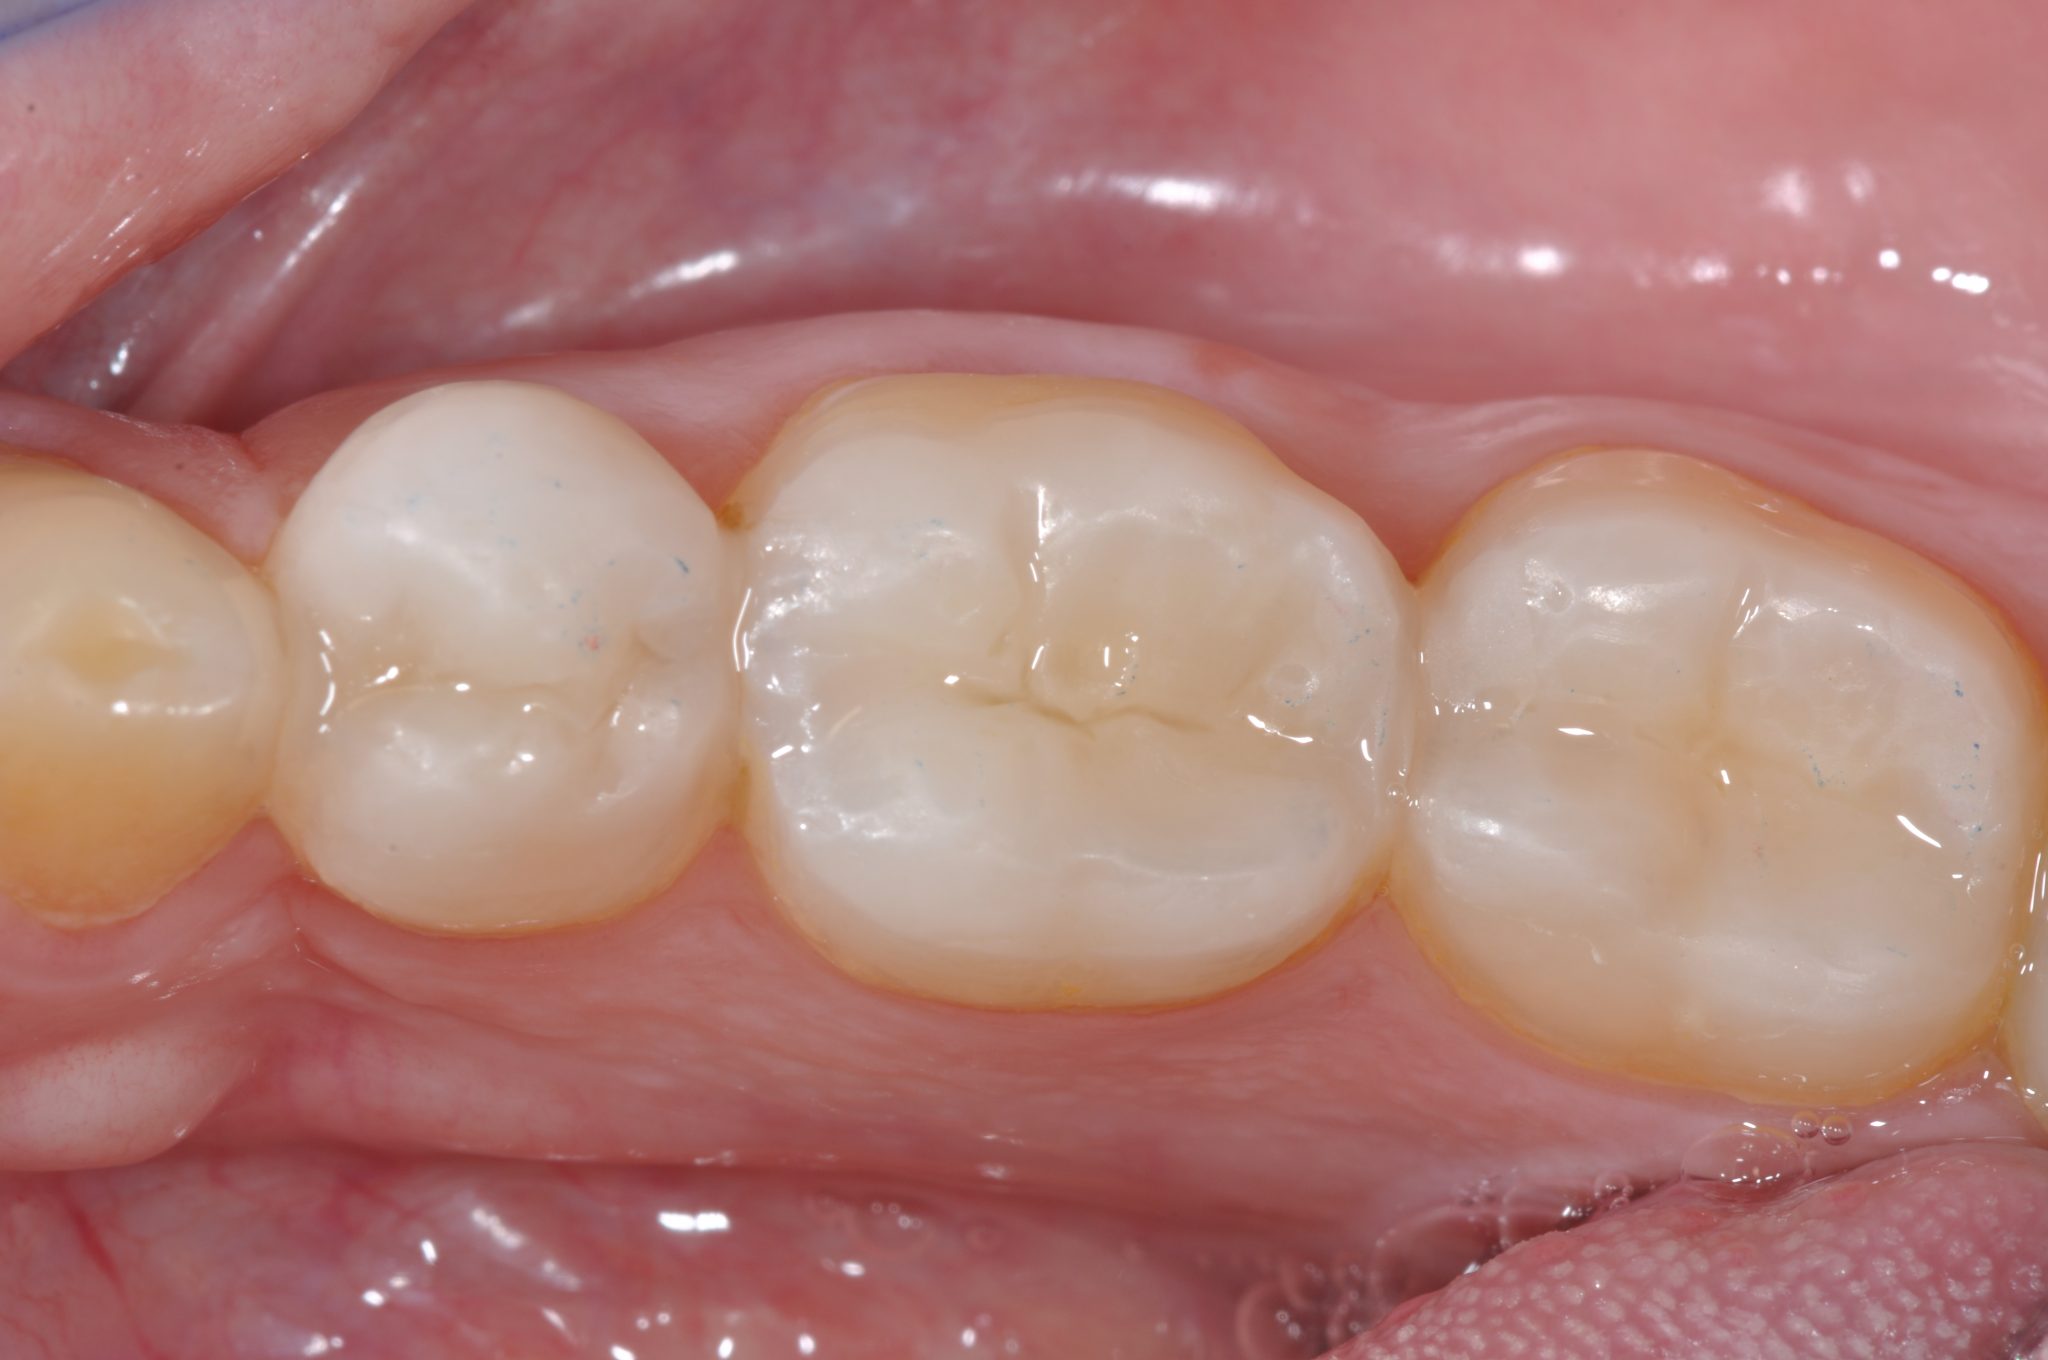
Figure 22
Occlusal veneers from 35 to 37, high-quality marginal fit.
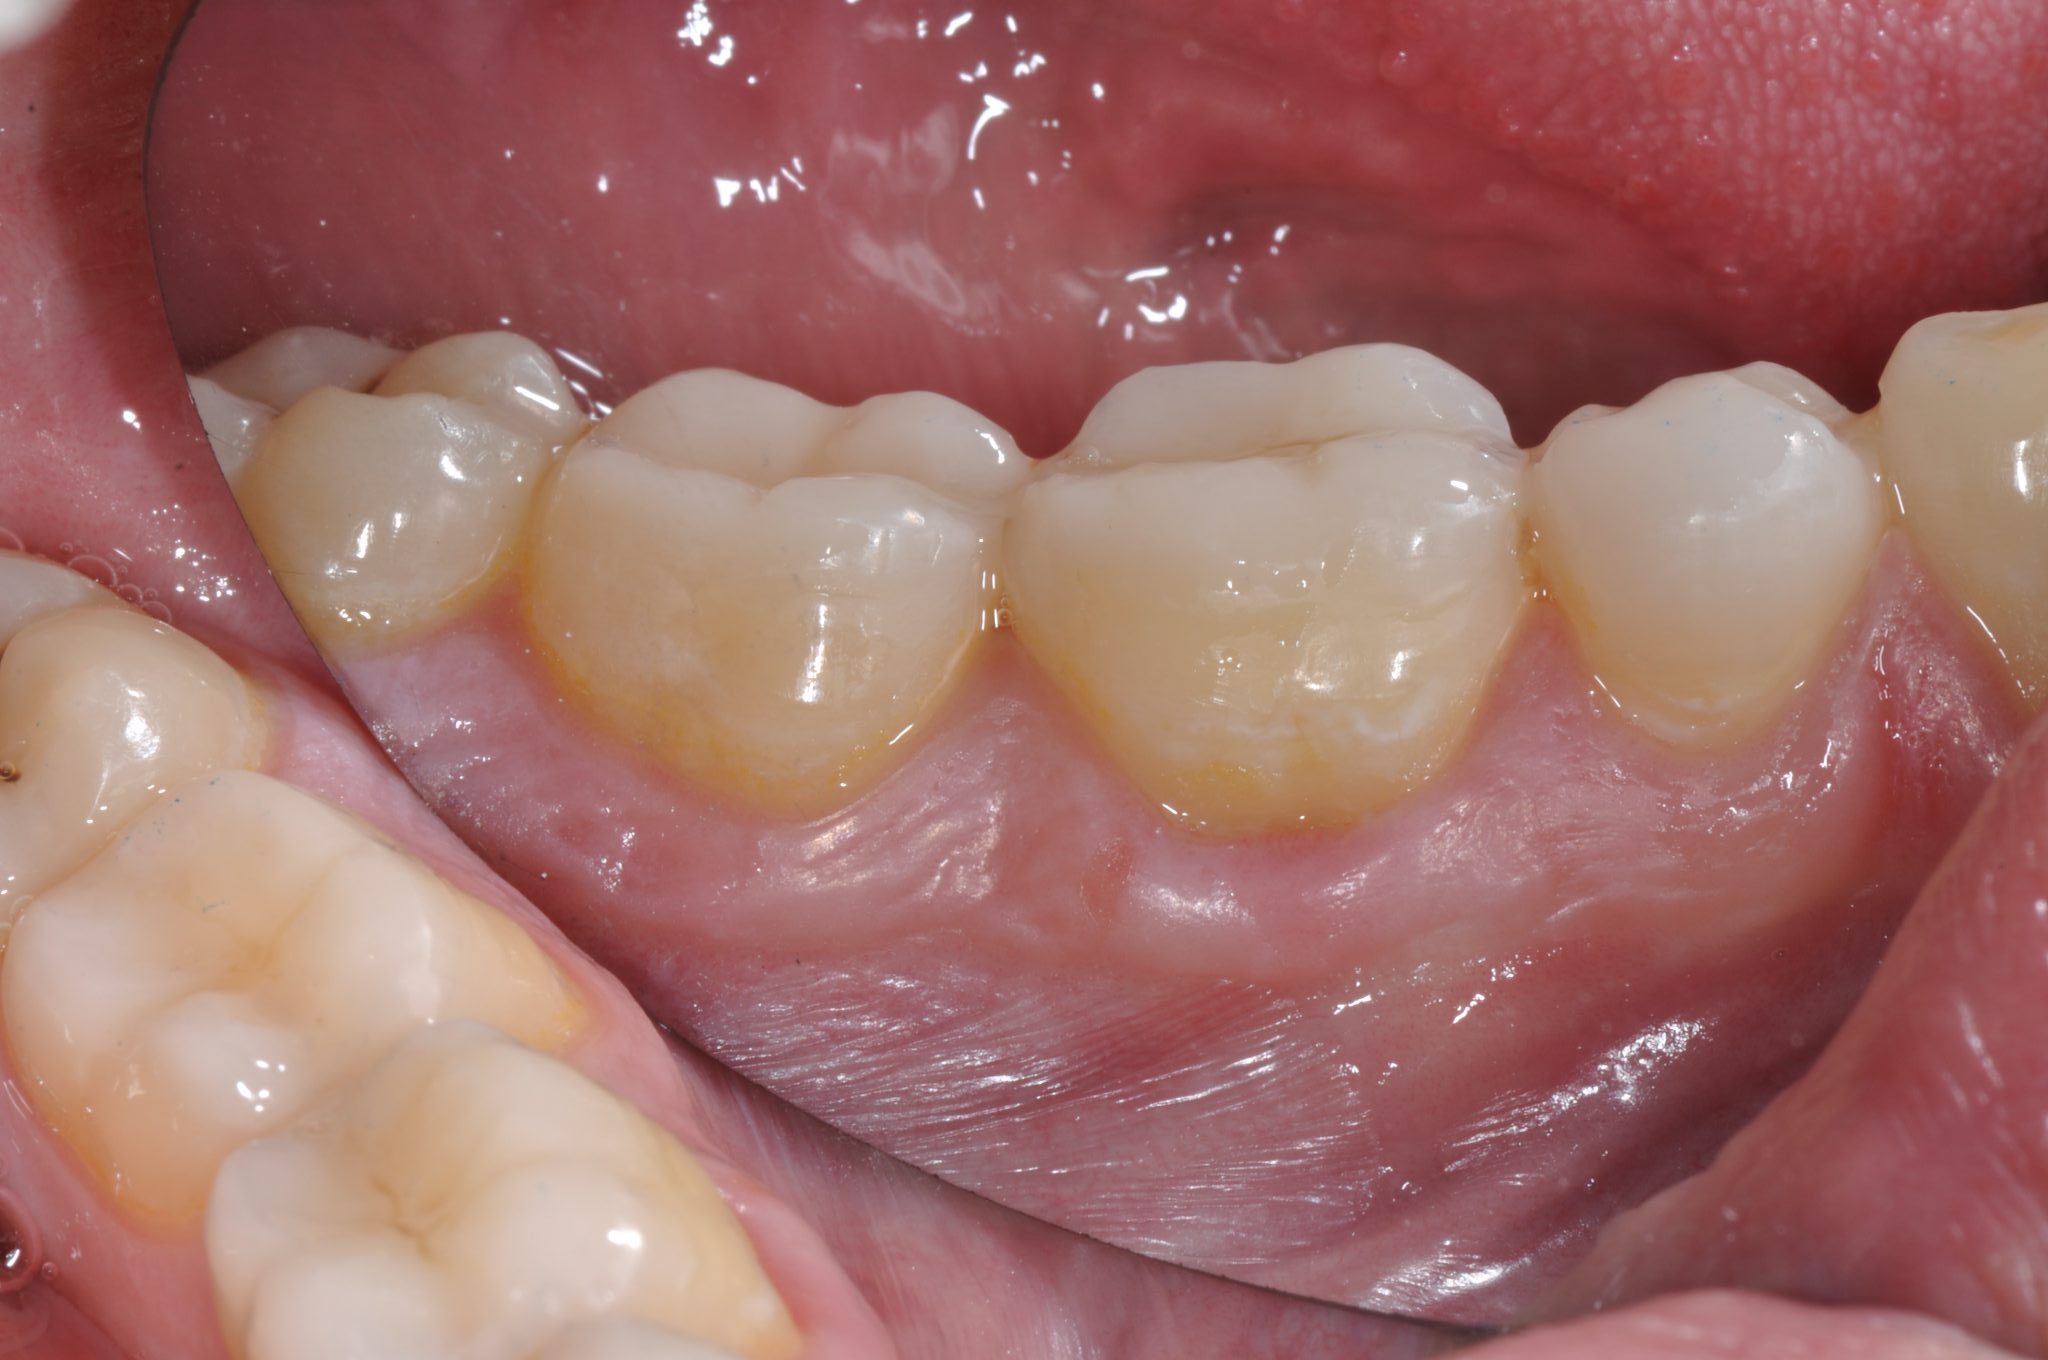
Figure 23
Occlusal veneers are fixed over the natural occlusal anatomy.
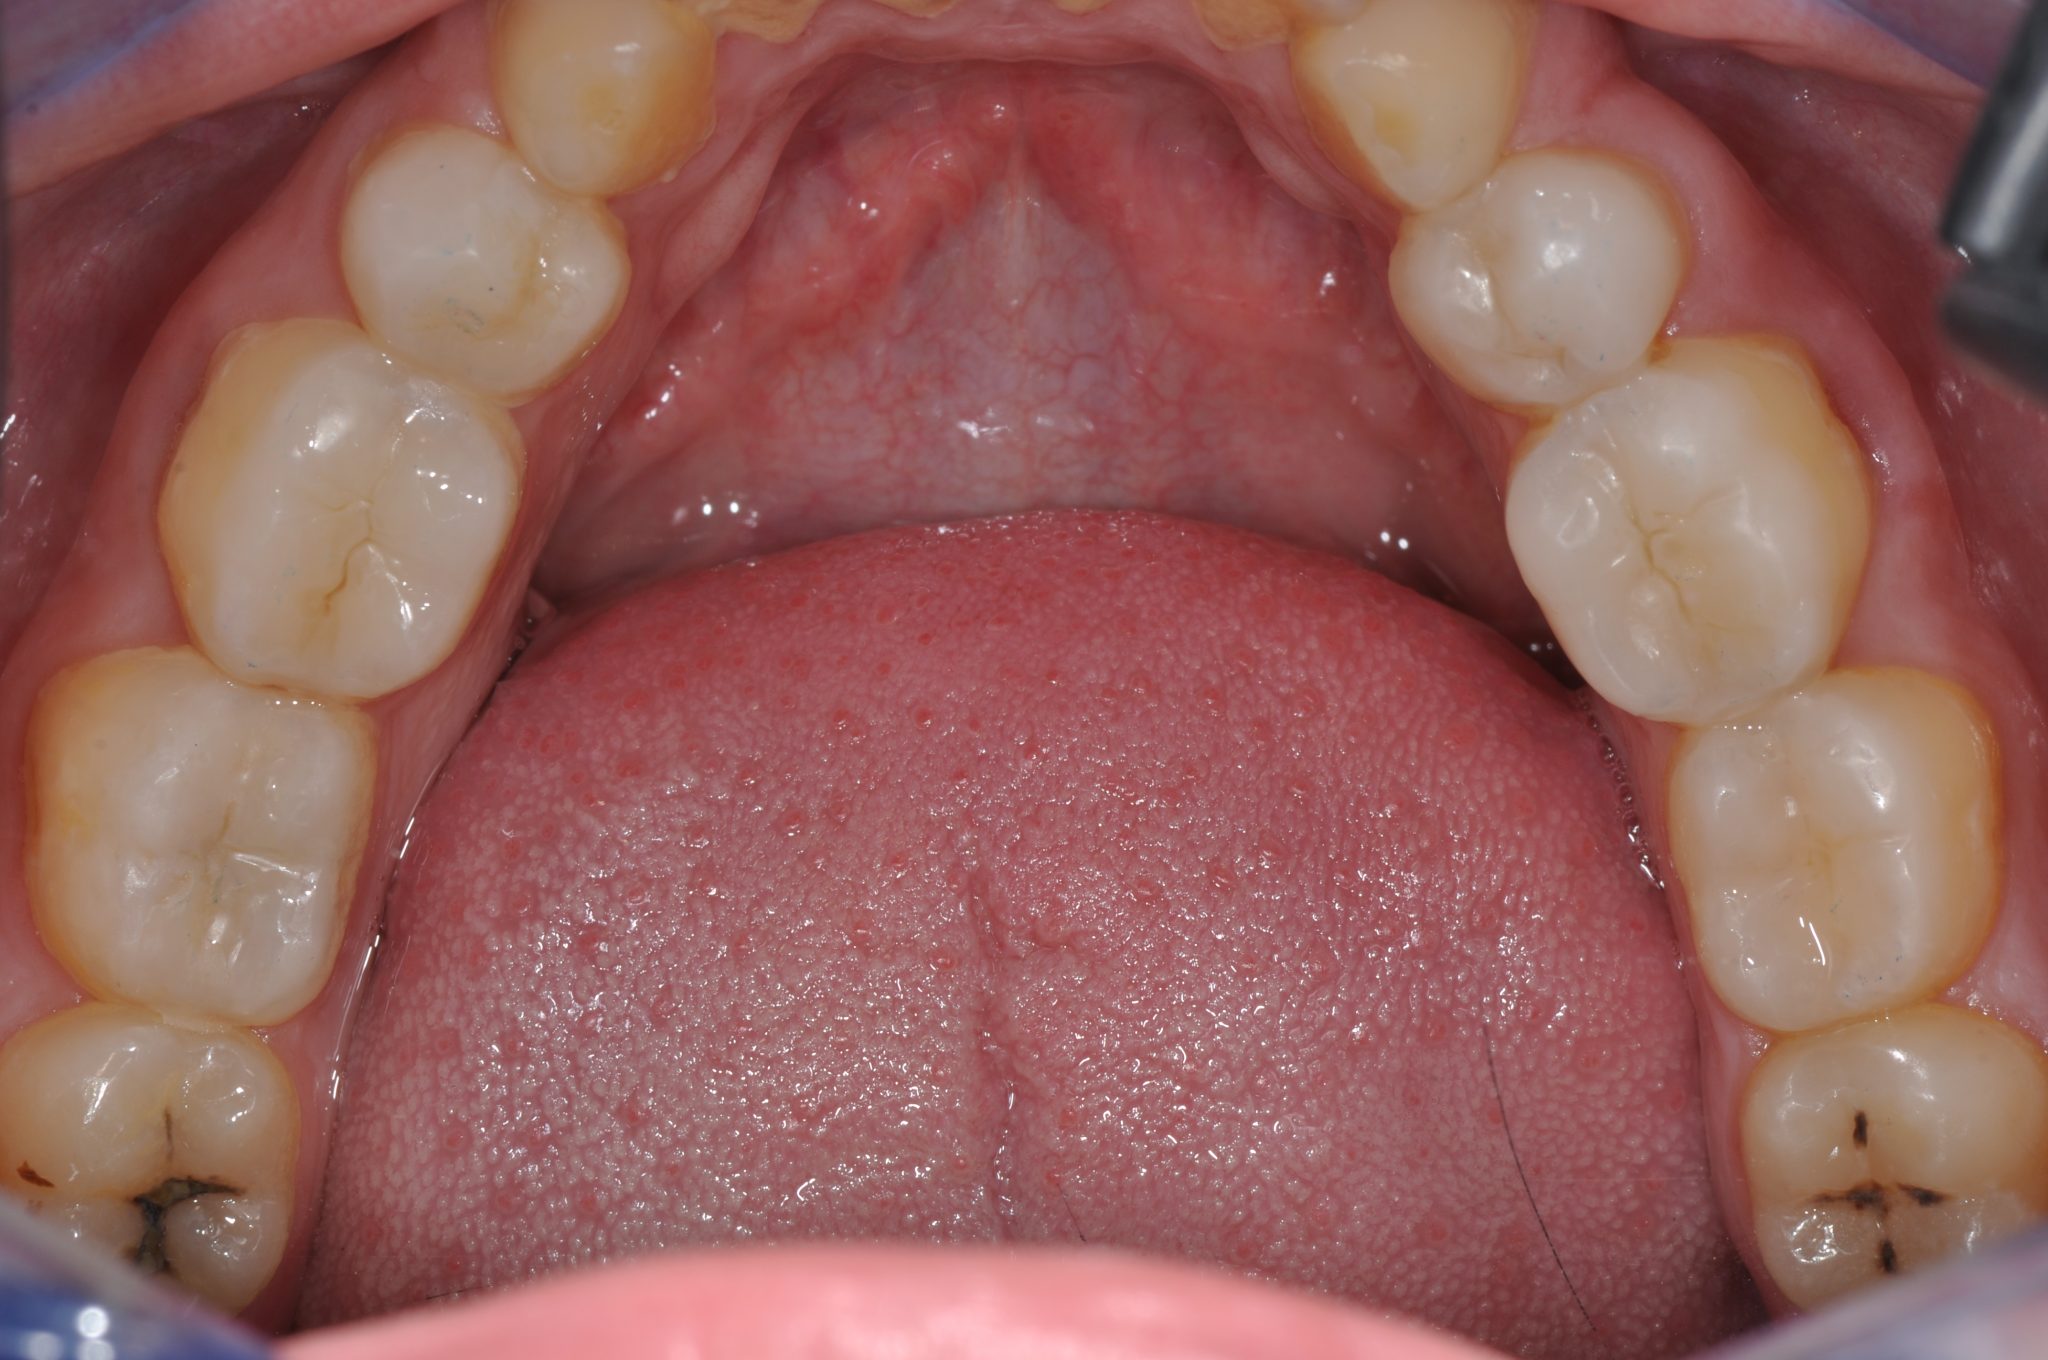
Figure 24
Restored lower dentition.
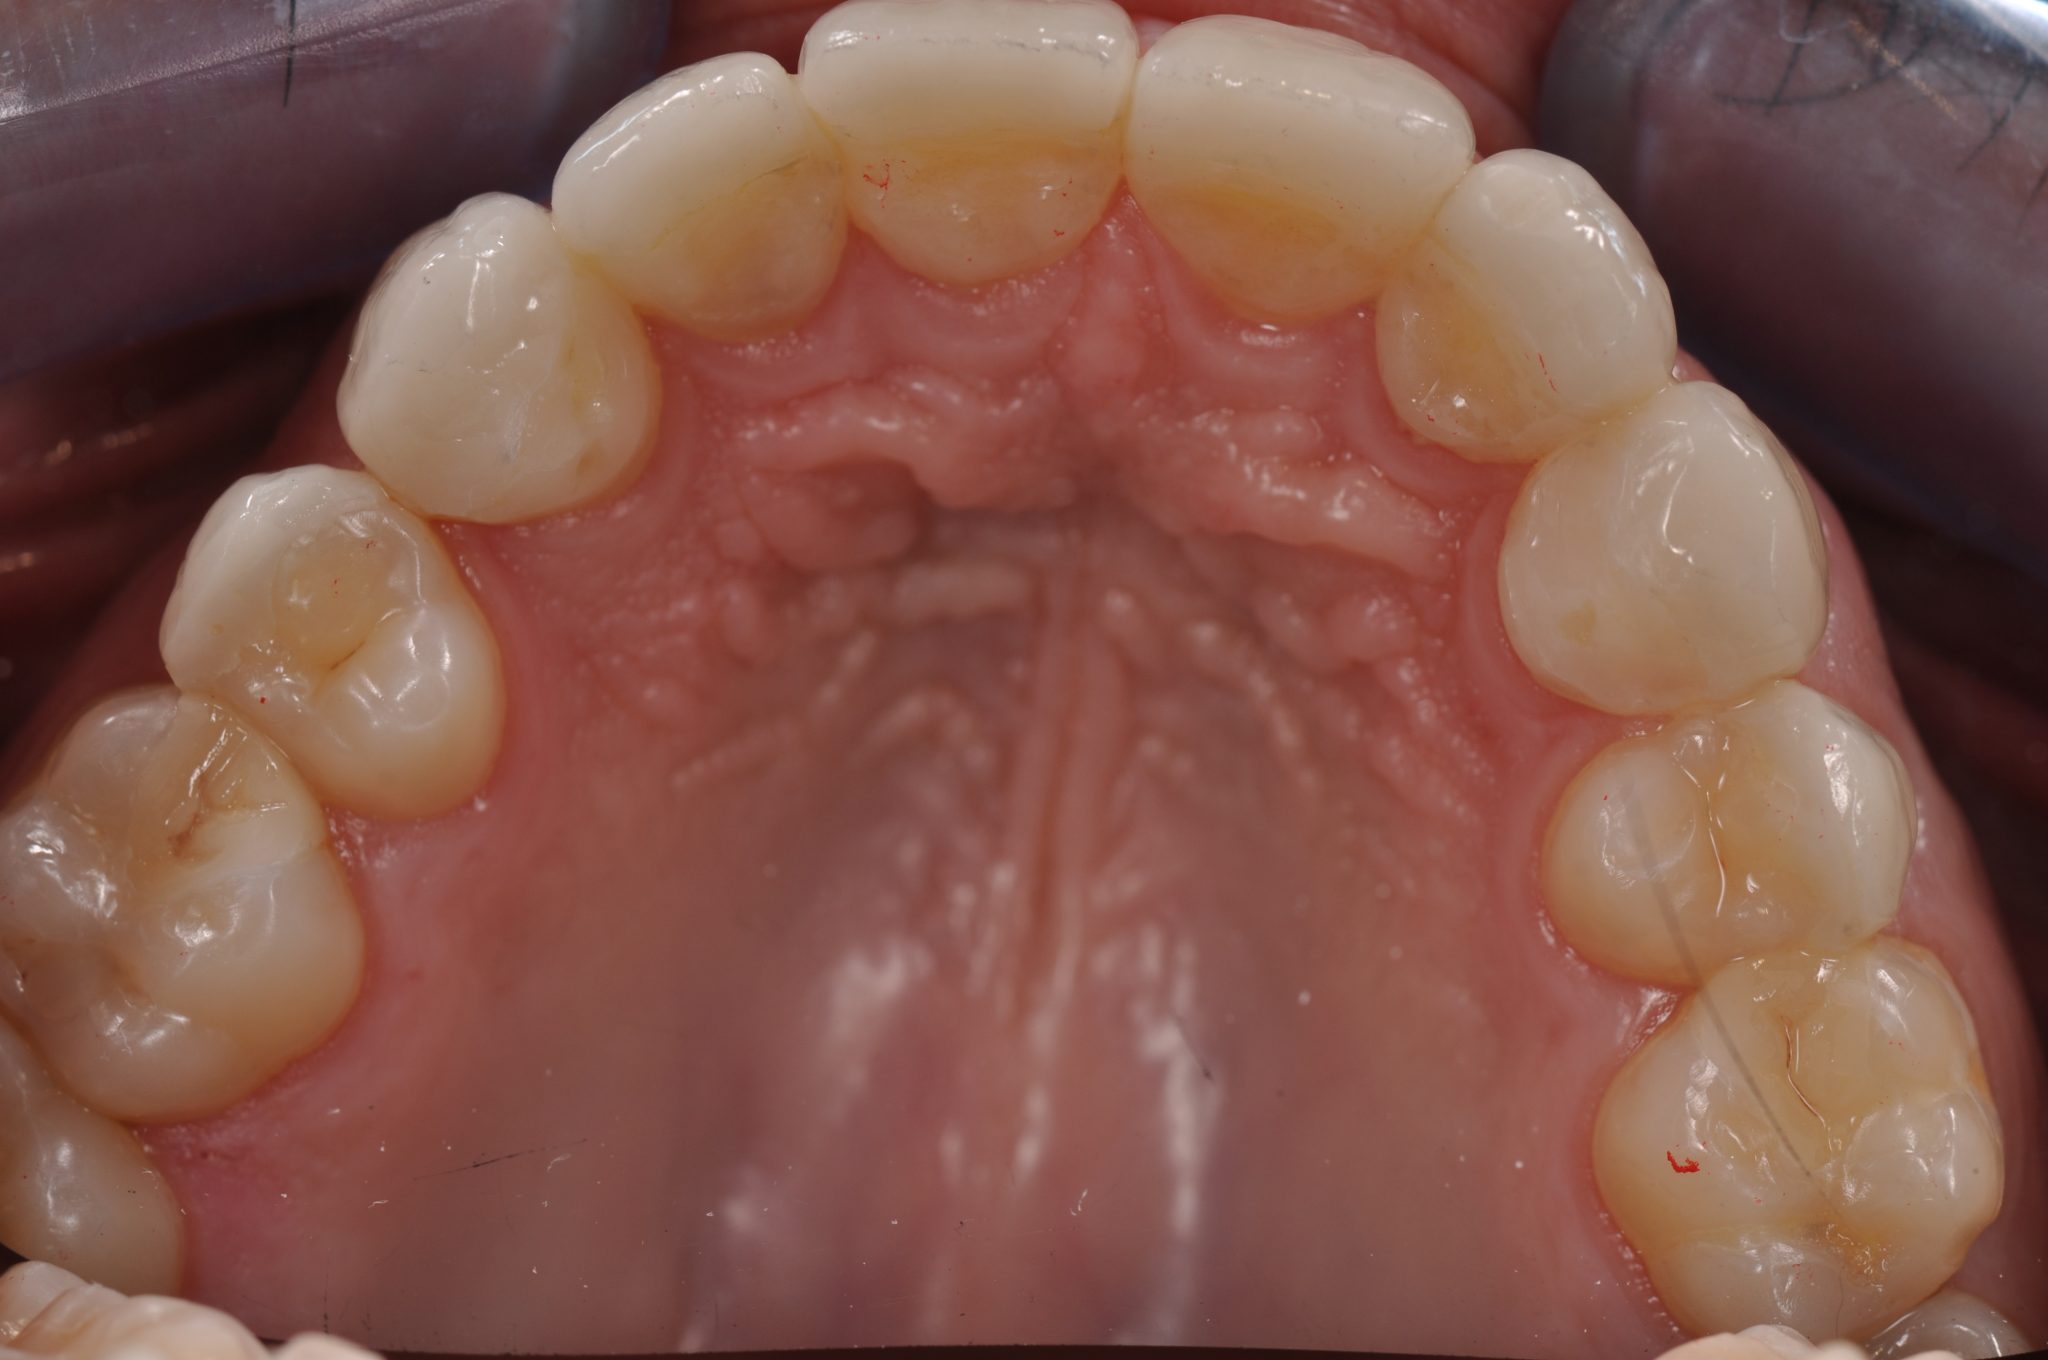
Figure 25
Restored upper dentition.
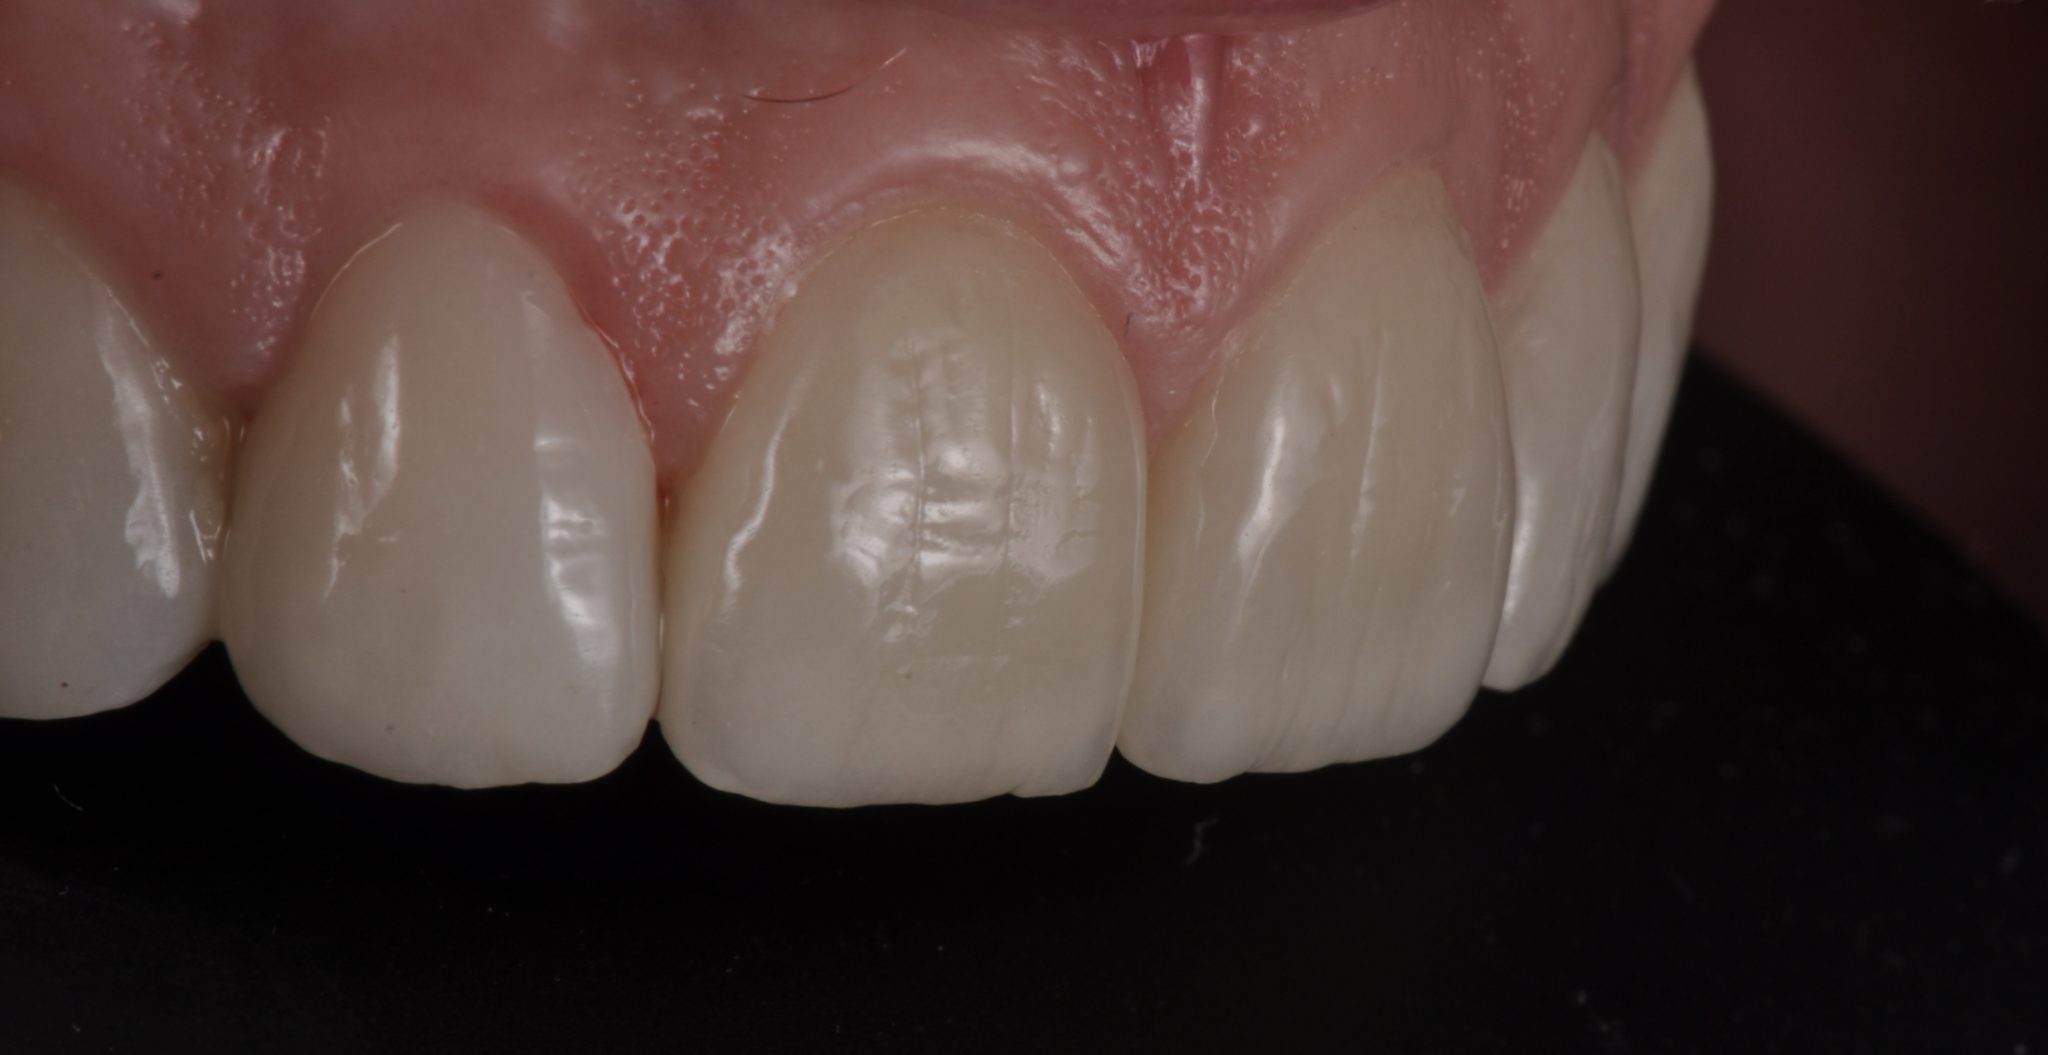
Figure 26
Final appearance of integrated veneers. Special thanks to Hilal Kuday CDT (Bodrum) for this masterpiece and his incredible work.
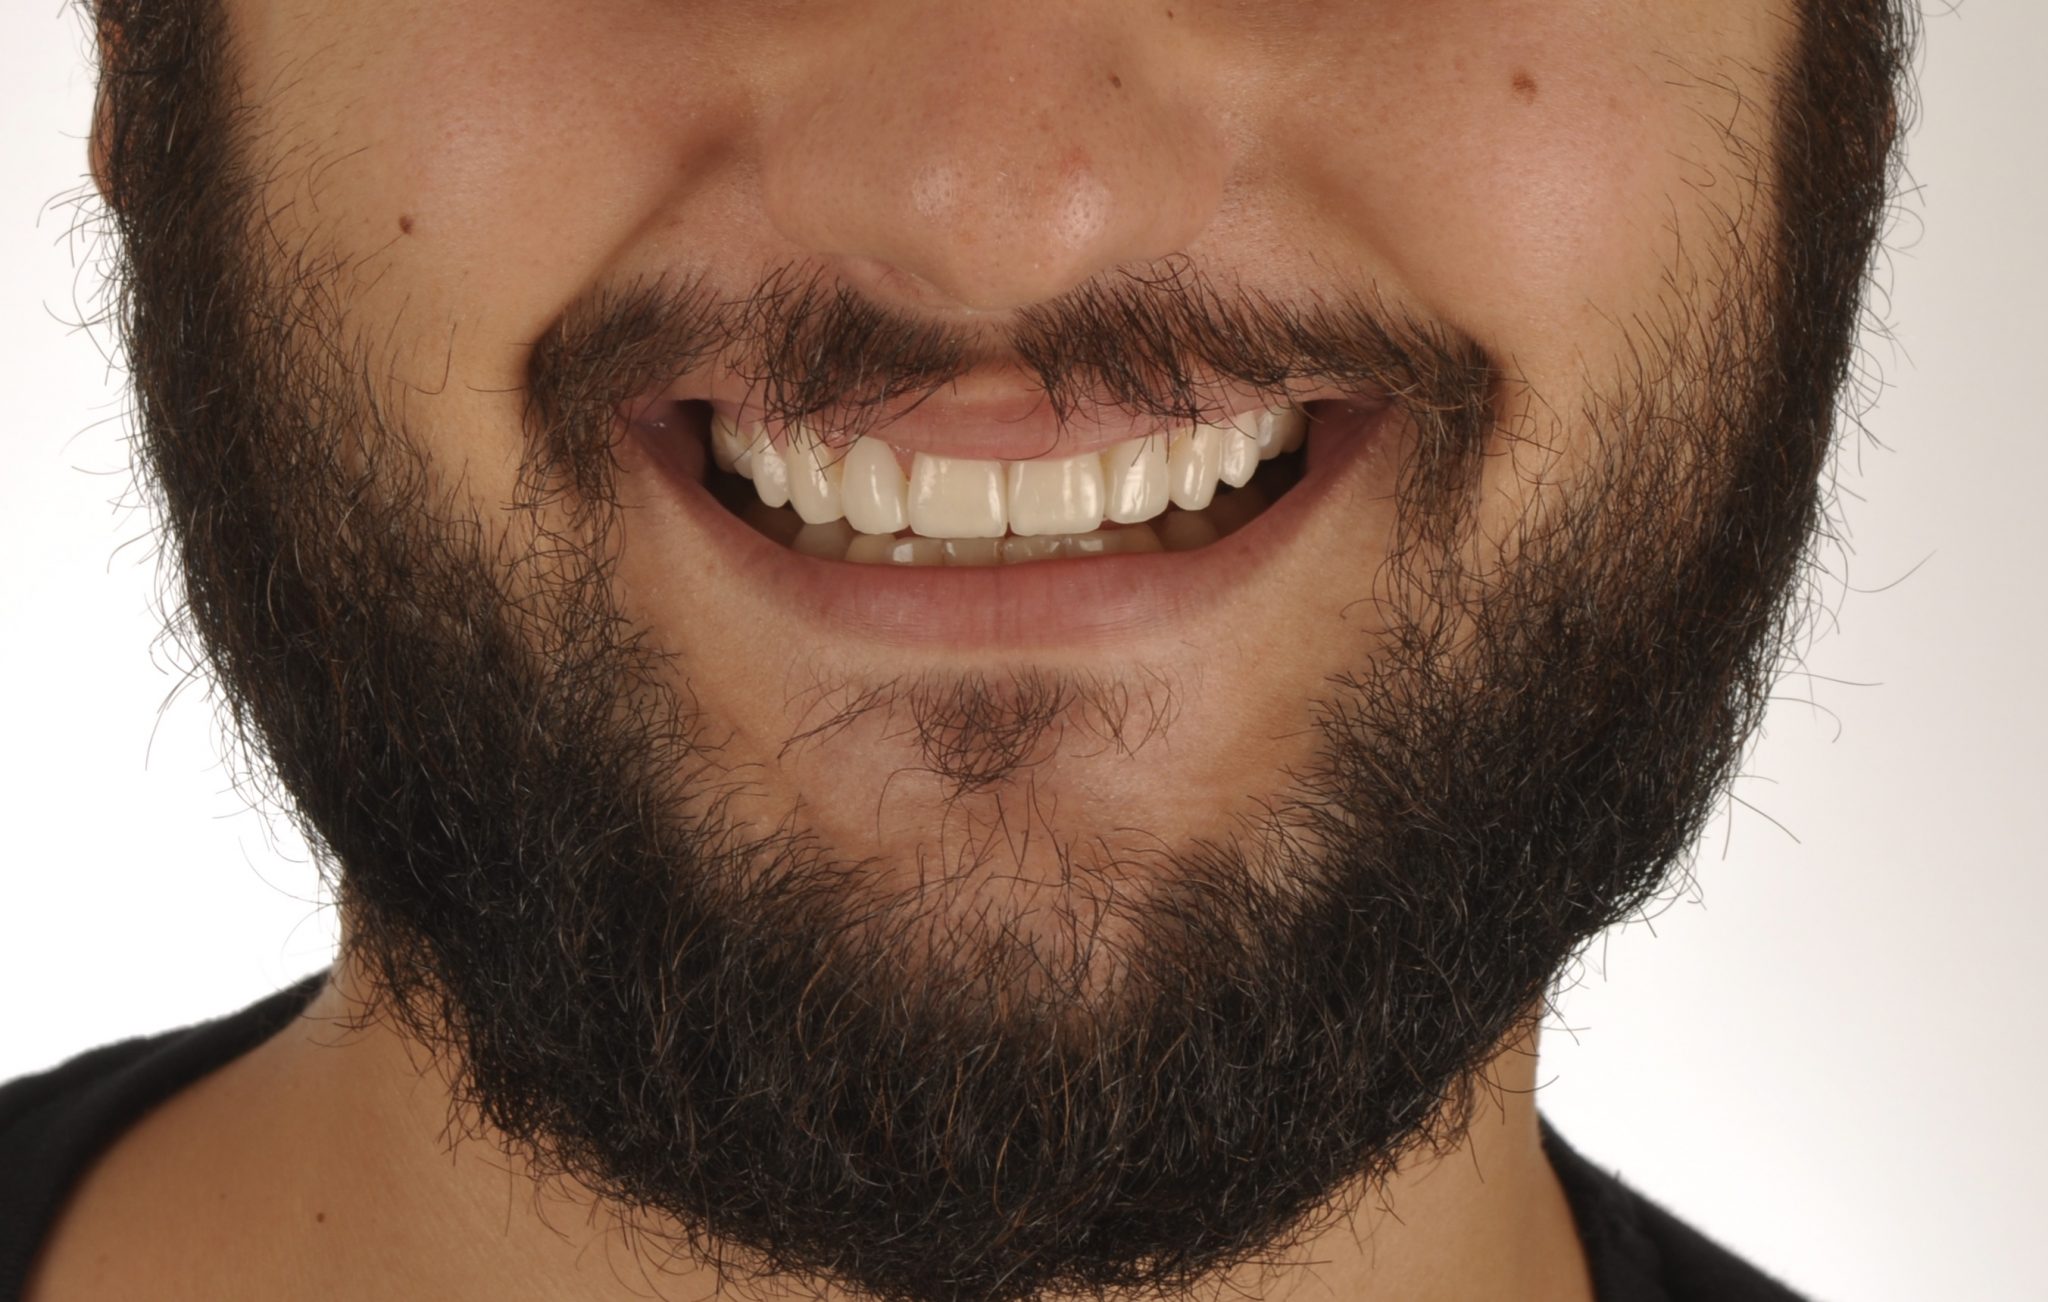
Figure 27
The patient's new smile.
conclusions
Over the past ten years, the dental materials market has seen quite a number of innovative products, especially in the CAD CAM workflow industry. It is extremely important to gain a deeper understanding of the characteristics of these materials, their physical properties, and thickness limits. The dentist and technician should then create a harmonious workflow and discuss clinical and technical issues. Last but not least, it is necessary to analyze the mechanical conditions, the antagonist teeth, as well as the chemical conditions, that is, the acidic environment in the oral cavity, in order to make a reliable treatment prognosis.
If you liked this article, go to the online course dedicated to working methods of treating patients with pathological abrasion Pathological abrasion: treatment .
http://www.styleitaliano.org/</a