
Complications during tooth extraction surgery
Machine translation
Original article is written in RU language (link to read it) .
The operation of tooth extraction, as noted in previous articles, is one of the most common surgical interventions not only in dentistry, but also in medicine in general. Often such an operation is accompanied by the development of complications both during its implementation and at the stage of preparation for the operation. In previous articles we discussed in detail the long-term local complications of tooth extraction, and now we will consider complications during tooth extraction.
The webinar Tooth extraction: step-by-step protocol is devoted to this topic. Treatment of complications .
Soft tissue injuries
Damage to soft tissue is a common occurrence in the practice of a dental surgeon. Careless or incomplete detachment of the gums when inserting the cheeks of the forceps under the gums and further advancement will lead to stretching of its tissues and subsequent ruptures.
When forceps are applied to the edges of the alveolus and the gum is captured, crushing and even tearing off the marginal part of the gum occurs.
Insufficient detachment of the circular ligament leads to rupture of the gums during removal of the tooth from the socket.
Damage to the tongue, tissues of the floor of the mouth, cheeks, and palate occurs when the elevator slips during tooth dislocation.
Prevention of soft tissue damage
Prevention of damage to soft tissues is quite simple and consists, firstly, in careful exfoliation of periodontal tissues and careful handling of instruments in the oral cavity, secondly, in peeling off the gums to a sufficient depth, and thirdly, in using instruments for their intended purpose.
When inserting the elevator blade and during tooth dislocation, it is necessary to block the direction of possible sliding of the tool with the finger of your free hand.
Treatment of soft tissue damage
If the soft tissue damage is not accompanied by bleeding, the tooth extraction should be completed, and then the edges of the wound should be brought together with sutures. If there is bleeding, it is necessary to stop it by ligating the vessel in the wound, bringing the edges of the wound together with sutures.
In case of a blind wound, sutures are placed on the bottom of the mouth and tongue, after which the wound must be drained for 12-24 hours by inserting a rubber or polyethylene strip into it.
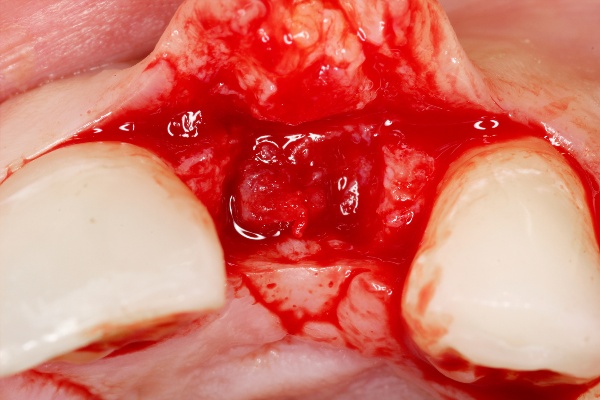
When the gum edge is torn off exposing the alveolar process, it is necessary to cover the exposed bone surface. To do this, two vertical incisions are made in the gums to the arch of the vestibule of the mouth, and the mucoperiosteal flap is peeled off. In order to mobilize it, the periosteum is crossed. After this, the mucoperiosteal flap is lowered and fixed with sutures so that it covers the exposed area of the alveolar process.
The second option is to form a mucoperiosteal flap in the area of the vault of the oral vestibule and move it to the area of the gum defect.
Tooth crown fracture
A tooth crown fracture is often a complication. It occurs due to the destruction of the crown by a pathological process or due to anatomical features. Increases the risk of traumatic removal of the root remaining in the hole. A fracture of the tooth crown can occur due to incorrectly selected instrumentation and violation of the extraction technique.
Prevention of tooth crown fracture
Prevention of tooth crown fractures lies in the correct tooth extraction technique and strict adherence to the principle of anatomical correspondence of the forceps to the tooth being removed.
When fixing the forceps, you should not use excessive force, and tooth dislocation should be carried out with smooth back-and-forth movements with a gradual increase in the amplitude of tooth movement and the applied force.
Before removing a tooth affected by caries, a fibrotomy should be performed along the entire perimeter of the root part of the tooth to the maximum possible depth in order to reduce the force required to dislocate the tooth.
Tooth root fracture
A tooth root fracture can occur due to:
- errors when choosing a tool for tooth extraction;
- violation of the rules for the rational use of tools;
- features of the anatomical structure of the tooth (long, thin, curved roots, root divergence).
Prevention of tooth root fracture
Prevention of root fracture comes down to following the recommendations described above. The first dislocation movement should be made towards the thinner and less durable alveolar wall.
Subsequent stages of tooth dislocation should be carried out with smooth back-and-forth movements with a gradual increase in the applied force, mainly in the direction in which the tooth being moved encounters less resistance.
It is advisable to plan a tooth extraction operation taking into account X-ray data.
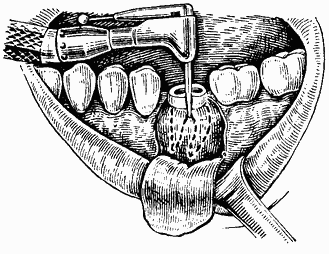
If, based on the analysis of radiographs, it is determined that the tooth being removed has diverging curved roots, then to prevent a root fracture, it is better to start the operation by crossing the interroot adhesions with a fissure bur, and then sequentially remove each part of the tooth using an elevator or forceps.
Treatment of tooth root fracture
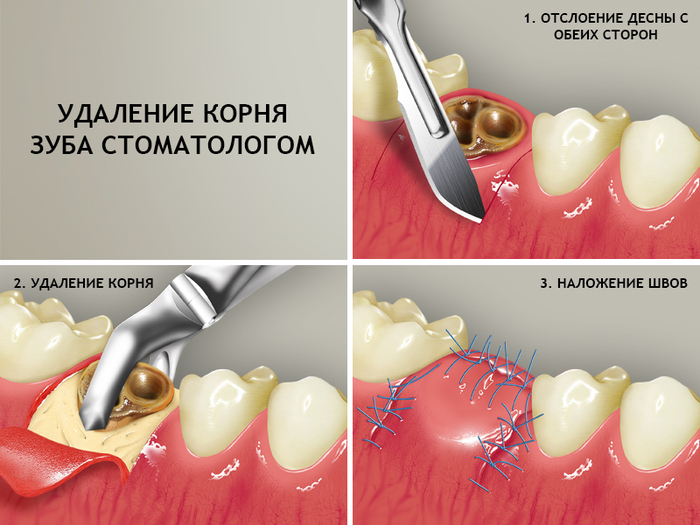
If a root fracture occurs, you should proceed to an atypical tooth extraction operation:
- detachment of the mucoperiosteal flap;
- access to the root through a burr hole in the area of the vestibular wall of the alveolar process (alveolar part of the lower jaw);
- dislocation of the root with an elevator and pushing through the alveolus;
- filling the alveoli with an osteotropic drug;
- fixation of the mucoperiosteal flap and bringing together the edges of the gums above the alveolus of the extracted tooth with sutures.
Fracture, dislocation of an adjacent tooth
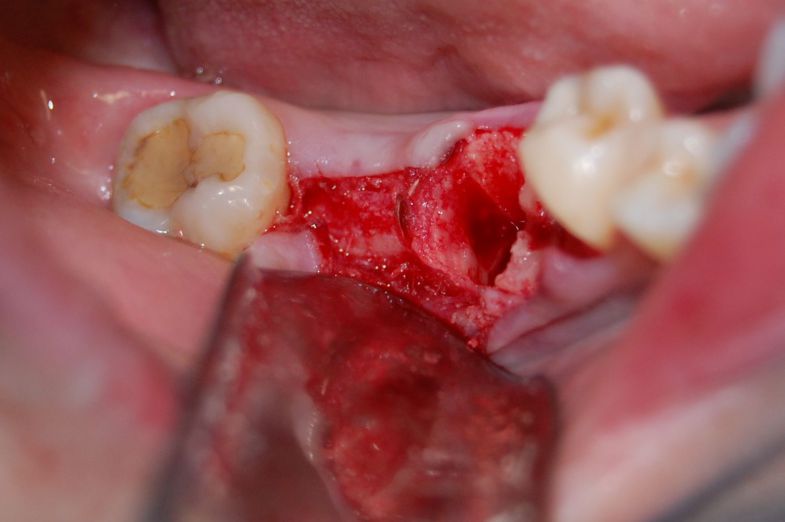
Fracture or dislocation of an adjacent tooth during an extraction operation most often occurs when using forceps with wide cheeks or when removing teeth with an elevator, when the adjacent tooth serves as a support for the instrument. This complication is considered a medical error.
Prevention of fracture or dislocation of an adjacent tooth
Prevention of dislocation of an adjacent tooth is the careful removal of the causative tooth without relying on the adjacent tooth, or when a tooth is dislocated with an elevator, the fulcrum for the instrument should be the edge of the interdental septum, the neck of the tooth, and not the crown.
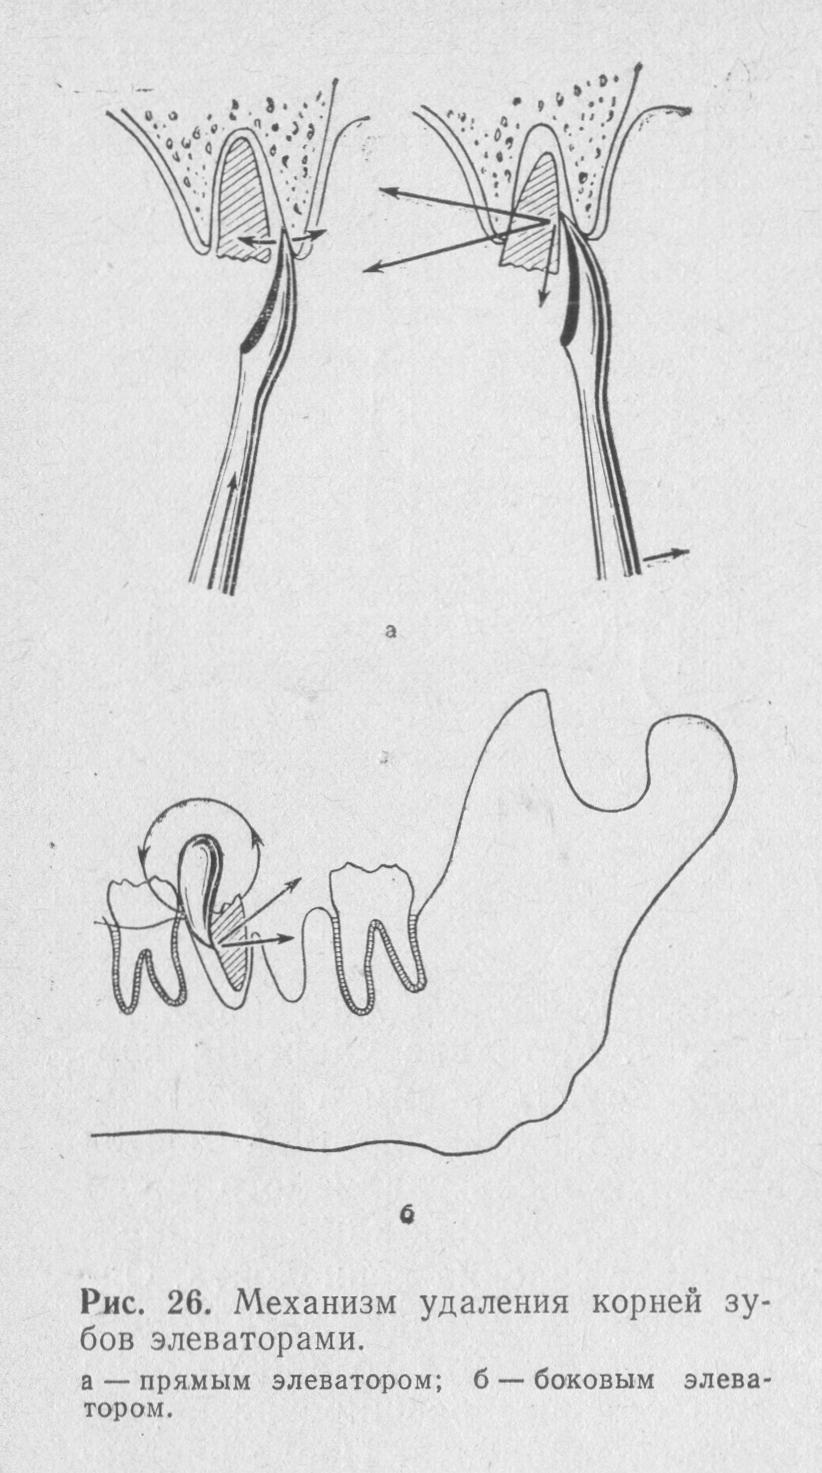
When using a direct elevator, the first stage of tooth dislocation should be carried out mainly by reciprocating rotational movements of the instrument as its blade is inserted between the surface of the tooth and the wall of the alveolus.
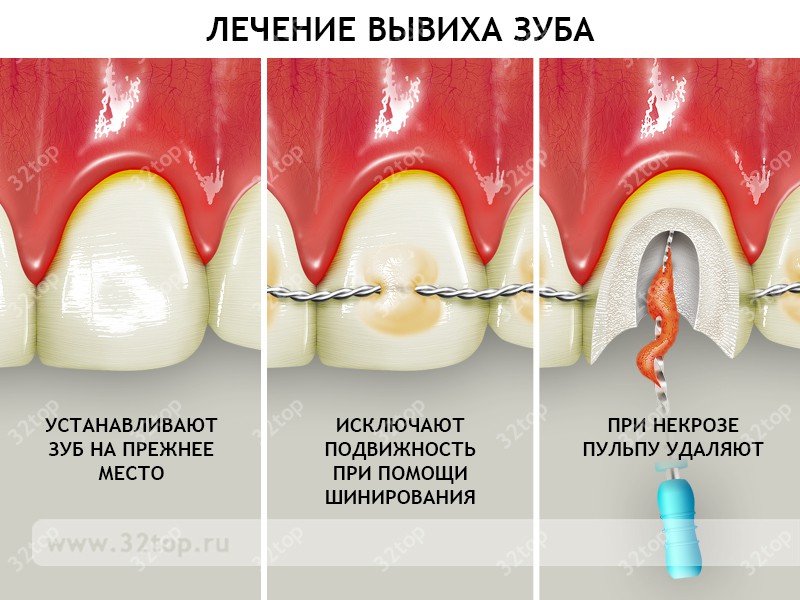
Treatment of a dislocated adjacent tooth
If the adjacent tooth is completely dislocated, if it is intact, replantation is possible. If a single-rooted tooth is dislocated, it should be immobilized using a dental wire splint.
It is not necessary to immobilize a multi-rooted tooth after replantation. The patient should adhere to a gentle diet and carefully observe the rules of oral hygiene. If tooth extraction was performed due to an acute or chronic infectious-inflammatory process, a course of antibacterial therapy should be administered. The patient should be under dispensary observation with monitoring of the condition of the dental pulp (electroodontometry in dynamics) and the condition of the periodontium (x-ray monitoring after 2, 6 and 12 months).
If a fracture of an adjacent tooth occurs, we choose treatment tactics based on the clinical situation: we determine the condition of the hard tissues of the tooth, pulp and periodontium. Assessing the condition of the dental tissues can also help determine whether there were any factors that caused the fracture: periodontal disease, caries, poor-quality fillings.
Pushing the tooth into the perimaxillary soft tissues
Pushing a tooth into the perimaxillary soft tissue occurs when removing roots or impacted teeth using an elevator. Most often when removing third molars in case of resorption of the alveoli from the vestibular side. A dislocated tooth or part of it is displaced under the mucous membrane.
Diagnostics
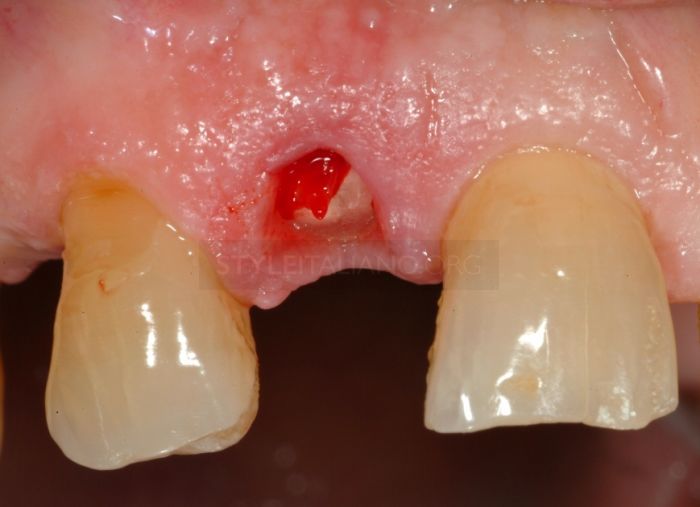
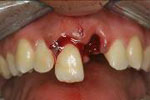
An empty socket and the disappearance of part of the tooth are grounds to assume the possibility of pushing it into the perimaxillary soft tissue. To prevent “forgetting” part of a tooth, you should not throw away the extracted tooth, but carefully examine it and make sure that you have completely removed it. If the tooth was intentionally fragmented, you need to assemble the entire “puzzle”. If part of the tooth is still missing, you need to palpate the soft tissue in the area of removal.
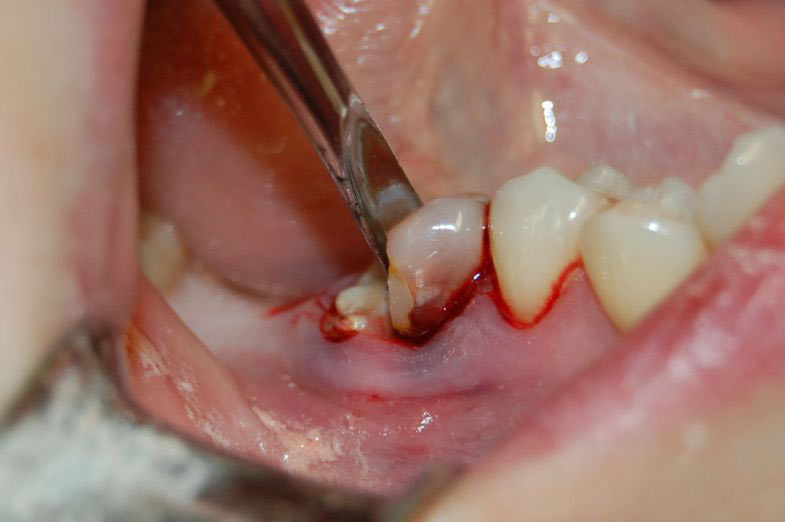
If a compaction is clearly palpated through the mucosa, it is necessary to dissect the mucous membrane above it, stratify the tissue and expose the surface of the fragment. Then it is removed using a curettage spoon or tweezers.
If the “disappeared” tooth fragment is not determined by palpation, it is necessary to conduct an X-ray examination - take extraoral radiographs of the expected area of localization of the tooth fragment in two mutually perpendicular planes - frontal and sagittal.
If it is impossible to continue the operation on an outpatient basis, the patient should be sent to a hospital.
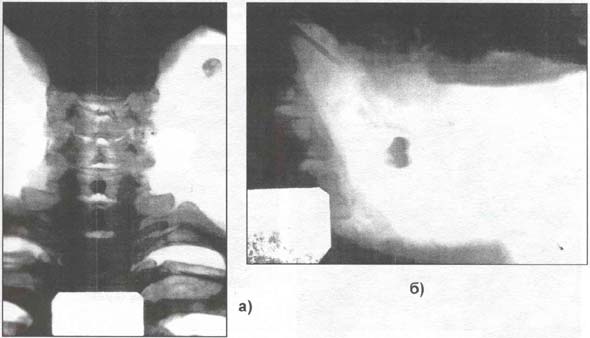
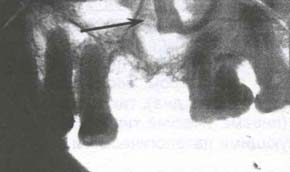
X-ray of the cervical spine. The wisdom tooth to be removed was pushed into the soft tissues of the upper neck: a) side view; b) front view.

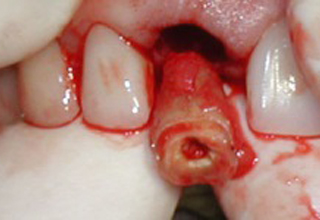
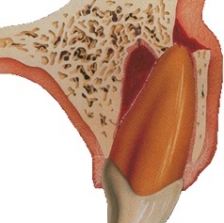
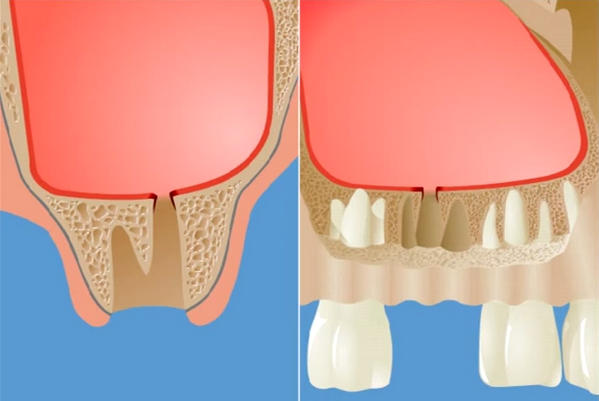
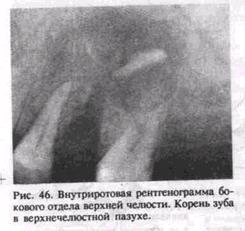
One of the roots of the extracted tooth was pushed under the mucous membrane of the alveolar process from the buccal side.
Perforation of the floor of the maxillary sinus
Perforation of the floor of the maxillary sinus can occur when removing upper molars, less commonly premolars. Contributing factors:
- anatomical features of the structure of the upper jaw - the low position of the sinus bottom and the peculiarities of the relative position of the roots of the teeth with the sinus;
- infectious and inflammatory processes: periodontitis, osteomyelitis, cysts, tumors, lead to resorption of the bone plate between the sinus and the tips of the roots of the teeth, up to its complete absence;
- rough removal of teeth and scraping of pathological tissues from the apical periodontium.
Clinic for perforation of the maxillary sinus floor
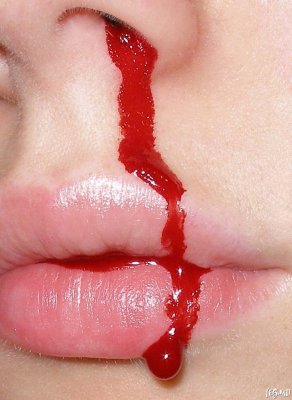
The clinical picture of perforation of the maxillary sinus floor is quite specific. A characteristic symptom is the appearance of bloody discharge from the nose on the side of the perforation. The patient complains of air passing through the tooth socket and a feeling of pressure.
Diagnosis of perforation of the maxillary sinus floor
Diagnosis of perforation of the floor of the maxillary sinus is quite simple. When the bottom of the maxillary sinus is perforated, a connection between the oral cavity and the nasal cavity occurs. Therefore, when the pressure in the nasal cavity and sinus increases during vigorous exhalation, air can penetrate into the alveolus of the extracted tooth, causing foaming of the blood present there.
If you invite the patient to pinch the external nose and exhale vigorously through the nose, the appearance of bloody foam in the alveolus of the extracted tooth will appear even more clearly.
In this case, you can hear the whistling sound of a stream of air passing into the mouth through the alveoli (nasal test).
If you ask the patient to increase the pressure in the oral cavity (inflate the cheeks), you can hear the whistling sound of a stream of air passing from the oral cavity into the maxillary sinus through the alveolus of the extracted tooth, and from the sinus into the nasal cavity through a natural opening - hiatus maxillaris (oronasal test).
A characteristic symptom is the appearance of bloody discharge from the nose on the side of the perforation.
Prevention of perforation of the maxillary sinus floor
Prevention of perforation of the floor of the maxillary sinus comes down primarily to identifying the presence of risk factors in the patient before removing the upper molars based on X-ray data and medical history.
Removal of pathological tissue in the area of the apex of the upper molars should be carried out carefully, and if there are risk factors, the procedure should be abandoned altogether.
Treatment of perforation of the maxillary sinus floor
Treatment of perforation of the bottom of the maxillary sinus consists of creating conditions for the formation and preservation of a blood clot in the alveolus of the extracted tooth. After replacing the blood clot with granulation, osteoid, and then mature bone tissue, there will be a reliable separation of the maxillary sinus from the oral cavity. This is achieved in the following ways.
- Bringing the gum edges together with sutures. Thus, the entrance to the hole from the oral cavity is blocked.
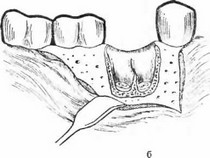
- Detachment of the mucoperiosteal flap in the area of the arch of the vestibule of the mouth with its reduction down to contact with the palatal edge of the gums.
Before suturing, the walls of the alveoli are carefully scraped out with a sharp curette, which causes bleeding and promotes the formation of a blood clot, opening the way for the release of osteoblast precursors involved in reparative osteogenesis. Any osteotropic biological product can be injected into the alveolus.

Pushing the root into the maxillary sinus
Pushing the root into the maxillary sinus occurs when the forceps or direct elevator are not advanced correctly, when the root of the tooth being removed is separated from the bottom of the sinus by a thin bone plate or it is thinned or completely absent as a result of a pathological process.
The cheek of the instrument must be inserted between the root and the wall of the socket, and if the forceps are applied incorrectly, the cheek presses on the root of the tooth and thereby moves it into the maxillary sinus. In some cases, when the handles of the forceps are brought together and the cheeks are not applied deeply enough, the root slips out and gets into the sinus.
To diagnose this complication, radiographs of the paranasal cavities and intraoral photographs are taken. X-ray examination helps to clarify the location of the tooth. Endoscopy is also used to detect a root or tooth in the sinus. A rhinofibroscope or endoscope is inserted into the defect in the bottom of the maxillary sinus through the socket of the extracted tooth and examined.
When the root is pushed into the maxillary sinus, perforation of the sinus bottom occurs, so this complication is accompanied by a clinic characteristic of perforation.
- When you exhale sharply through the nose, you can observe the appearance of blood and small bubbles from the hole.
- The appearance of blood in the nose on the side of the damaged sinus.
- The appearance of a nasal voice.
- The patient complains about the passage of air through the hole, a feeling of pressure in the projection of the sinus.
A root that has entered the maxillary sinus must be removed as quickly as possible, otherwise the mucous membrane of the maxillary sinus may become infected and sinusitis will develop.
The tooth or part of it cannot be removed through the socket, because this only worsens the conditions for subsequent closure of the sinus defect.
The root is extracted in a hospital. A burr hole is made in the anterior outer wall of the maxillary sinus. In case of developed sinusitis, all stages of radical surgery of the maxillary sinus are performed. At the same time, plastic closure of the sinus floor defect is performed. Using an endoscope inserted through the formed hole in the lower nasal meatus, the location of the root is recorded and it is removed with special endoscopic instruments.
Learn more about tooth extraction in the online lesson Qualified tooth extraction .