
"The Perfect White" – Is Less Sometimes More?
Machine translation
Original article is written in DE language (link to read it) .
Often, the practitioners put a lot of work and effort into the construction and maintenance of hard and soft tissues, the selection of the appropriate implant design, and the perfect implant position. These are very important therapy steps, but often the work step that the patient can best assess is neglected – the final restoration – “the perfect white”.
To achieve and maintain perfect aesthetics in the long term, a perfectly coordinated workflow between the dentist and the dental technician is required.
In previous issues of the Implantology Journal, we have introduced our implant concept. The “Simpl(e)y perfect-Concept” is primarily distinguished from other concepts by one main component: Keep it simple! Whether we are talking about augmentation techniques for hard and soft tissues, the selection of the appropriate implant design, or the prosthetic supply options, this treatment credo is always at the forefront.
The following case report discusses "the perfect white" and the question "Is less sometimes more?". It describes a prosthetic rehabilitation in the aesthetic zone and the exemplary application of our four-part implant concept: "the perfect bone, screw, pink and white".
Case Report
The 76-year-old patient presented to our practice regarding pain in the upper front jaw. In addition to medically controlled hypertension, she had an unremarkable general medical history. In the specific dental examination, existing periodontitis was identified as a risk factor.
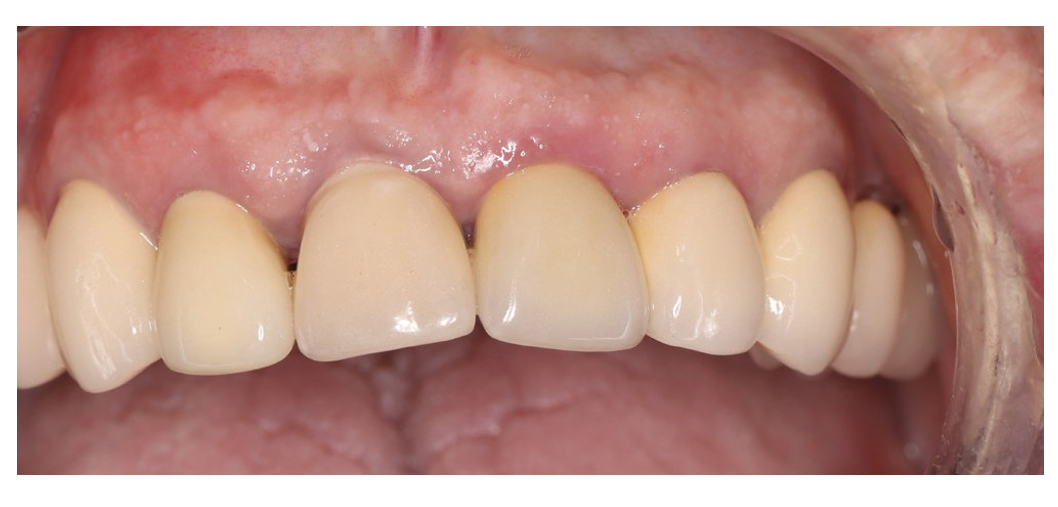
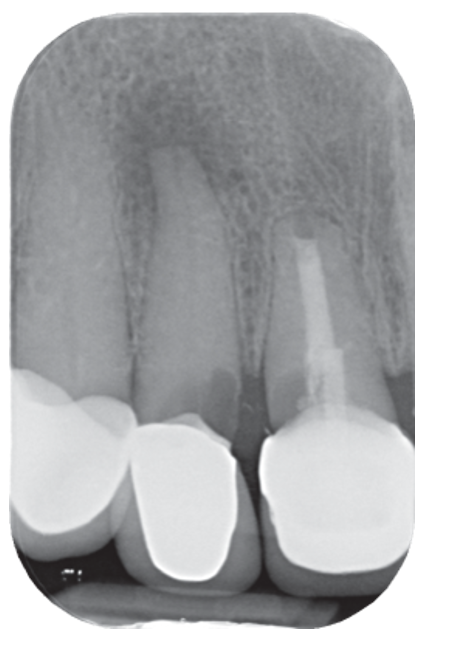
Clinically, the patient showed pain at tooth 12. Radiologically, significant secondary caries and a pronounced apical lesion were detected. The restoration at tooth 11 was also insufficient (Fig. 1 and 2).
The patient expressed the desire for tooth extraction followed by prosthetic treatment. After weighing the prosthetic options, she opted for an implant-based solution in the form of immediate implantation. We decided on just one implant in region 11. The missing tooth 12 was to be replaced by means of a cantilever bridge. Due to the patient's advanced age and the existing influencing factors, there was an increased risk profile. Through our practice- and patient-oriented concept, which is particularly characterized by minimally invasive procedures and the use of the wound healing accelerator hyaluronic acid, such treatments can also be carried out safely.
Implantation
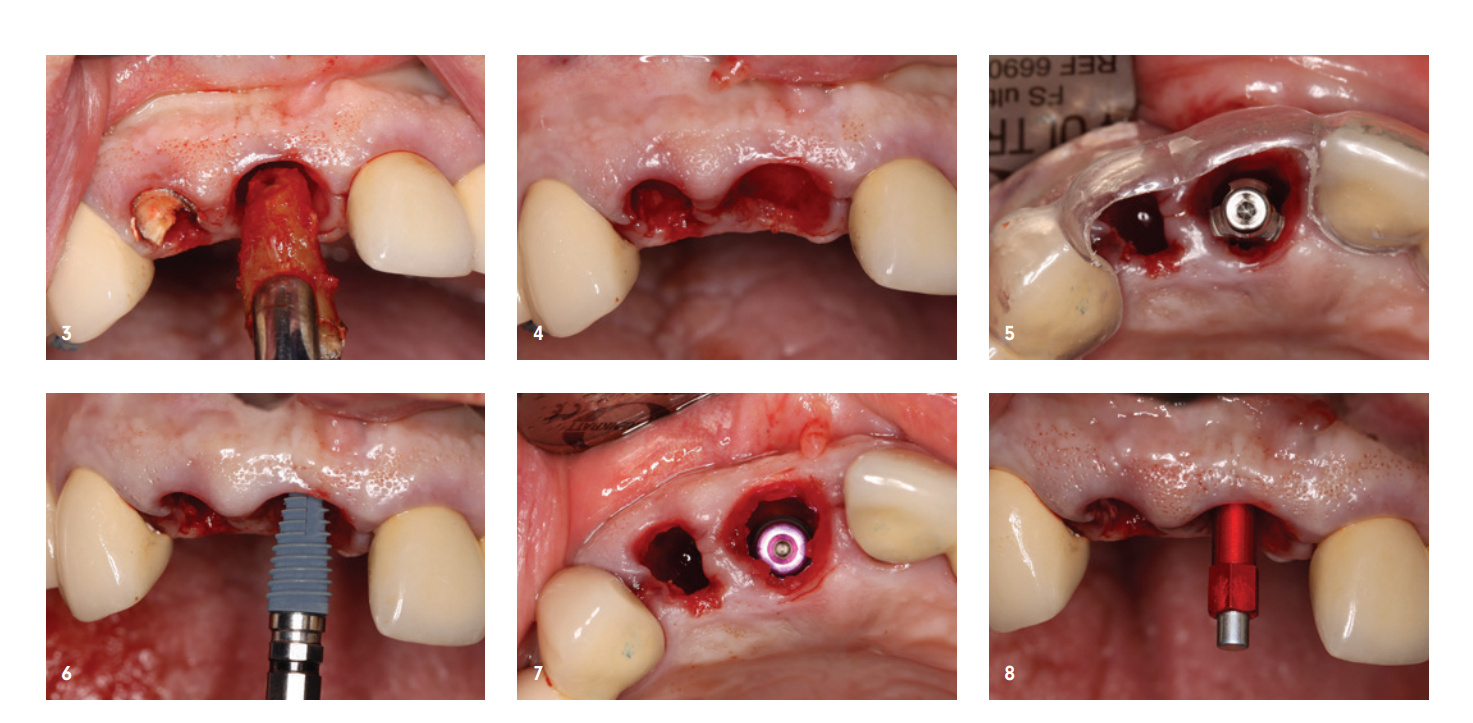
The non-salvageable teeth 11 and 12 were removed in a particularly atraumatic manner to allow for maximum bone and soft tissue preservation (Fig. 3 and 4). Using a prefabricated orientation guide, the future implant position was controlled during the preparation of the implant bed (Fig. 5). An implant with a diameter of 4.1 mm and a length of 10 mm was inserted (Bluediamond, MegaGen; Fig. 6). Figure 7 shows the palatal and subcrestal implant position.
Due to the special implant design, a very high primary stability can be achieved here through the protruding thread flanks. With a constant core diameter but an increasing implant diameter, maximum bone preservation is prioritized. The BIC (Bone to Implant Contact) was determined using the so-called Mega-ISQ via a SmartPeg (Fig. 8). An ISQ value of 74 was achieved here. Values greater than 70 indicate high primary stability, allowing for immediate loading of single-tooth implants.
The so-called Jumping Distance (space between the implant and residual bone) was filled with Sticky Bone, as was the extraction socket of tooth 12. For this purpose, a porcine bone substitute material with a slow resorption profile (SMARTGRAFT, REGEDENT) was mixed with cross-linked hyaluronic acid (hyaDENT BG, REGEDENT) to achieve a more precise augmentation and better positional stability (Fig. 9 and 10).

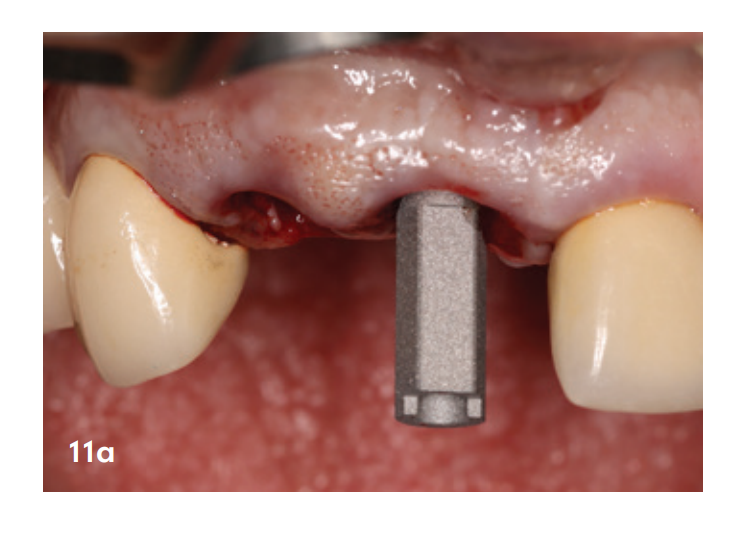
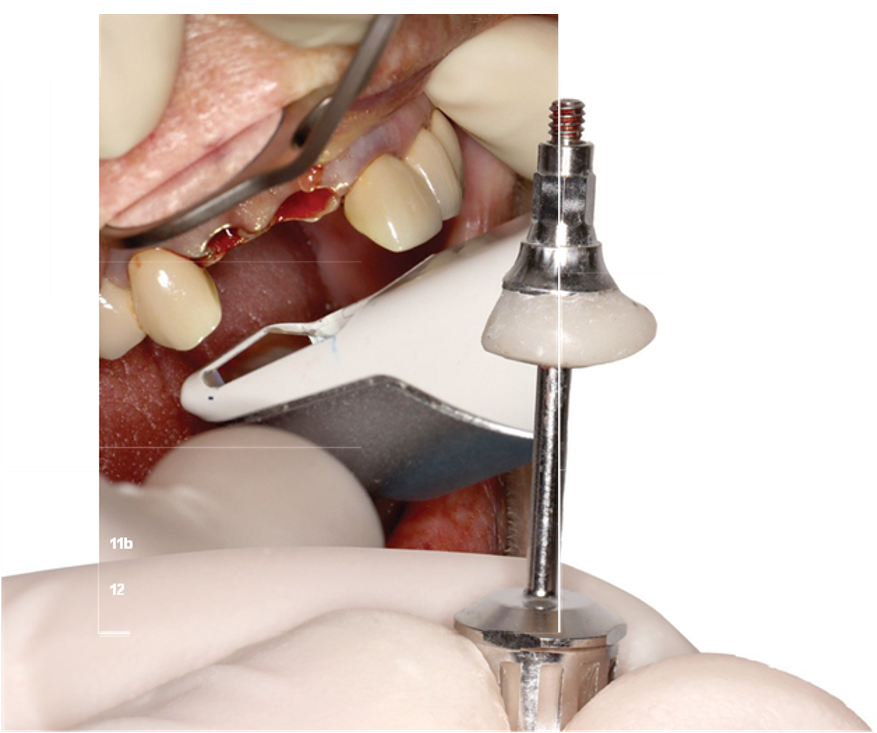
Both the implant position and the emergence profile were digitally recorded to create the later fixed provisional. Tip: First scan the emergence profile, then the implant position. After the removal of the healing abutment, a collapse of the soft tissue occurs, and the emergence profile of the soft tissue changes. This scan workflow prevents a discrepancy of the emergence profile from being included in the dataset (Fig. 11a and b).
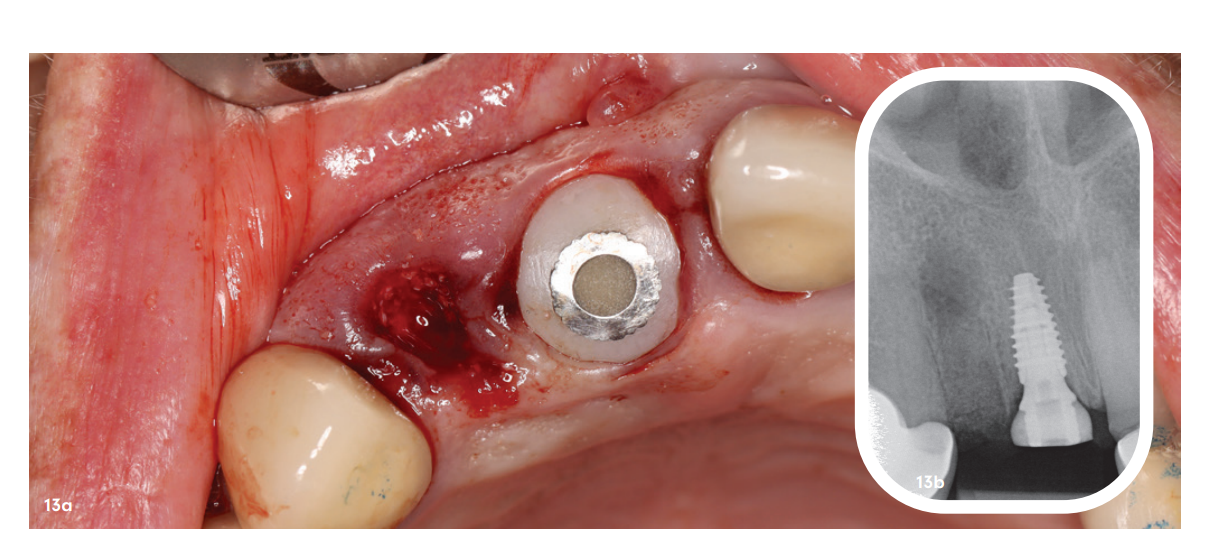
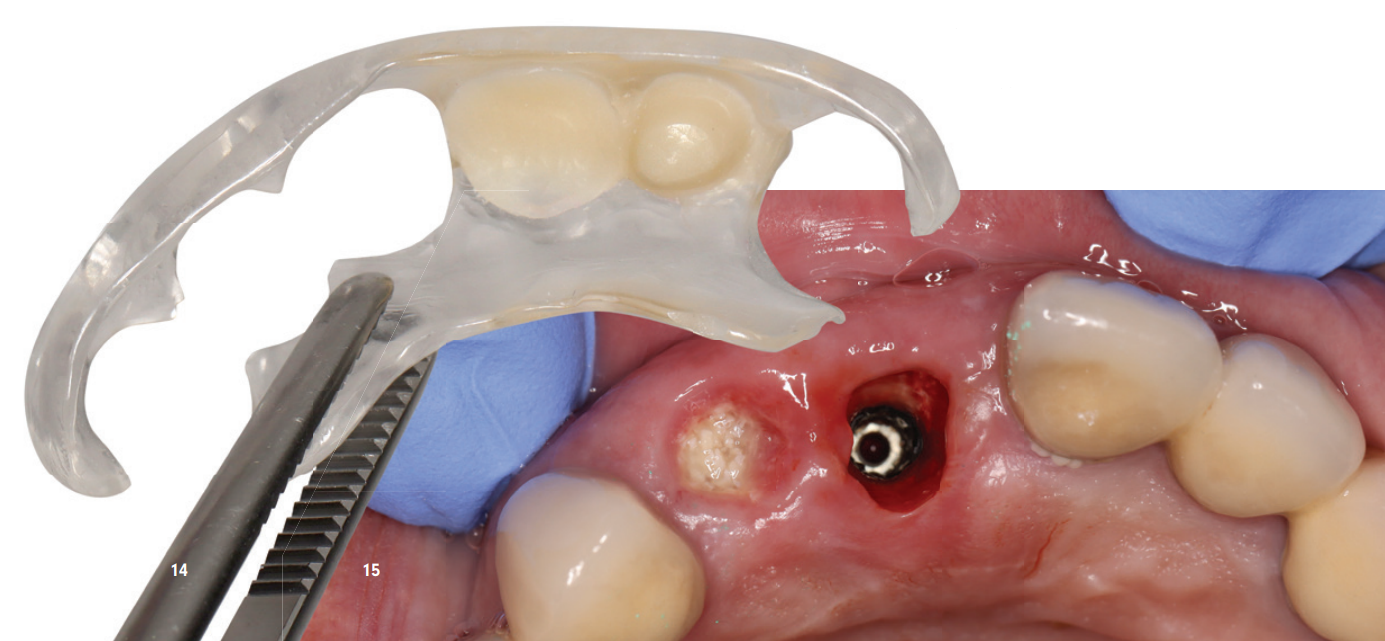
A custom gingiva former was created chairside using a temporary abutment (Fig. 12). This has the significant advantage that both the soft tissue is optimally preserved and the augmentate is protected in the sense of a "socket seal technique" (Fig. 13a and b). Since we only inserted one implant, we unfortunately could not take advantage of the great benefits of a fixed provisional. Therefore, the patient was initially provided with a removable interim solution after the procedure (Fig. 14).
Provisional Phase/Healing Phase
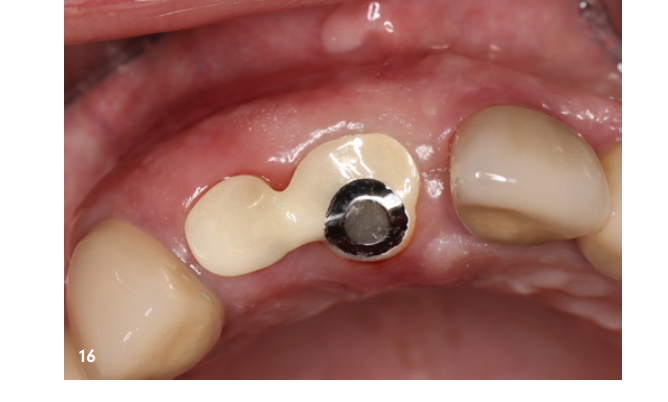
After one week, the perfect wound healing and the previously mentioned collapse of the soft tissue can be observed after the removal of the healing abutment (Fig. 15). At this point, an individual gingiva former made of highly polished zirconia was placed (Fig. 16). The data for this was obtained during the implantation. This already had the extent of the later extension bridge, and the pontic shaping of tooth 12 was to take place here.
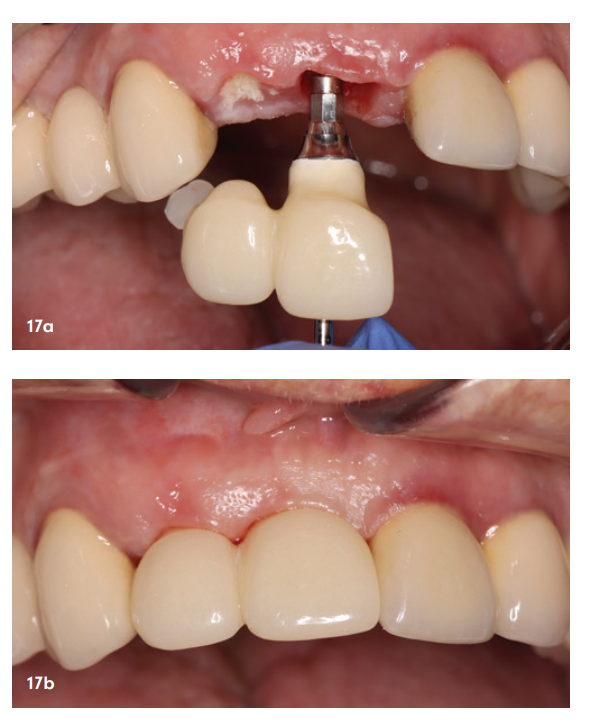
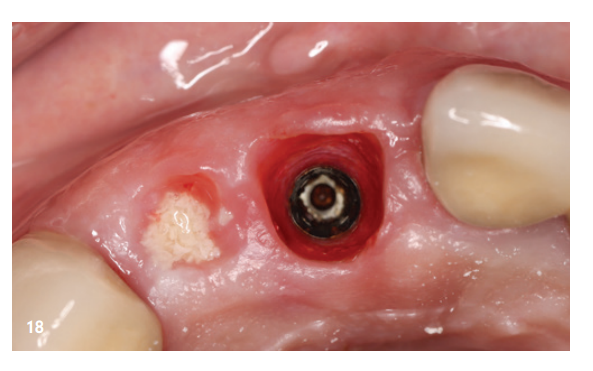
The following weeks went smoothly, so after twelve weeks the fixed provisional could be placed (Fig. 17a). Here, the papilla shape formed by the individual gingiva former between tooth 11 and the pontic of tooth 12 is already visible (Fig. 17b). The soft tissue appeared non-irritated and the emergence profile was already anatomically shaped (Fig. 18).
Final Phase
After another twelve complication-free weeks, the final prosthetic steps for completing the work could be carried out. The emergence profile was scanned again and matched with the implant position. Through early influence on the soft tissue and the individual prosthetic steps, we were able to create perfect soft tissue conditions. Both the shaping of the emergence profile and the pontic could be perfectly implemented (Fig. 19 and 20). Figure 21 shows the developed papilla structure between the single implant 11 and the pontic of tooth 12. The final restoration could be occlusally screwed due to the palatal implant position (Fig. 22a). When implementing the prosthetic restoration, care must be taken to ensure that there is no veneer or feldspathic ceramic in the area of the emergence profile. Instead, there should be a highly polished part of the restoration here. In our case, highly polished zircon was chosen as the material in the area of the emergence profile (Fig. 22b).

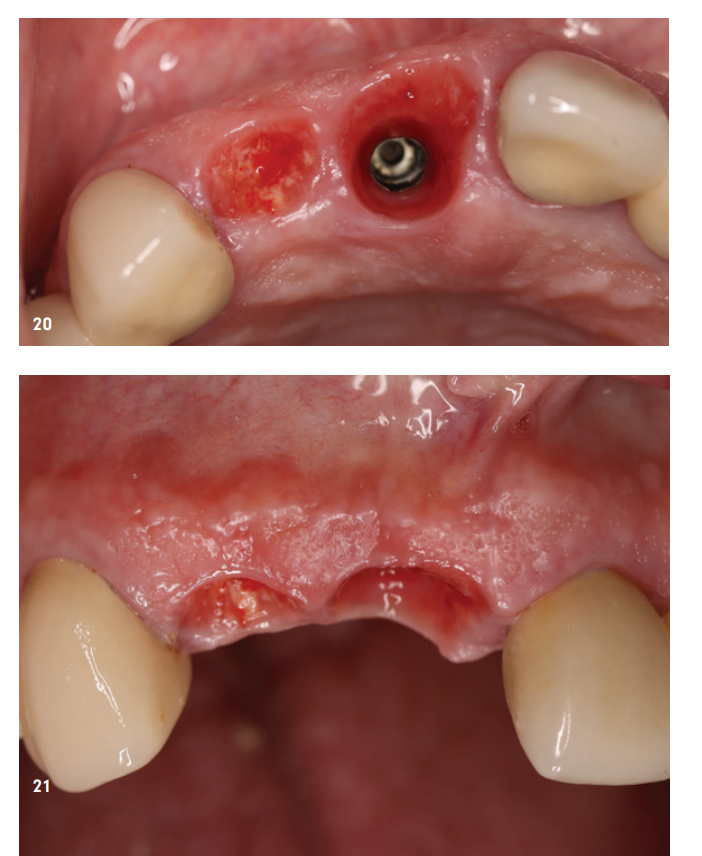
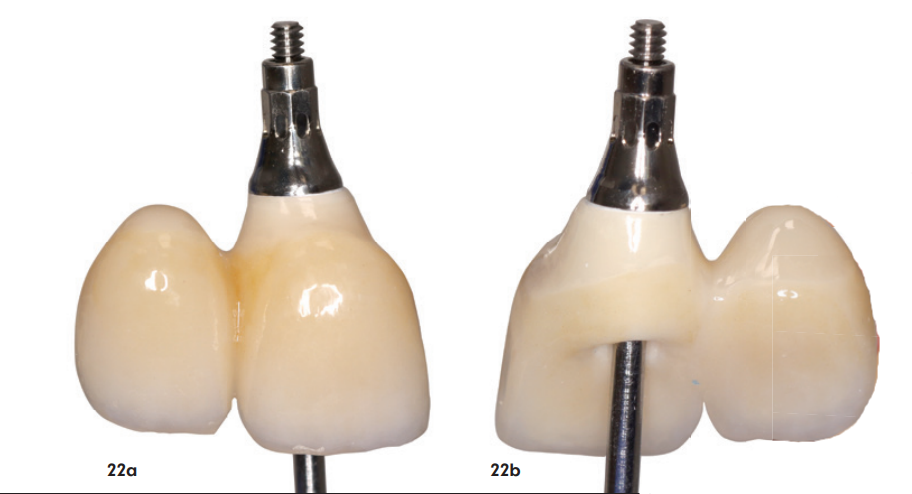
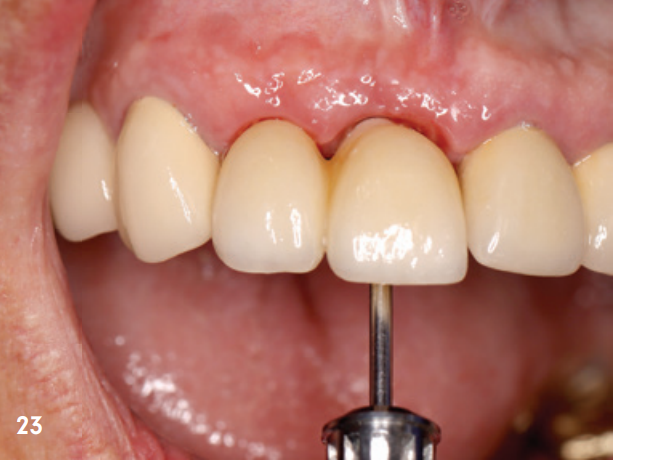
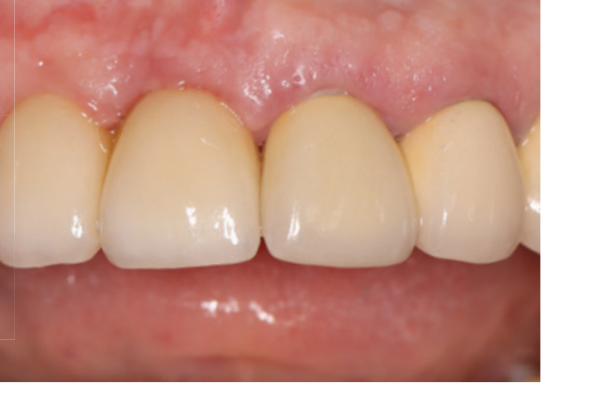
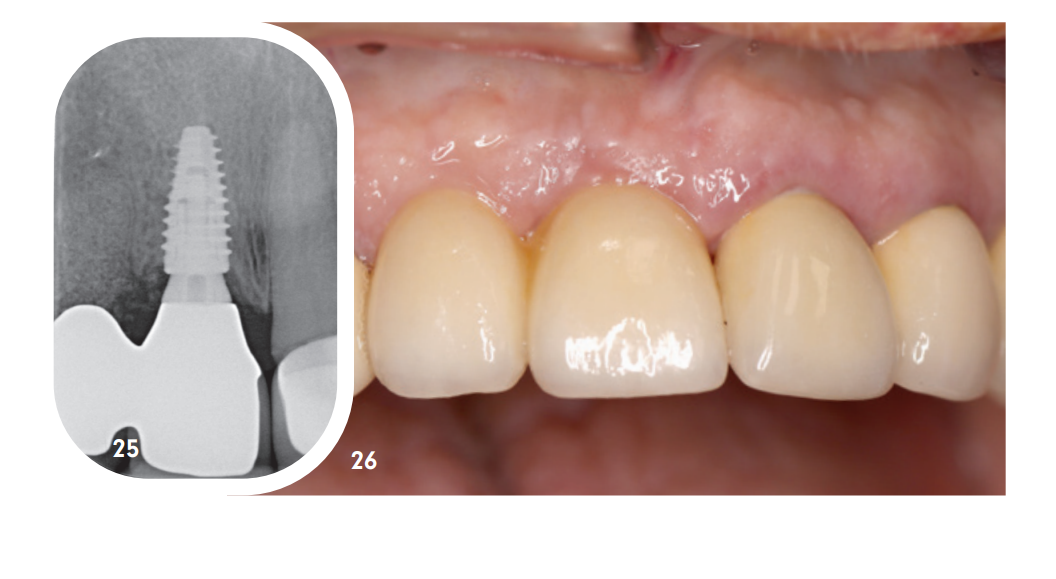
Figure 23 shows the insertion of the final restoration and Figure 24 the clinical situation after the placement of the extension bridge. The radiological control showed no abnormalities (Fig. 25). During the clinical follow-up, stable and aesthetic soft tissue conditions were observed (Fig. 26).
Summary
The initial question: “Is less sometimes more?” can be clearly answered with “Yes” in our presented patient case. Here, the choice of an extension bridge with only one implant abutment perfectly utilized and preserved the bony and soft tissue starting situation. Every dentist working with implants knows how difficult it can be to create and reconstruct an interdental papilla between two implants. In consultation with the patient and after weighing all treatment options, we chose the path with only one implant. As shown, with the right materials and the right implant concept, a perfect functional and aesthetic result can be achieved: Keep it simple(y) perfect!