The Power of the Pencil in Restorations of Anterior Teeth with Composite
Machine translation
Original article is written in RU language (link to read it) .
Who wouldn't want to predict the future? The element of prediction is always present in direct composite restorations of anterior teeth… At the beginning of the treatment, we use wax-up and mock-up to see what we will ultimately achieve. We illuminate a specific color composite in the mock-up to see the future result.
For more current information on this topic, check out the webinar Techniques of Directed Composite Restoration (Injection and Thermopressed).
In addition to defining the shape using a silicone key and studying the internal color anatomy, we will need one more important thing to look through time—a simple pencil. To see the thickness of the incisors and determine the transition lines in the restoration. And to see if they fit… Before the polishing stage, there is no shine, so you cannot assess the correctness of their placement due to the lack of light reflections. And after polishing, you hardly want to redo anything. This article will guide you on the path to achieving the desired and strictly defined result.
The Power of Pencil in Direct Composite Restoration
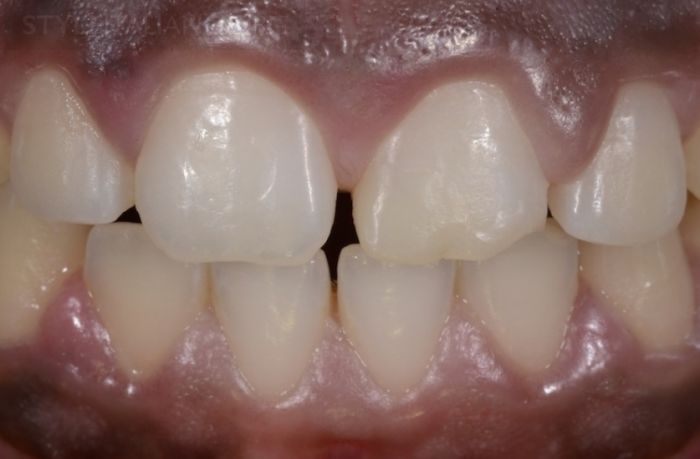
Figure 1 — Initial situation: the patient was in an accident 9 years ago and sustained a tooth injury to tooth 2.1. The tooth was fractured at the dentin level without pulp involvement and was partially displaced in the socket. It was repositioned, and endodontic treatment was performed by endodontist Marga Ree. After 8 years, internal bleaching was performed due to developing discoloration. A composite buildup on a fiberglass post was created. The patient came in for the restoration of the coronal part.
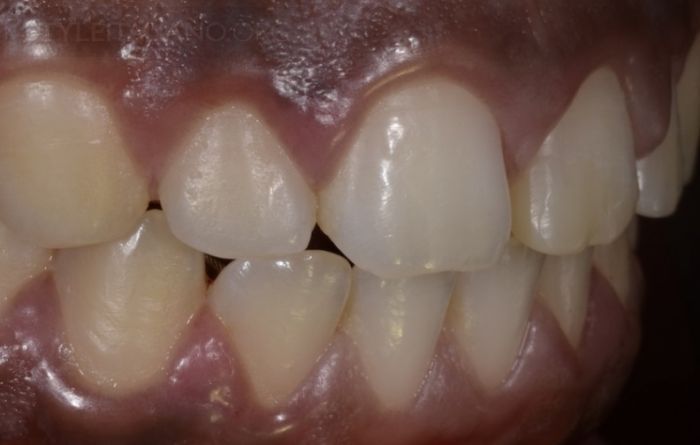
Figure 2 — The shape and color of the restoration do not satisfy the patient.
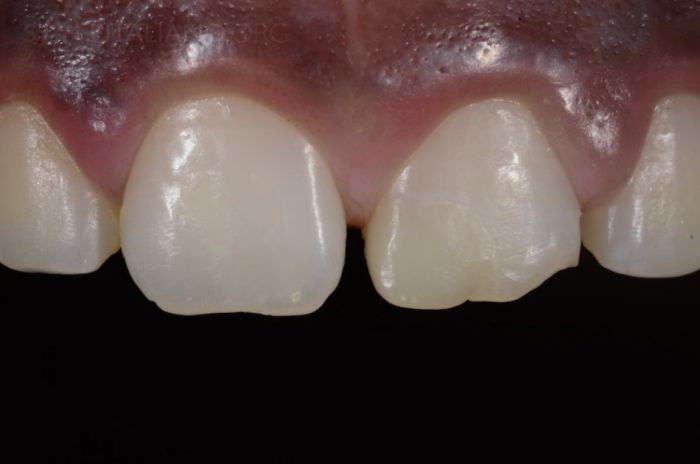
Figure 3 — The composite-tooth border is highly noticeable. The treatment goal is defined: to create an inconspicuous restoration, identical to 1.1. Based on the color mock-up, it was decided to use the shade A2 body, covering A3 core in combination with enamel shades translucent and white.
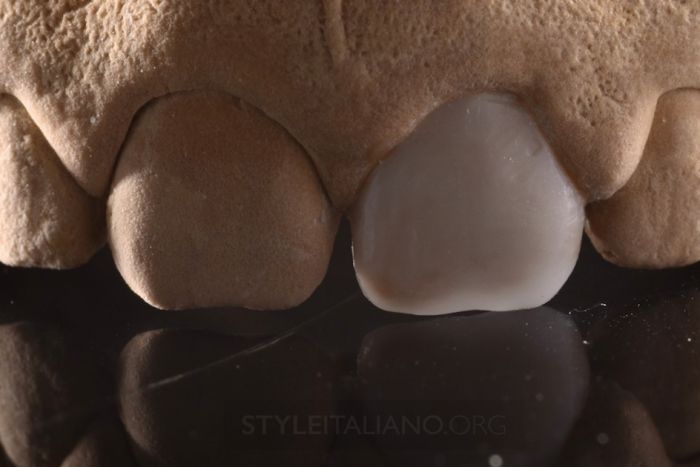
Figure 4 — After taking preoperative photographs, impressions were taken for wax-up modeling. The wax-up shows the correct shape. Surface texture on the wax is not necessary. Wax-up is used to create a mock-up and a silicone key for transferring the result into the oral cavity.
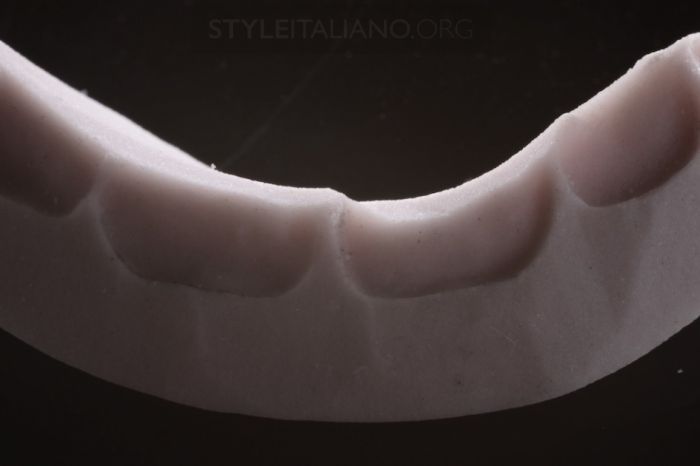
Figure 5 — In the past, the patient underwent orthodontic treatment. A retainer is fixed on the palatal surfaces of the incisors. The silicone key is carefully trimmed for convenience and fit. This is not always possible due to the location of the retainer. The shadow on the incisal edge of the key indicates that it has a certain thickness.

Figure 6 — After the restoration is completed, the cofferdam is removed and obvious irregularities are smoothed out. A pencil is used to draw the first line on the labial side of the incisal edge. The next line is drawn on the palatal side of the incisal edge. All photographs of the incisal edge in this article are taken from the operator's side for a better understanding of the process.
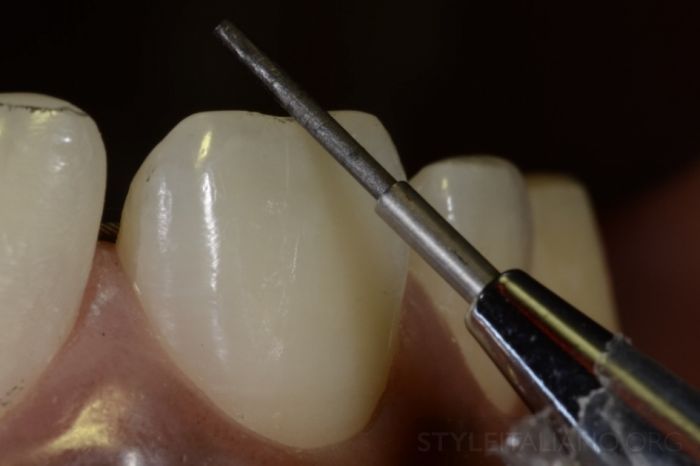
Figure 7 — The same steps are conducted for tooth 1.1 for comparison.
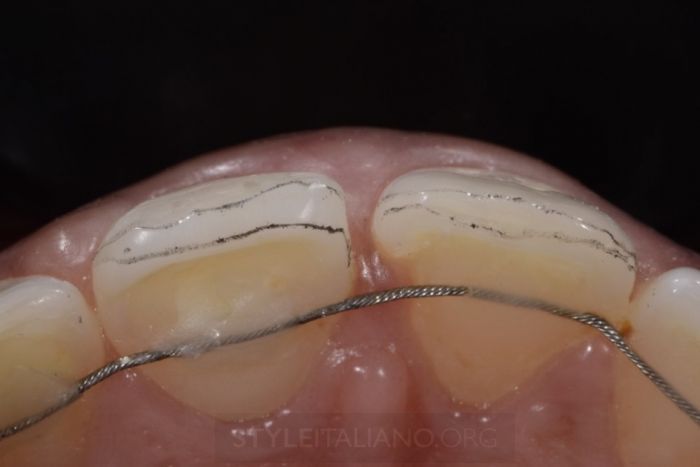
Figure 8 — The mirror clearly shows a noticeable difference in the thickness of the cutting edge. The restoration is thickened on the lip side. On the palatal side, one can be sure: it is completely based on the wax-up and silicone key.
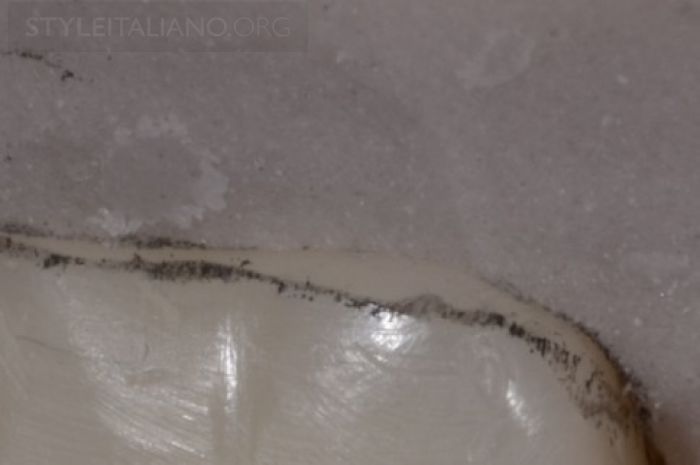
Figure 9 — In the close-up, it is immediately noticeable that the lip pencil line does not match the silicone key. The silicone key is more important, as this tooth shape has already been approved by the patient and operator through a mock-up.
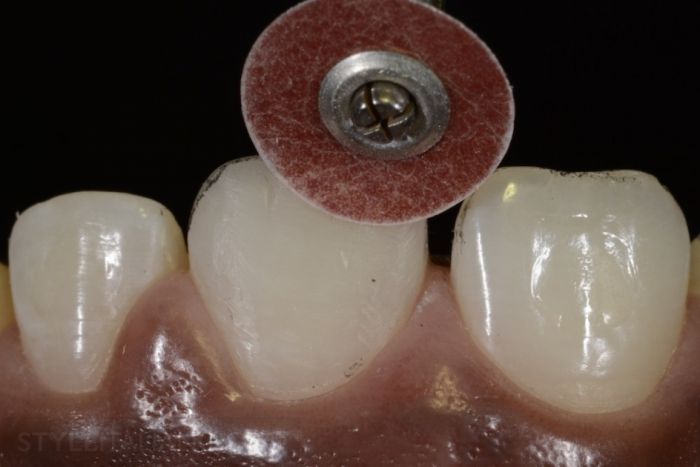
Figure 10 — Sof-Lex disc used at low speed without water cooling for filing composite in the incisal ⅓.
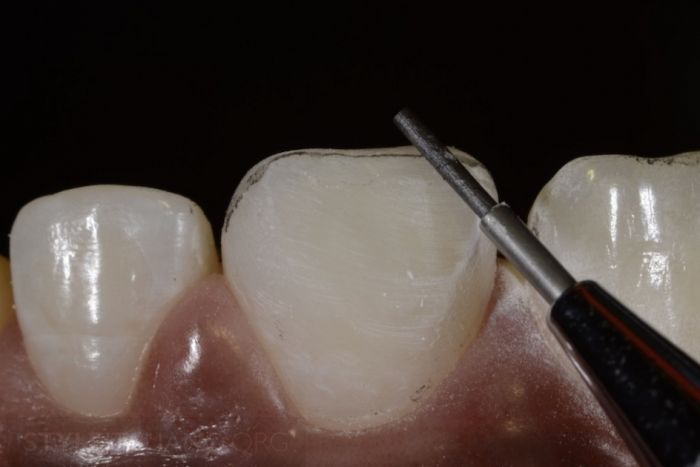
Figure 11 — Pencil lines are drawn again. A pencil with a long lead is selected, lines are drawn passively, not with the tip, but with its side.
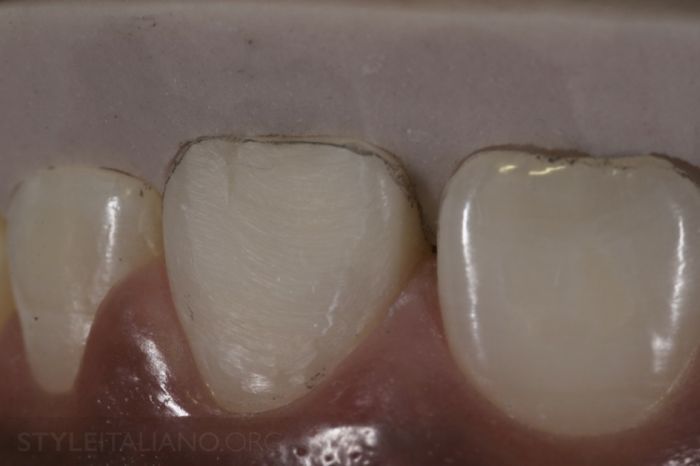
Figure 12 — The silicone key shows the need for re-reduction of the composite, which is again performed with a disc.
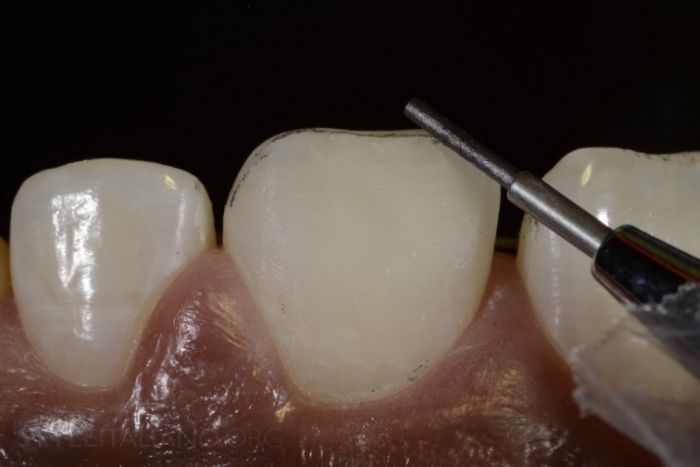
Figure 13 — Pencil lines are passively drawn again.
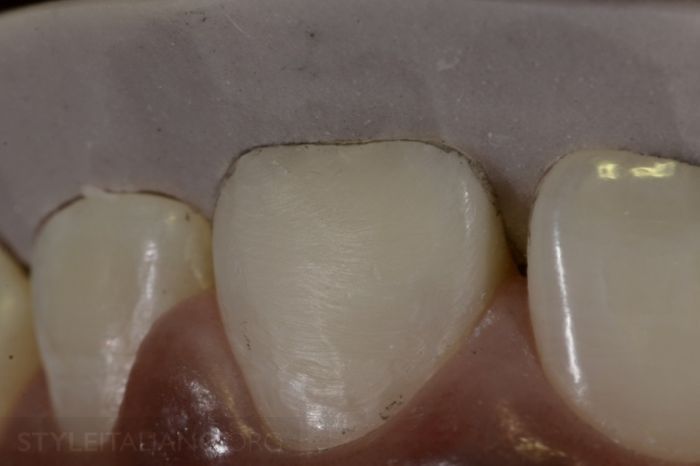
Figure 14 — The silicone key matches the lip pencil line. Knowing that the incisal ⅓ is in the correct position, one can check the convexity of the lip surface.
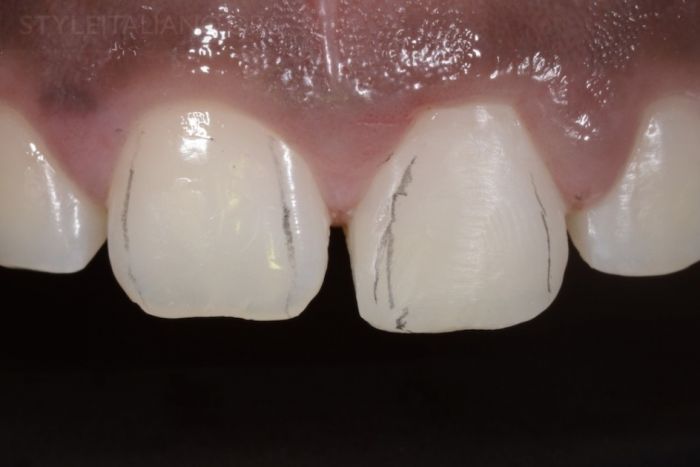
Figure 15 — The next step is creating transition lines that accurately reflect light. In this case, the example is the pencil lines on the intact adjacent central incisor. The goal is defined. The pencil lines suggest that the restoration needs to be adjusted to match.
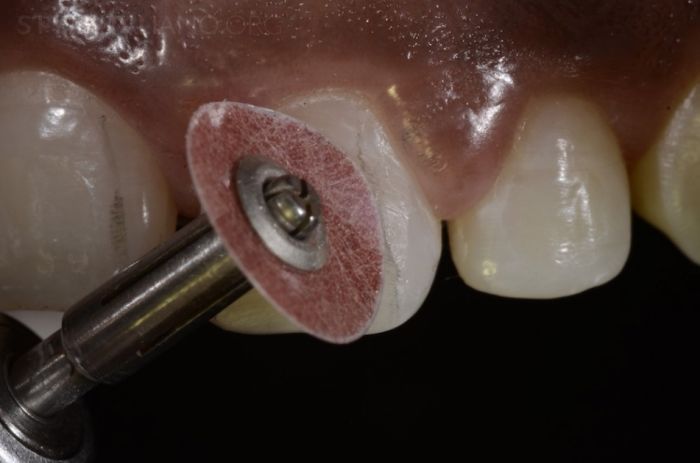
Figure 16 — The Sof-Lex disc can be used to move the line outward, or…
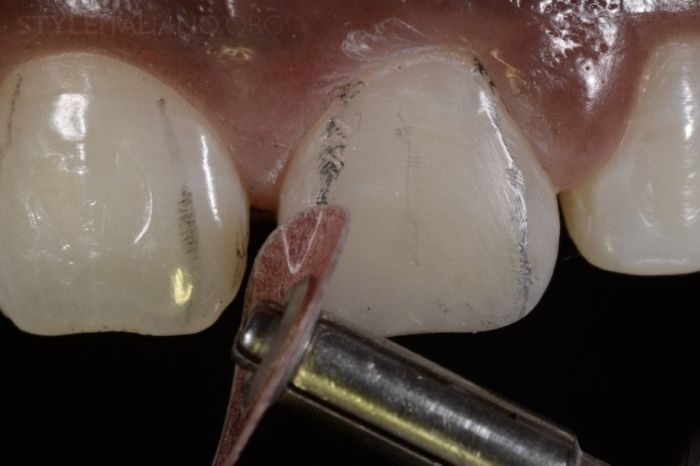
Figure 17 — …or inward, at low speeds for full control.
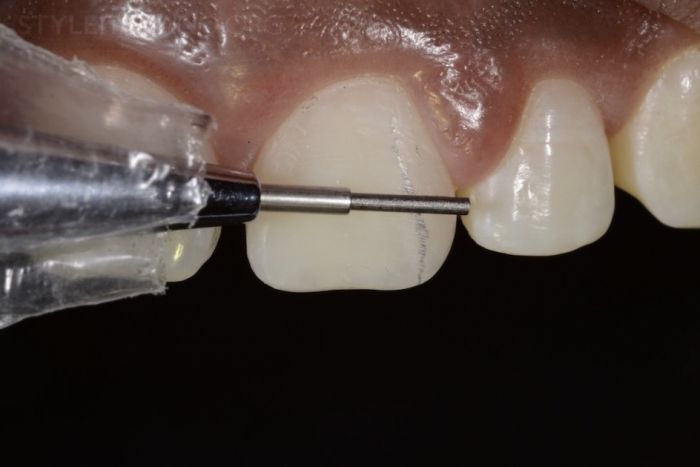
Figure 18 — Redrawing lines for checking and refitting. The asymmetry of the transition lines on teeth 1.1 and 2.1 is as visually irritating as the asymmetries of the tooth contours.
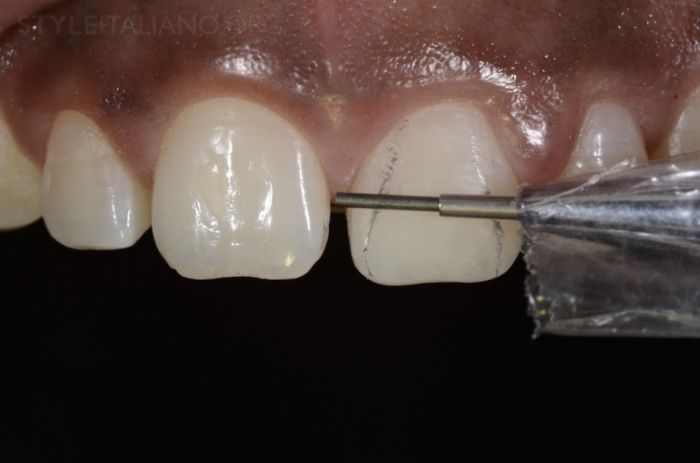
Figure 19 — Small steps and repetitions are the key to full control.
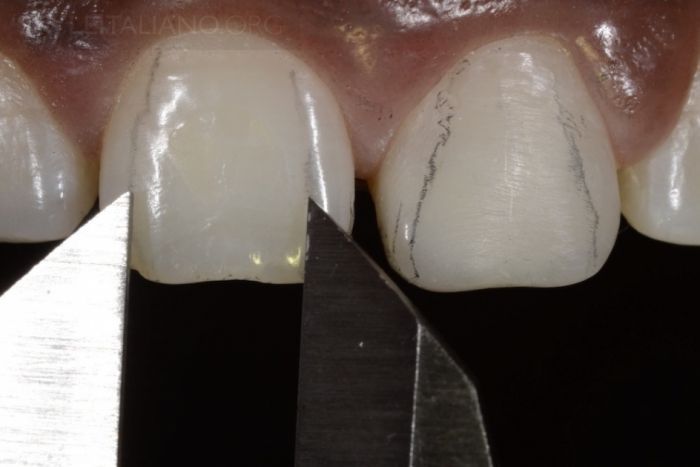
Figure 20 — To check the symmetry of lines, you can measure the distance between them with a digital caliper. Start with the optimal width and transfer it to the restoration for comparison and fitting.
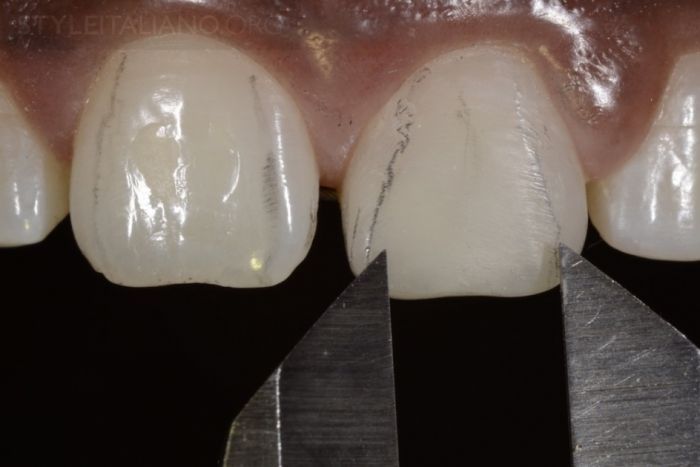
Figure 21 — It is now easy to notice that the distance between the lines is too great and needs to be reduced. Measurements can be taken in the incisal, middle, and cervical thirds. An electronic caliper is more accurate than the operator's eye.
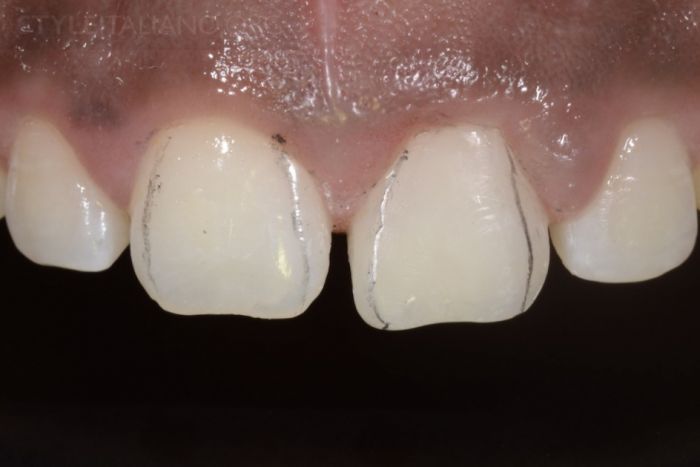
Figure 22 — We are close to the goal: the mesial line needs a slight final adjustment to match the characteristically rounded shapes of tooth 1.1.
Figure 23 — During the correction process with the disc, a border of white dust appears, which gives an idea of how the transition line shifts.
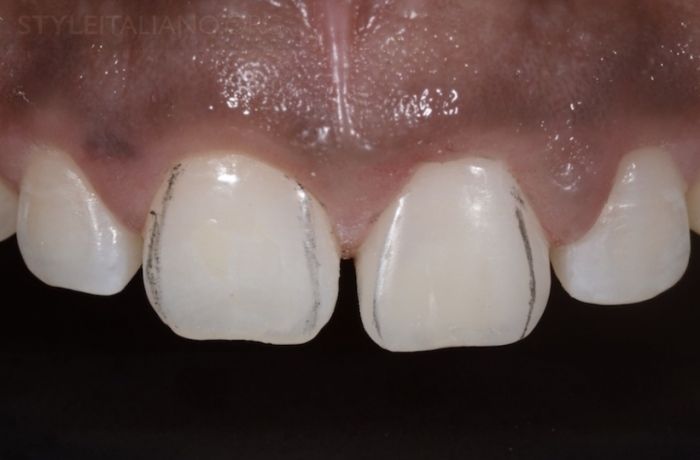
Figure 24 — The thickness of the cutting edge and the vestibular curvature create a bulge. The transition lines are optimal. The next step is to create a vestibular relief.
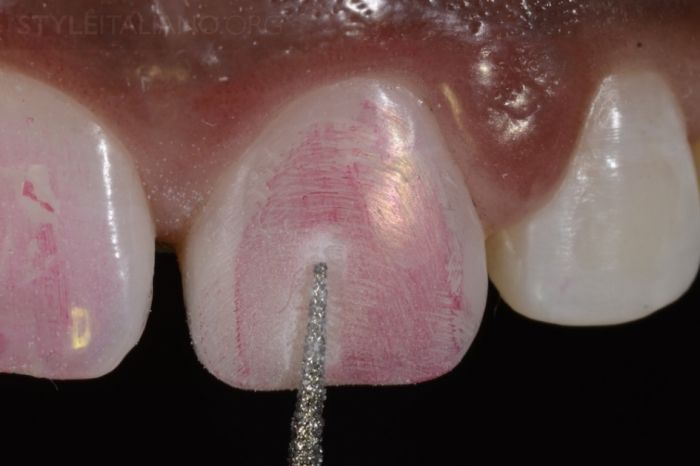
Figure 25 — The tooth surface is rubbed with articulating paper to see the effect of the diamond bur moving very softly and at low speed, creating elements of secondary anatomy. In our case, the surface structure is barely perceptible. To add organicity and naturalness, a worn Sof-Lex disc can be used to slightly smooth out marks that seem overly pronounced.
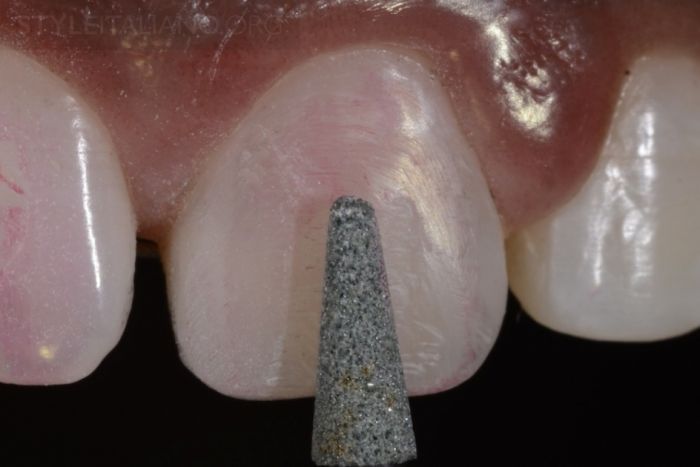
Figure 26 — Elements of tertiary anatomy, such as perikymata, can be created with a light single horizontal movement of a green Arkansas stone by hand.
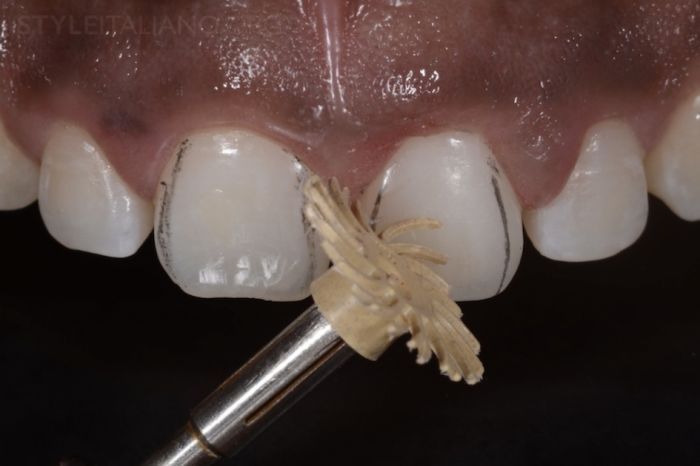
Figure 27 — Step-by-step polishing procedures begin with Sof-Lex spiral elastomeric brushes, starting with beige.
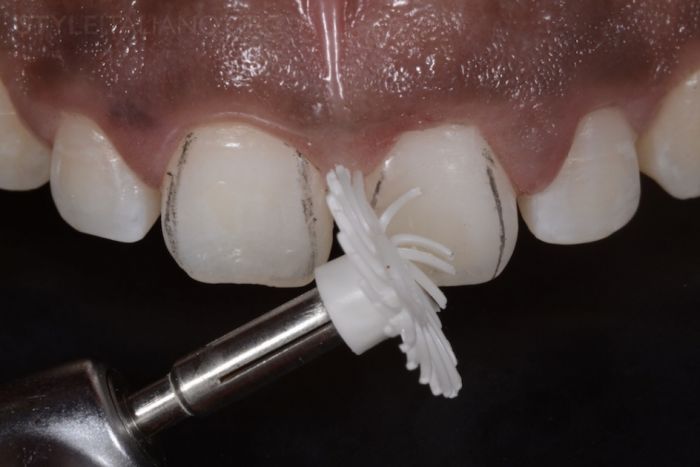
Figure 28 — Finishing with white. Produced without water.
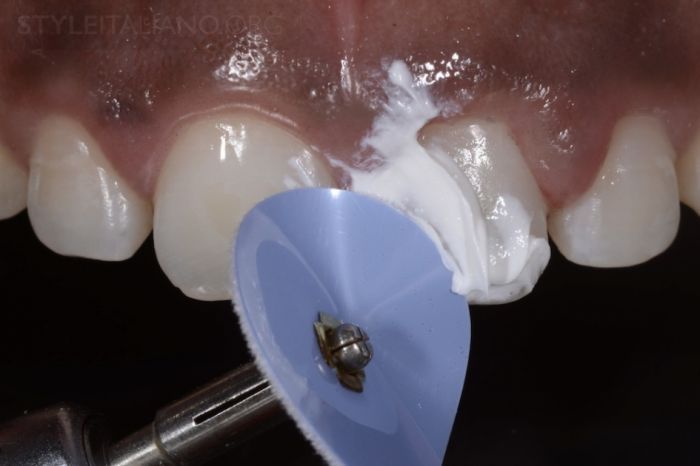
Figure 29 — The next step is using aluminum oxide paste on a felt disc. The disc allows reaching all corners of the restoration due to its flexibility.
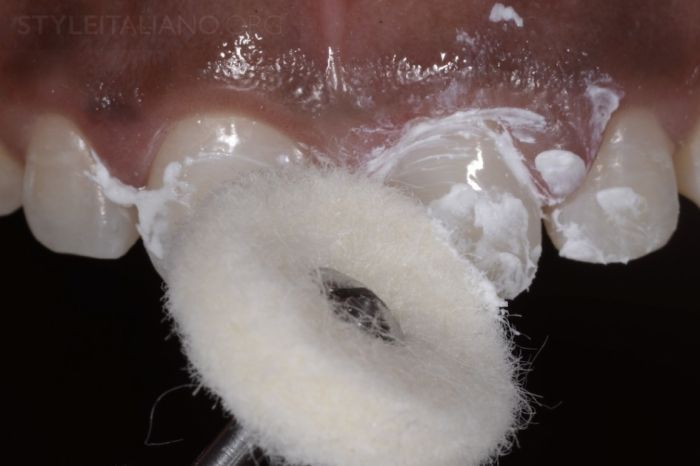
Figure 30 — A large felt brush is used on flat surfaces.
Shape, palatal surface, silicone key, direct mock-up and Wax Up, composite layering techniques — all this and much more in the webinar Success Strategies in Treating Vital and Endodontically Treated Teeth: Direct Restoration of the Anterior Group. Part 1.
http://styleitaliano.org/