
Review of Individual Stages of Endodontic Treatment
Machine translation
Original article is written in RU language (link to read it) .
The complexity of endodontics is associated with a variety of diseases of the pulp and periodontium, the branching and variability of the canal system, the presence of various endodontic treatment protocols, and methods of post-endodontic tooth restoration.
On the importance of rubber dam in endodontic treatment at the webinar Mistakes in conducting endodontic treatment.
Isolation in Endodontics
Regardless of the chosen endodontic treatment strategy, it is necessary to reliably isolate the working field before proceeding to the mechanical processing of the canals.
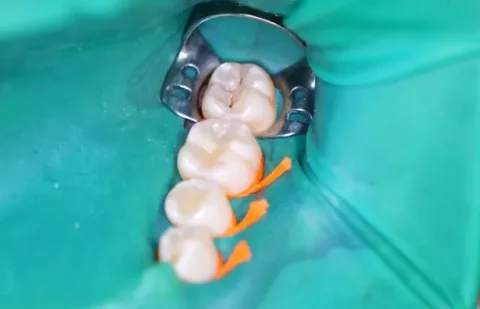
Figure 1. Tooth isolation using a rubber dam.
The classic approach to isolating the working area in endodontics is the use of a rubber dam. The advantages of using it include:
- It allows the tooth to be isolated not only from oral fluids but also from moisture contained in exhaled air.
- Provides the ability to isolate the tooth from oral microorganisms, implementing the principles of asepsis and antisepsis in practice.
- Reduces the impact of elevated oral cavity temperature on the materials used during treatment and their polymerization.
- Facilitates access to surfaces or teeth that are inconveniently positioned for the dentist.
- Protects the working area from the patient's lips and tongue.
- Allows the dentist to focus on the intervention site, easing visual control over the procedures.
- Shields the patient from unpleasant contact with the substances used.
- The oral mucosa is protected from the effects of aggressive substances.
- Provides a higher degree of patient control.
- Reduces the time taken to perform procedures.
Despite the impressive list of advantages of using a dental dam during endodontic treatment, there are also some disadvantages to its use:
- Axial landmarks necessary for creating endodontic access are lost.
- In some cases, setting up the dental dam system is accompanied by trauma to the patient's mucosa.
- Performing radiography is complicated (the latex barrier needs to be removed before each image).
- Possible allergic reactions.
An important nuance to consider when isolating a tooth with a dental dam is the rule of four walls; adhering to this rule significantly reduces the penetration of oral fluid into the canal system.
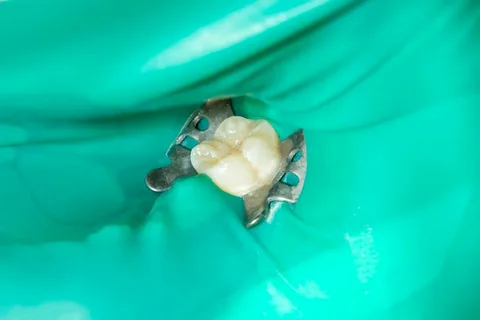
Figure 2. The tooth is isolated for subsequent endodontic treatment.
There are a number of recommendations that help to implement the rule of four walls in practice:
- preservation, sparing excision of the tooth walls during preparation;
- it is permissible to preserve a fragment of an old, but viable restoration as a wall;
- creation of a temporary restoration or temporary artificial crown, performing endodontic access through these structures;
- use of orthodontic or copper (cupperband) bands.
The choice of one of the presented techniques for adhering to the rule of four walls is determined by the following factors:
- the degree of tooth destruction,
- the tightness of previous restorations,
- the expected lifespan of the temporary restoration.
Thus, glass ionomer cement provides reliable marginal fit for a short period of time, the material wears off quickly and the marginal fit is compromised, allowing the use of glass ionomer cement with rings exclusively for short-term constructions. Composite crowns, fitted on adhesive cement, can be used for the next few months. Metal crowns with plastic cladding are installed for a period of no more than two years.
Endodontic Access Preparation
The main principle of forming endodontic access involves removing all overhanging tissues inside the tooth crown that obstruct direct access to the canal orifices.
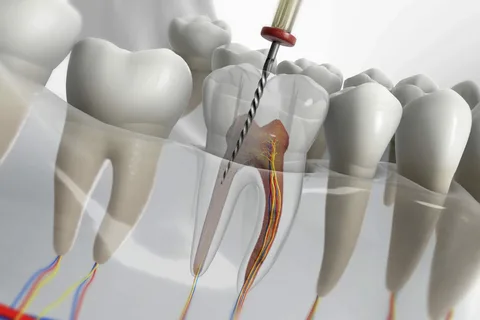
Figure 3. Creating endodontic access.
Endodontic access preparation consists of the following steps:
- Excision of tooth tissues affected by caries, removal of inadequate restorations, preparation of the cavity.
- Opening of the cavity.
- Further, the cavity is expanded, and dentinal ledges are removed.
- Searching for canal orifices.
- Creating a straight-line access.
During the process of dissection and opening of the tooth cavity, a diamond spherical bur is used, which must be positioned parallel to the longitudinal axis of the tooth. The creation of access begins from the middle of the crown, then the bur is shifted towards the area of the largest pulp chamber space (located above the orifice of the largest canal). The excision of dentinal bays when opening the cavity is carried out using conical or cylindrical burs without an aggressive tip.
When the roof of the tooth cavity is completely excised, the doctor is provided with the best view of its floor, which is riddled with projections and depressions, among which the canal orifices are located. It is preferable to search for canal orifices using sturdy thin probes or thin files. The use of ultrasonic systems for forming endodontic access is popular (NSK endo lines, Satelec, StartX).
Many root canals are characterized by a pronounced curvature of their configuration. To ensure straight-line access to the canal system, it is necessary to try to reduce the angle of the canal, which will significantly mitigate the risk of tool breakage in the canal. To reduce the angle of the canal, the following tools are used: Gates Glidden, Largo, Protaper SX (Dentsply). During the work with these tools, the maximum effort in the canal is directed towards the greater curvature.
Passing the Canal and Establishing the Working Length
The working length is the distance measured from the most protruding point of the tooth crown to the anatomical narrowing of the canal. Measuring the working length is a distinct phase of endodontic treatment, especially considering that this distance is highly variable.
Mechanical processing of the canal within the physiological narrowing has certain positive properties:
- acts as a prevention of trauma to the periapical tissues;
- prevents the pushing of bacterial flora representatives, fillers, and sealers beyond the apical tip;
- ensures canal filling to an optimal depth.
At the stage of passing the canal, it is better to choose C-files, a file-catheter, as the tool for passage.
Verification methods for measuring the working length:
- via an X-ray, radiologically;
- apex location, physically;
- combined.
Apex locator devices of the latest models allow measuring the resistance of current of two different frequencies, can work correctly in moist conditions, and do not require additional adjustments or calibration.
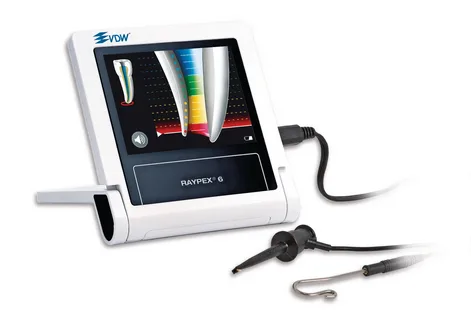
Figure 4. Apex locator.
The protocol for measuring working length consists of several stages:
- the instrument is inserted into the canal to a length, stopping 2 mm short of the distance established by the diagnostic image;
- verification through a physical method;
- refinement by radiological method.
It is considered that the working length is set correctly if the tool is located at a distance of less than 2 mm from the radiological apex, and the canal lumen beyond is not visualized.
Canal Treatment
After the working length has been established, one can proceed to the stage of mechanical and medicinal treatment of the tooth's root canal system. The objectives of this stage are:
- cleaning the canal from infected tissues;
- elimination of microorganisms;
- creating conditions for subsequent canal filling: its expansion, tapering, while preserving its anatomical shape and curvature.
The following approaches to canal shaping exist:
- tapered preparation;
- creation of an apical stop.
Each of these concepts has its negative properties. Disadvantages of the approach of creating an apical stop:
- apical "weakening";
- risk of damaging the stop;
- difficulty in execution in curved canals;
- complicated adequate irrigation.
Disadvantages of cone preparation:
- requires a long time investment;
- high probability of insufficient mechanical processing.
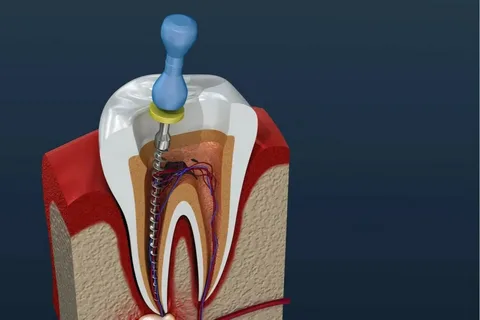
Figure 5. Mechanical processing of the root canal.
Rules of the modern approach to endodontic processing:
- Frugality: a small-sized tool is used once, it is not allowed to use a tool that visually shows signs of fatigue.
- Cleaning of the tool before re-entry into the canal is mandatory.
- Before re-entering the canal, the condition of the tool must be assessed.
- Preference should be given to flexible tools or pre-bending rigid tools.
- Returning to the previous size tool.
- Medicinal treatment of the canal after each tool.
- Adherence to exposure time, using the recommended amount of agent for irrigation.
About the complexities of apical anatomy in the webinar Root Canal Anatomy. Determining Working Length: The Gold Standard.